

Home automation is a trending topic these days so I wanted to share with you a new project. We are going to control AC appliances over the internet using an Android phone from anywhere around the world. I used an ESP8266 development board as the main controller.
Here we will be using RemoteMe services. If you have no experience with RemoteMe, Check out “Control Devices using NodeMCU” and “Weather station” tutorials to get a general idea.
CAUTION: Alternating Current is very dangerous and accidental shock could be fatal. Only work with AC appliances if you are 100% sure you know what you are dealing with. We shall not be held responsible if you cause any harm to yourself or anyone else.
With that said, let’s get started.
What is RemoteMe?
I decided to start with a simple introduction to RemoteMe for those who do not know what it is and what you can do with it.
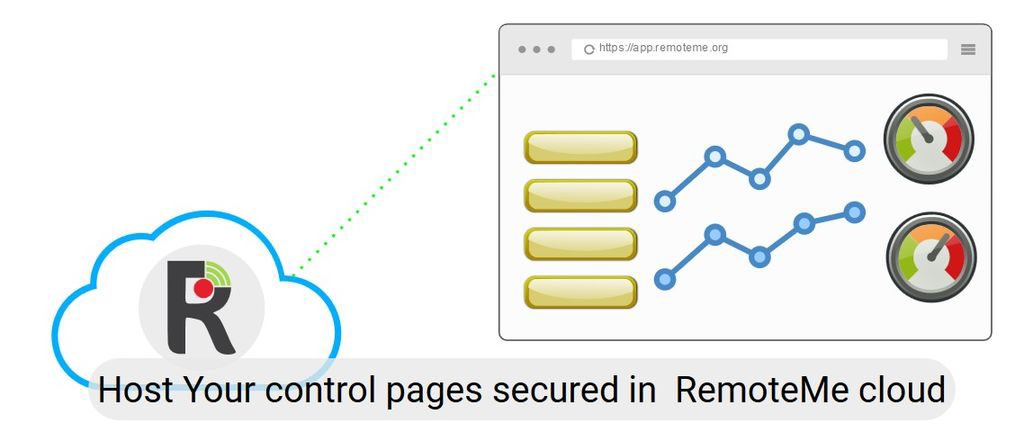 RemoteMe is a web application that is used to communicate with devices like Arduino, NodeMCU, Raspberry Pi, etc. With the RemoteMe application, you can host a website to control your devices in the RemoteMe cloud.
Only you and the users who have the generated key have access to those websites. You can have as many pages as you want, and it’s totally free! RemoteMe also has a built-in code wizard, so you don’t have to write all of the Arduino code from scratch. All you need is an account on RemoteMe to use its features.
What is Arduino Remote LITE ?
Arduino Remote Lite is Android application which can be used to remotely control your projects via Bluetooth or WiFi. It can also be connected to RemoteMe server to control Relays and other such devices. You can download this app from the Playstore. Here is the link.
Smart Home Automation Project Components
Hardware
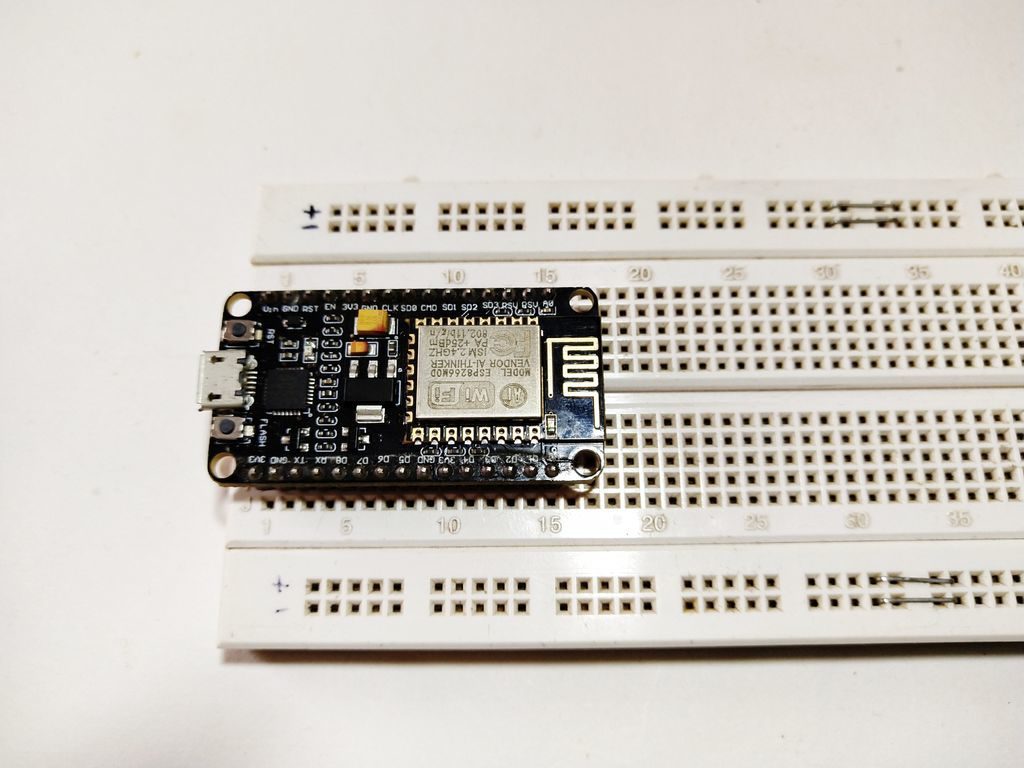
- ESP8266 dev board (You can use an Arduino with an ESP01 module)
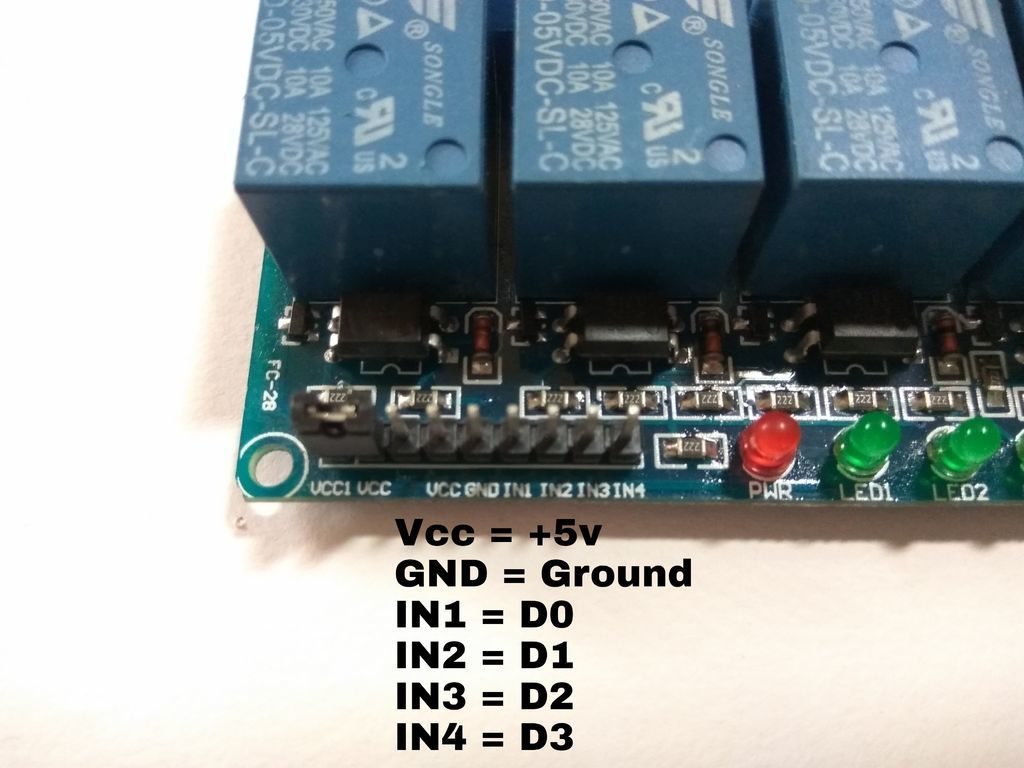
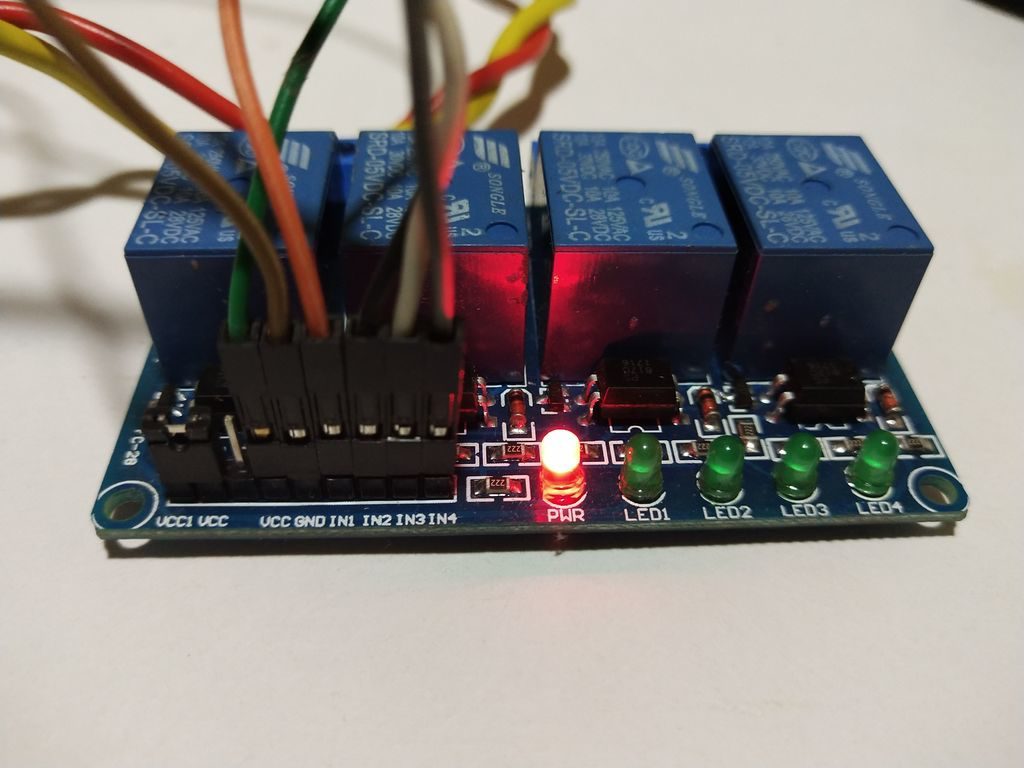
- Relay board (I have used a 4 ch relay, you can even use 8 ch or 16 ch relays)
- Breadboard (For prototyping, you can make it permanent on PCB if you want)
- Male to Female jumper wires
- 9v battery (To power the relay)
Software Components
- Arduino IDE. (To upload the code)
- RemoteMe account.
- Arduino Remote Lite app
Set Up the Arduino IDE
First things first, We have to set up the Arduino IDE and install all the required libraries.
In order to be able to program the ESP board, you need to configure the Arduino IDE.
Once the ESP environment is ready next step is adding the libraries required for RemoteMe connection. Open the Arduino IDE and Goto >> Sketch >> Include Library >> Manage Libraries. A pop will show up where you have to search the required libraries and install them one by one.
Libraries you’ll need to install are as follows:
* RemoteMe.h
* Remotemeutils.h
* RemoteMeSocketConnector.h
* RemoteMeDirectWebSocketConnector.h
* ESP8266WiFi.h
* ESP8266WiFiMulti.h
Once these libraries are installed, the IDE is ready to work with RemoteMe.org.
Configure RemoteMe
First head over to RemoteMe.org, and signup if you haven’t already.
Now install the Arduino Remote Lite apk, and sign in using the RemoteMe account. Once that is done, go back to RemoteMe website to create variables.
Follow the following steps carefully:
After logging in goto ‘Variables’, here you will notice a list of variables created automatically by the ‘Android Remote Lite‘ app. We will be using these variables to control the relays.

Now above ‘Variables‘ there is another option named ‘Devices‘ click on it and a new page will load where you can create devices.
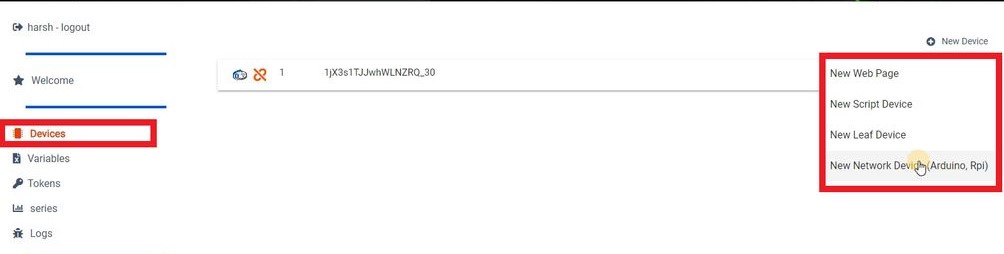
Click on ‘New Devices‘ option on the top right corner, a drop-down list will appear. Select the last option ‘New Network Device‘. Now give the device a name like ‘Relay‘ or ‘Automation‘ or anything you want. Also, give the device a unique ID so the device is recognized and differentiated from other devices.

Generating Arduino Code
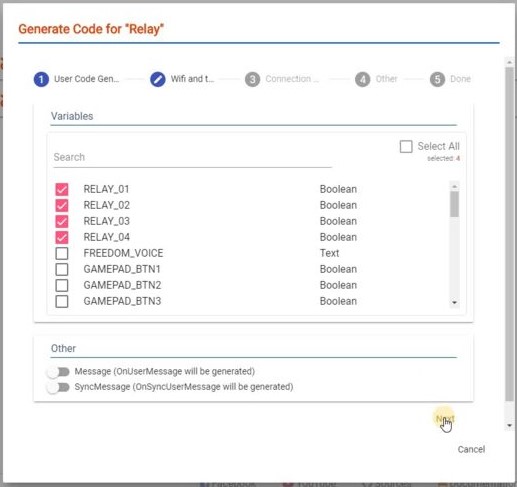
After the above step, a new device will appear. Now we have to generate the Arduino code. Click the burger menu (Represented by 3 horizontal lines). Then, select ‘Code Generating Wizard.‘ You will see a popup window with a list of all the variables generated by the App.

Scroll down to find the list of relays. As here I am using a 4 ch relay, I will select the first 4 relay variables, If you are using 8 / 16 ch relays. select the numbers you require and click on ‘Next‘
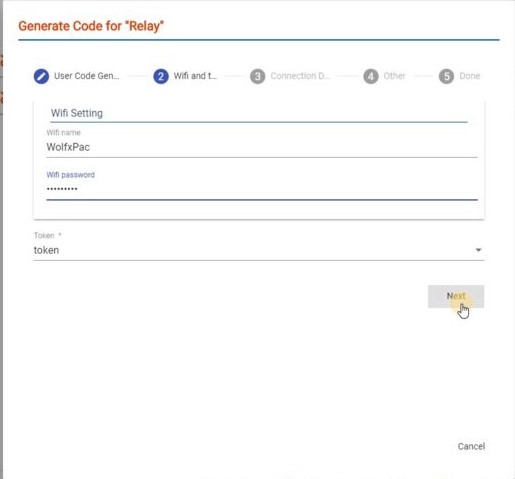
In the next step enter your WiFi name and password and click on ‘Next‘.
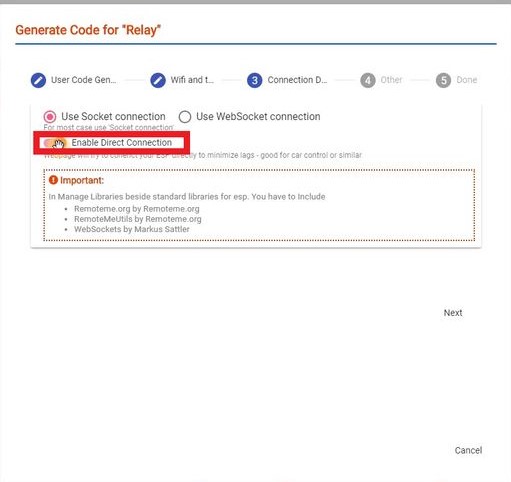
You also have an option to enable ‘Enable Direct Connection.‘ If you enable this option, the App will connect to the device directly without the internet if the Smartphone is in the range of the WiFi.
 In the next step, enable the Debug option, and hit next. Now you can download the code to your computer. We’ll need to edit the code to set the I/O pins.
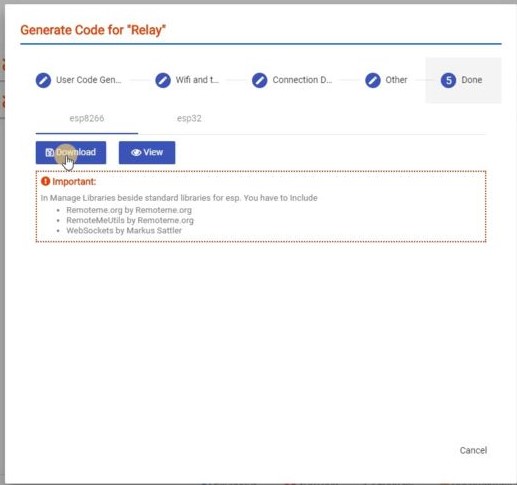
Modify the Home Automation Arduino Code
If you’ve already used RemoteMe, this part should look familiar. Make modifications as needed for your project. Or, you can download our modifications.
[pretty-locker id=”339508″]int Relay1 = D0; int Relay2 = D1; int Relay3 = D2; int Relay4 = D3;
So on you can add more if you want.
void onRELAY_01Change(boolean b)
{
    Serial.printf("onRELAY_01Change : b : %d\n", b);
    if(b == 1)
    {
        digitalWrite(Relay1, HIGH);
    }
    else if(b == 0)
    {
       digitalWrite(Relay1, LOW);
    }
 }
Above the functions in the code are edited for operating relays. In a similar way, you can edit all the functions for the number of relays you are using.
pinMode(Relay1, OUTPUT);
pinMode(Relay2, OUTPUT);
pinMode(Relay3, OUTPUT);
pinMode(Relay4, OUTPUT);
The above code is to be added in setup to set the pins as output.
That’s all the code that needs to be edited, The whole code can be downloaded from here. Just add your WiFi name and password, your device ID, and a token which can be found in ‘Token‘ below ‘Variables‘.
With that done, the code is ready to be uploaded to the ESP board.
Wire up the Electronics
Now that the software is ready, we can wire up the circuit board.
Here is a circuit diagram:
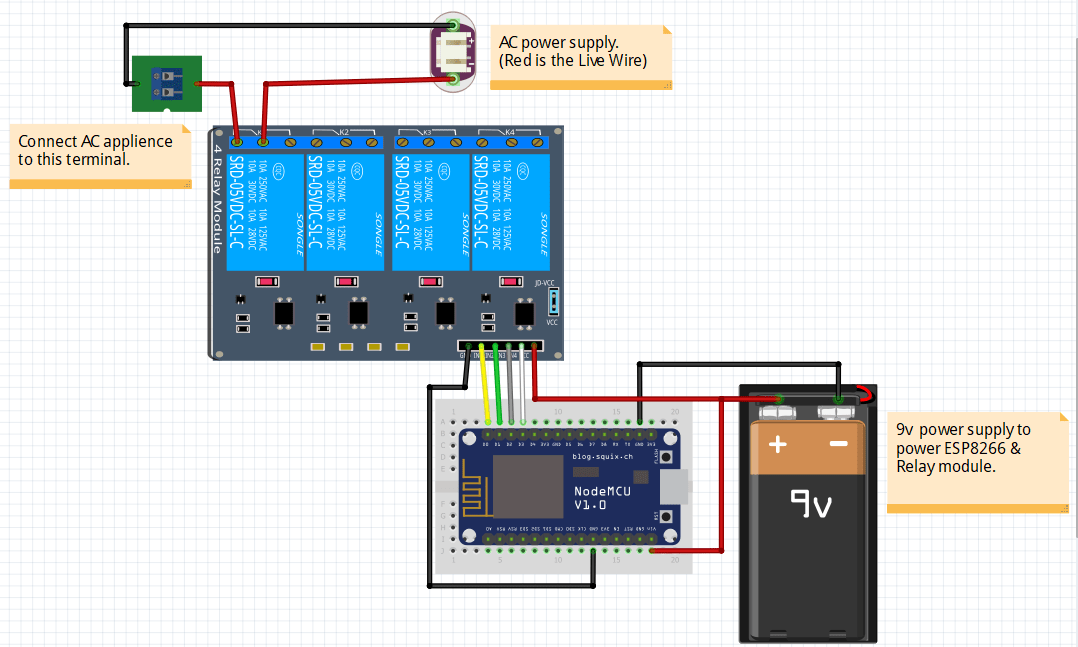
First, place the ESP8266 board on Breadboard, and connect the GND pin to the -ve rails on both sides.
Now connect some male to female jumpers to the relay board. Refer to the pictures below for the connections.
Next, attach a 9v battery clip to the breadboard. It will power both the Relays and the Logic circuit of the relay board.
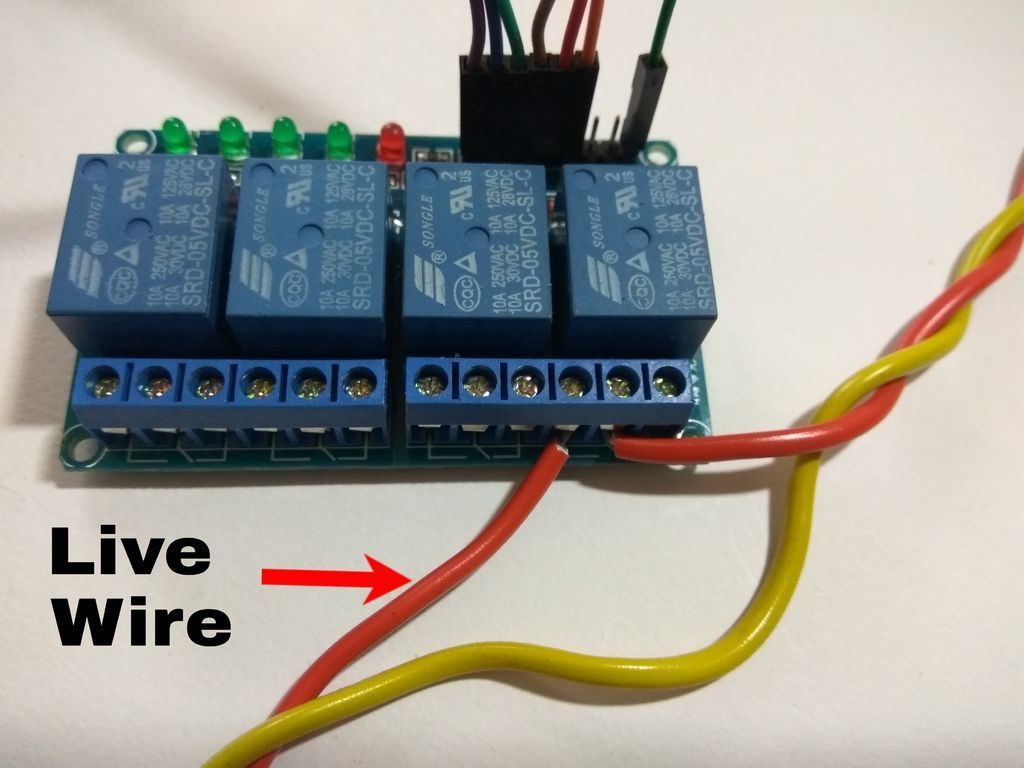
Then, connect the wires of the Appliance you want to control. The AC appliance will have 2 wires. First, cut the live wire and connect one end to the center terminal of the relay and another end to the normally open terminal.
Now, we can move on to test the build. First power up with 9v battery. If you want to power the ESP board with the battery as well, just connect the Vin pin of ESP board to +ve rail of the breadboard. Then you don’t need to connect the USB cable.
Open the Arduino Remote Lite app, Head over to the 3rd option “Relay Control” from here you can control the Relays with the switches. Finally, when you trigger the relay from RemoteMe, the lamp should turn on and off.
Hope this post was informative and helpful. If you have any questions, please drop a comment below!
Would you like to learn how to build robots? Join our new Robotics eCourse. For more tutorials like these, consider sending us a Coffee.


