

In this post, I will show you how to connect your NodeMCU or ESP8266 development board to the Internet, and control devices using a web browser. You can use it for a number of projects like, automation, controlling robots over a long distance, and much more. Before you get started checkout the previous article on using ESP8266. So without wasting any more time, let’s get started.
What You Need to Control I/O with NodeMCU
Pick up a NodeMCU kit or grab the following components.
- ESP8266 Dev Board
- Breadboard
- LED & Pushbutton (Momentary Switch)
In addition to the hardware, you will also need software to program the controller. I’ll assume you already know how to work with Arduino and write simple programs.
- Arduino IDE
- RemoteMe.org (You need to create an account here)
I’ve also created some RemoteMe and Arduino example files. Download these, below, then continue on with the tutorial! We’ll use these files in a later sections.
[pretty-locker id=”339508″]Access the RemoteMe project files
Create a Web Page using RemoteMe
If you have no idea what RemoteMe is, let me explain it in short.
RemoteMe.org is a free website where you can host web pages, create network devices and generate code. We’ll use RemoteMe to host our webpage to control I/O on our ESP8266.
The first step is to head over to RemoteMe.org. Goto Signup, and create an account. Now login using the username & password you created.
On the home page you will notice a menu on left side. Click on Device from that menu. A blank page will appear. Here you can create a new device.
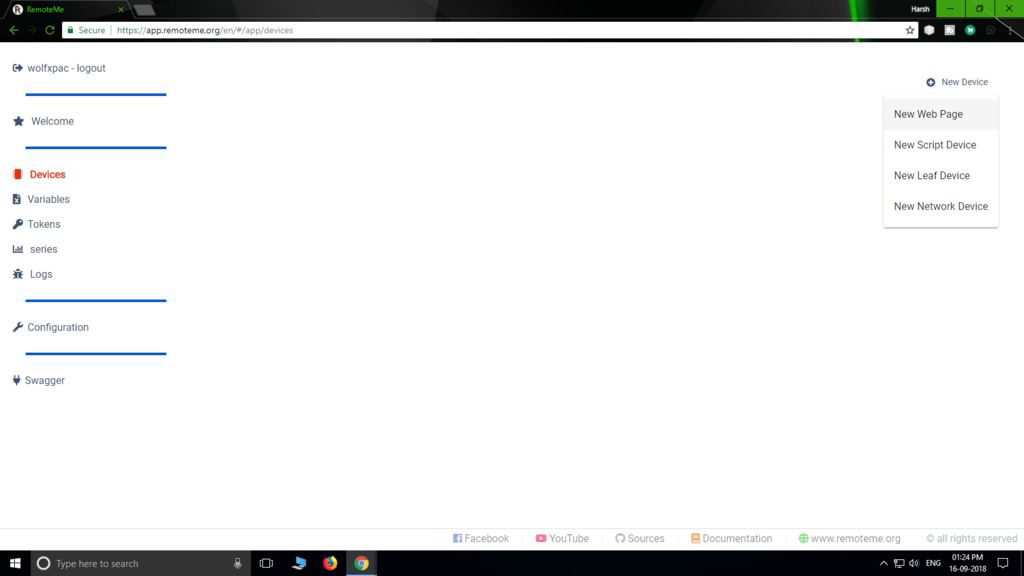
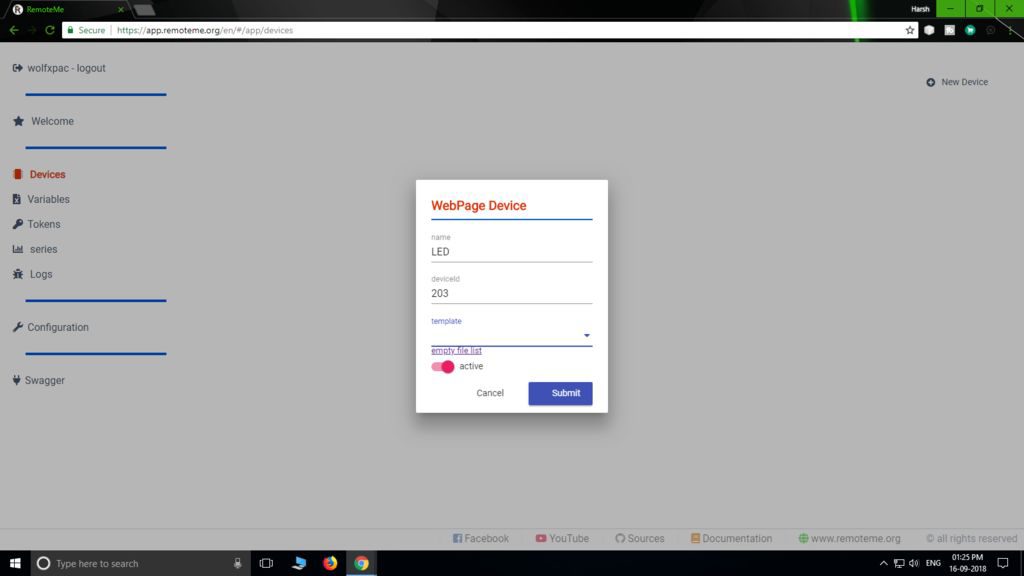
Next, from the drop-down list, select “New Web Page.” A pop-up window will appear. Provide a name, ID, and turn it on by toggling ‘active’.
You can name the device anything you want. But for this tutorial, name it the same as I have, below.
Name: LED
ID: 203
Template: componentsStarter
Finally, make sure the toggle is set to active and submit. A new device will appear at the top named LED.
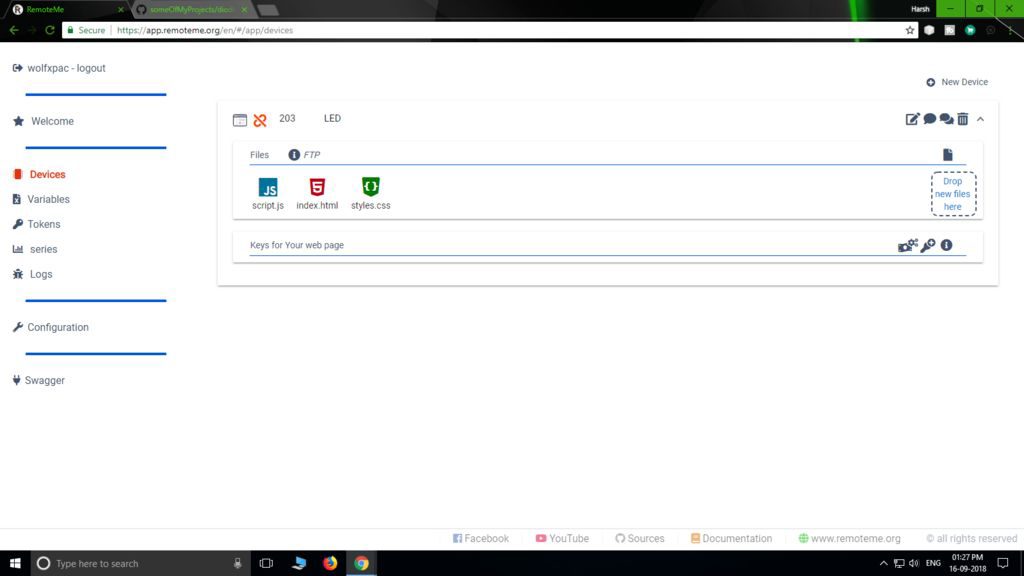
Now click on the down arrow. You will see a drop down with 3 files. These are blank files. Feel free to edit this to customize your web page.
Remember the RemoteMe files you downloaded at the beginning of the tutorial? We’ll use them here. Delete the files that are created automatically. Then drag & drop the provided RemoteMe files into the browser.
Once that’s finished, the web page is ready. You can click on the “Index.html” file and open it in new page.
Configure the Arduino IDE
Before we can use the code, we need to setup the Arduino IDE with some libraries.
Here is a list of libraries you will need:
- RBD_Timer.h
- RBD_Button.h
- RemoteMe.h
- ESP8266WiFi.h
- ESP8266WiFiMulti.h
- ArduinoHttpClient.h
To install these libraries goto >> Sketch >> Include Library >> Manage Libraries.
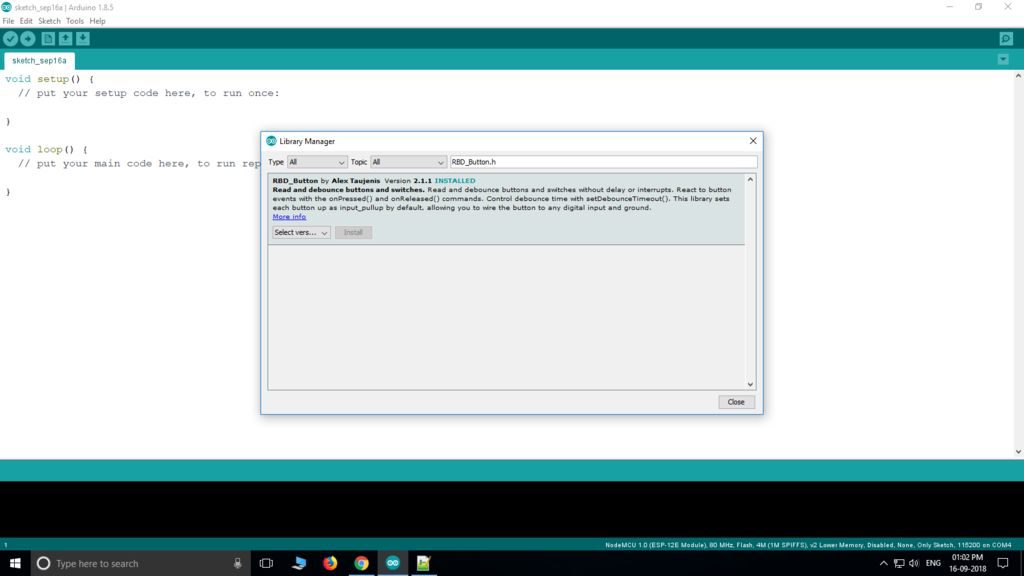
Copy and paste the names of libraries above and install them. After all the libraries are installed just restart the IDE and move on to the next section.
Upload Code to your NodeMCU
I have provided the code to make the project work. Before you can upload the code, there are some minor changes you have to make.
Now open your Arduino sketch from before. Enter your WiFi name and password in the required field so the board can connect to your network. Make changes to the following code:
#define WIFI_NAME "Enter your WiFi name"
#define WIFI_PASSWORD "Enter your WiFi password"
#define DEVICE_ID 203 #define DEVICE_NAME "LED"
#define TOKEN "Enter Authentication Token"
The token can be found on RemoteMe website >> Application >> Token. Copy and paste this token into the Arduino Sketch where it says “Enter Authentication Token.”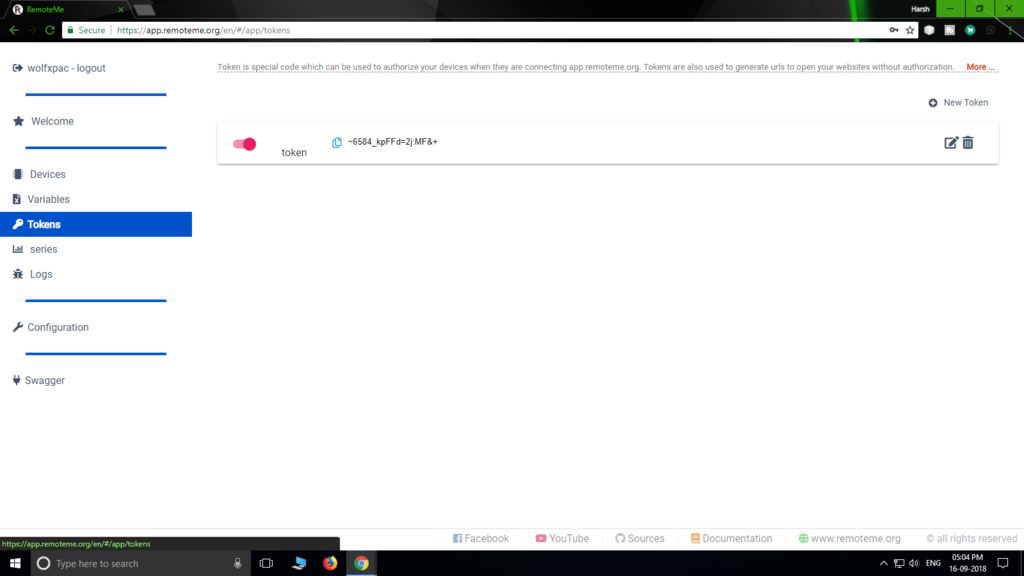
Now, we’re ready to move on to wiring up our ESP8266 circuit.
Wire your ESP8266 for Web Control
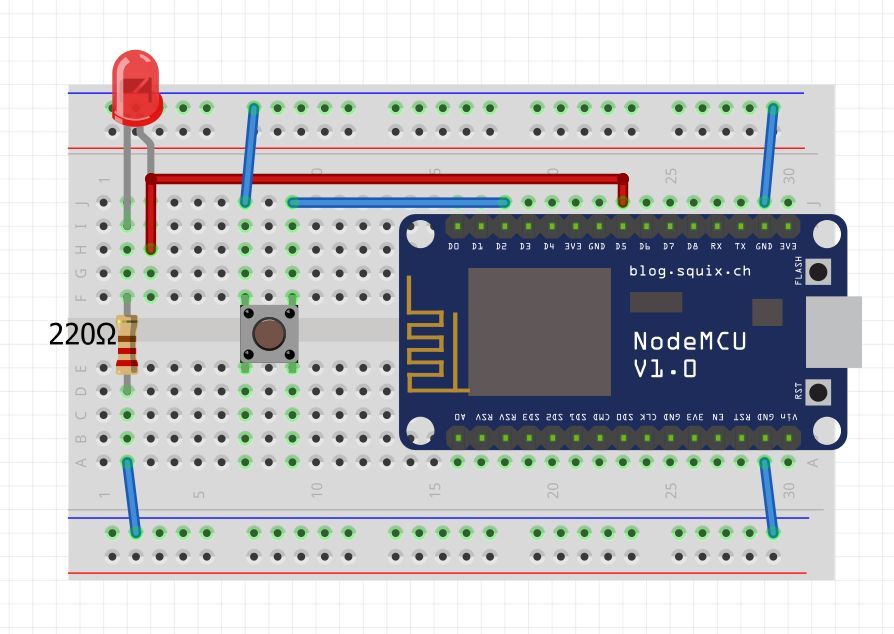
Use the Wiring Diagram, below to configure your ESP8266 for Web Control.
The LED is connected to Pin D5 of the NodeMCU. Connect a 220 ohm resistor in series with LED. The push button is connected to Pin D2. Be sure to ground both rails of the breadboard.
Once that’s complete, we’re ready to test out the device!
Test the ESP8266 Web Control
First check to see if the connections are right. Press the push-button, and you should see the LED turn ON. Pressing the button again and verify that the LED turns OFF.
Next, head over to the RemoteMe website and open your application. Login using the account with which you signed in with.
Now Goto Devices, and select the device you just created. Notice the Connection link symbol on the left side before the device ID. It should have turned green, which indicates that the ESP board is connected to the server.
Then, click on the “index.html” file, and select “open in new tab.” A new web page will load with a circle. You can click on the circle to turn on and off the LED.
Now, let’s control your LED using a smartphone. Again, go to the device page, and click on “index.html”. This time select the last option, “Get anonymous link.” A pop-up window will appear with a link you can open in any smartphone to control the LED without having to login every time.
An even better option, is to use the QR feature. Then, you can scan the QR using your Android or iPhone, and you will be redirected to the web page with the circle.
Hope you liked this project! If you have any questions feel free to ask them in the comments, below. Do you have a friend who’d want to build this project? Share this article with them!
We’re also looking to grow our contributor group. Become a Learn Robotics Contributor, and post your own tutorials on our blog!
Would you like to learn how to build robots? Join our new Robotics eCourse.


4 Responses
Dear Liz,
I get the following error when compiling the arduino file.
remoteMe.setupTwoWayCommunication();
^
exit status 1
‘class RemoteMe’ has no member named ‘setupTwoWayCommunication’
I installed the libraries as you mentioned, are there any other files needed?
Thanks
Hi Zaki,
Did you install WebSockets by Markus Sattler and the RemoteMe by RemoteMe.org libraries in the Arduino IDE? If not, try installing this library by going to Sketch > Include Library > Manage Libraries and search for “WebSockets”. You’re looking for the one by Markus Sattler. Do the same for the RemoteMe library. Click install and try compiling your code again.
I followed your tutorial to the part where I tried to drag and drop the github files. When dropped in the file area the website rejected each one of the four! What do I need to do now ??
Make sure you have the correct file format before dragging and dropping into the website.