

In this article we will learn about another popular sensor in the market known as the BME280. Developed by Bosch, the BME280 is an integrated environment sensor for mobile applications. It is a barometric sensor which can provide Temperature, Pressure and Humidity data quite accurately. Today we will learn more about this cool sensor and how to use it with an Arduino to monitor indoor weather.
BME280 Datasheet, Specs, & Features
Before we can start using the sensor, let’s take a look at its specifications. You can grab a copy of the BME280 Datasheet here.
Supply Voltage: 1.8 – 5V DC
Interface: I2C (up to 3.4MHz),
SPI (up to 10 MHz)
Operational Ranges:
Temperature: -40°C to +85°C, +-1°C
Humidity: 0-100%, -3%
Pressure: 300-1100 hPa, +-1Pa
I2C address:
SDO LOW : 0x76
SDO HIGH: 0x77
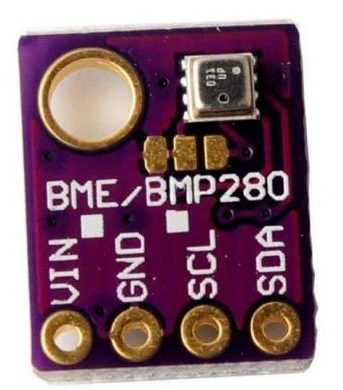
The sensor communicates using I2C protocol similar to how an OLED display works. Now that we are familiar with the sensor, let’s see how to connect it to the Arduino. For this project you’ll need an Arduino UNO and a BME280 module.
BME280 Arduino Wiring
As stated before, BME280 works with I2C protocol. So we just need 4 connections. Refer to the connection list below:
- VIN = 3.3v
- GND = GND
- SCL = A5
- SDA = A4
Here’s the Fritzing wiring diagram for the BME280.
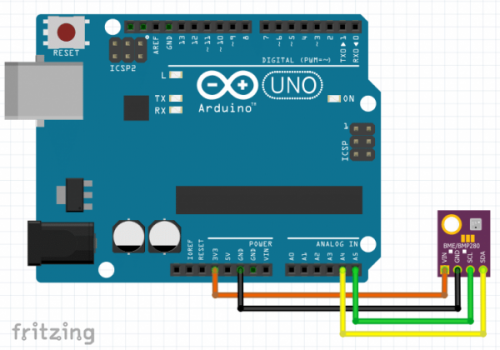
After you wire up the BME280 to the Arduino, it’s time to upload a sketch.
BME280 Arduino Programming
Before we can upload code, we have to install a library for the sensor. To install the library first open Arduino IDE and goto >> Tools >> Library manager. In the search box type “Adafruit_BME280.h” and install the library that shows up.
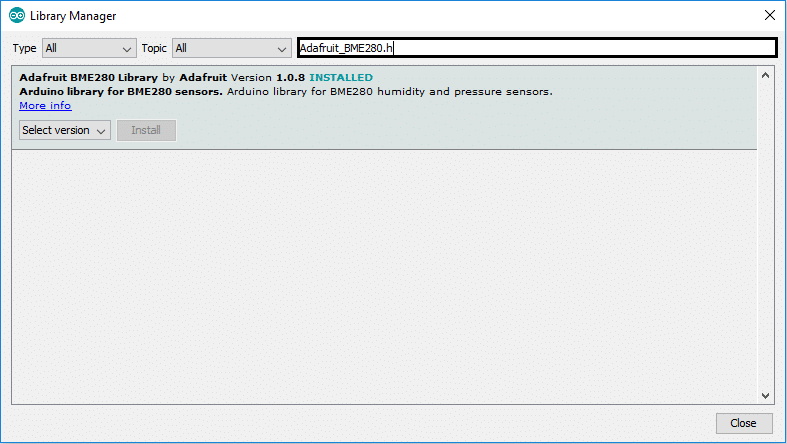
After the library is installed, restart the IDE. Upload the following code:
#include <Adafruit_BME280.h>
Adafruit_BME280 bme;

void setup()
{
  Serial.begin(9600);
  if (!bme.begin(0x76))
  {
    Serial.println("Could not find a valid BME280 sensor, check wiring!");
    while (1);
  }
}

void loop()
{
  Serial.print("Temperature = ");
  Serial.print(bme.readTemperature()); //prints in °C
  //Uncomment the line below to get temperature in °F
  //Serial.print(bme.readTemperature() * 9 / 5 + 32);
  Serial.println("*C");

  Serial.print("Pressure = ");
  Serial.print(bme.readPressure() / 100.0F);
  Serial.println("hPa");

  Serial.print("Humidity = ");
  Serial.print(bme.readHumidity());
  Serial.println("%");

  Serial.println();
  delay(1000);
}
After writing the code, connect your Arduino to the PC, select the right port, and upload the code.
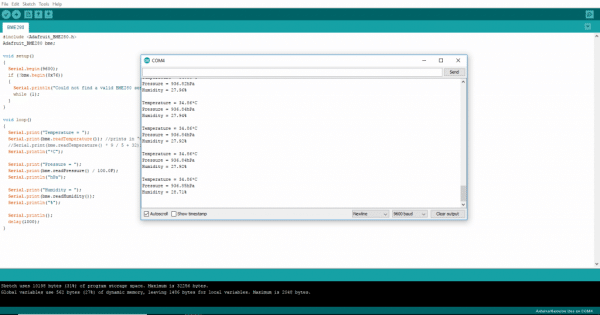
Sensor Readings from the BME280
Now that the code is uploaded successfully, open the serial monitor and see the data printed in real time.
Now you can use the sensor for different projects. In the past we created a simple weather station without sensors. Now that we have a way to obtain temperature, pressure, and humidity, we’ll expand upon this project using the BME280 sensor. Stay tuned!
And, if you enjoyed this tutorial, consider picking up a copy of my “Mini WiFi Robot” eBook. In this full project guide, I show you how to design, build, and program your very own custom robot that can be controlled over WiFi. Snag your copy, today!


