

Hello and welcome back to this week’s Learn Robotics tutorial! I’m going to preface this article by saying, man, did I dig myself into a bit of a hole with this one! For those of you on Instagram, I posted a video saying I was going to build and program a Wifi-connected robot using a WeMos D1 Mini (based on ESP8266) and an L298N motor controller. Basically retrofitting my Arduino Robot to use a wifi-enabled chip, rather than the Arduino Uno + Sensor shield.
Anyways, I ramble. What I thought was going to be a fairly straightforward and easy reconfiguration, turned into an afternoon of frustration. Who would have thought the WeMos D1 Mini would be so difficult to implement with a motor controller? I think part of my problems included not using a breadboard from the start and having loose motor signal wires.
There aren’t too many full-blown tutorials that show you start-to-finish how to do this, so sit back, relax, and let’s get our robots connected and controlled via magic (wifi!).
Things you’ll need to create a WeMos Wifi Controlled Robot using L298N
- Robot Chassis with Motors & Wheels
- 7.4V Battery Pack: 2X 3.7V (4000mAh) flashlight batteries
- Jumper Wires
- Breadboard
- WeMos D1 Mini controller
- L298N motor controller
- Small Phillips Head (+) Screwdriver
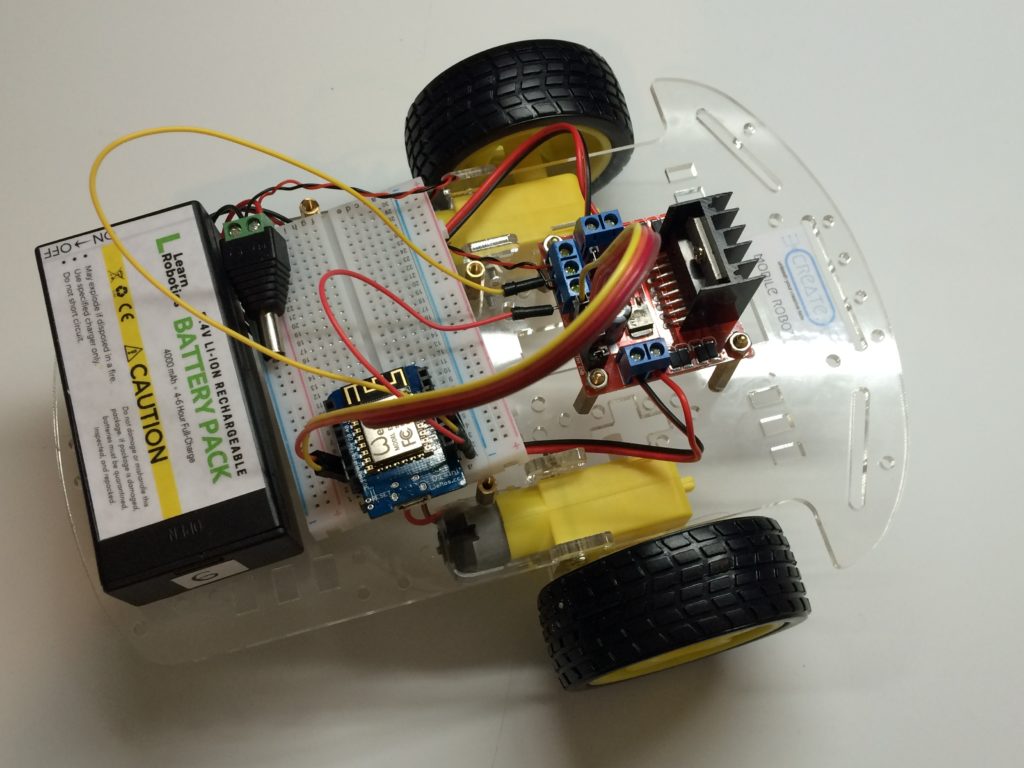
Prework – Before Starting, Construct your Robot
Before proceeding with the tutorial, you’re going to want to assemble your robot chassis, motors, and wheels. You’ll also want to mount your battery pack and breadboard. Once that’s all set, go ahead and jump to Step 1.
Step 1 – Wire up the WeMos & L298N Motor Controller
Because I like writing tutorials that include resources all in one place, here are the two wiring diagrams you’ll need to properly connect your WeMos (Wiring Diagram) to your L298N motor controller. I suggest clicking on both diagrams before continuing…
- Place a jumper on both the ENA and ENB pins.
- Attach the motor polarity wires as follows. (Use the L298N wiring diagram to figure out the motor pin numbers.):
- Pin 1 – Left + Red
- Pin 2 – Left – Black
- Pin 3 – Right Black –
- Pin 4 – Right Red +
- Connect the motor signal pins as follows:
- IN1 to D7
- IN2 to D6
- IN3 to D3
- IN4 to D4
Note: If you decide to use different pins, you’ll have to modify the source code.
Step 2 – Configure the Software
You’re going to need a copy of the Arduino IDE. So before we get started, download and install a copy of it here.
-
- Update the Arduino Board Manager. Go to Arduino >> Preferences and paste the following code in the “Additional Board Manager URLs” field.
https://arduino.esp8266.com/stable/package_esp8266com_index.json
- Add the ESP8266 Library. Go to Sketch >> Include Library >> Manage Libraries >> then Search “ESP8266com” & install.
- Set your board WeMos D1 R2 & mini under Tools >> Start
- Change baud rate to 115200. Tools >> Upload Speed >> 115200
- Update the Arduino Board Manager. Go to Arduino >> Preferences and paste the following code in the “Additional Board Manager URLs” field.
If you need additional help, check out the WeMos wiki for the WeMos D1 Mini.
Step 3 – Download the Arduino Sketch or Create Your Own
I’m not going to go in-depth on how to configure the software for this robot because the code is well commented on Github. You can access the code by signing in below. If you have specific questions or problems that you need help solving, please contact me!
[pretty-locker id=”339508″]Step 4 – Modify Sketch Parameters to work with your Network
If you choose to use my code, you’ll need to update a few parameters. Let’s go through that now.
Find this block of code:
// Replace with your network credentials
const char* ssid     = "yourssid";
const char* password = "yourpassword";
- Replace yourssid with your Wifi network name.
- Replace yourpassword with the Wifi network password.
Compile the code and be sure you don’t have any errors before proceeding.
Note: You may need to connect your WeMos to the computer using the Mini USB cable.
Step 5 – Test Drive
Here’s the moment of truth. Be sure your board is selected (Step 2 part 3) and the baud rate is set to 115200 (Step 2 part 4). Connect your WeMos to your computer via USB. Then upload the code like you usually would any other Arduino sketch.
Note: This code takes much longer to upload versus a typical Arduino Uno. BE PATIENT!
Once the code is done uploading, open up the Serial Monitor. Click the magnifying glass in the top right corner or navigate to Tools >> Serial Monitor.
You should see the following printout:
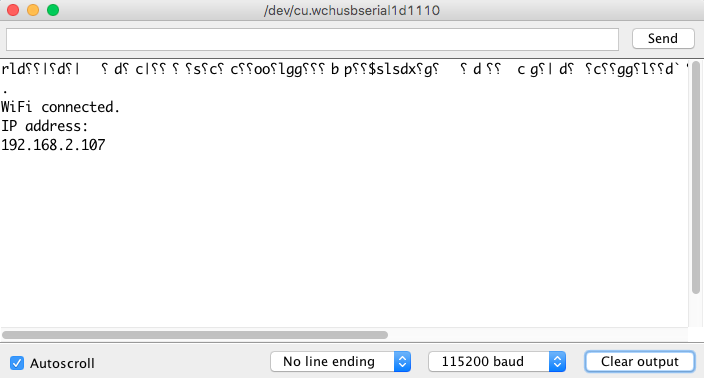
Copy the IP address (in my case it’s 192.168.2.107) and paste it into an Internet Browser. This is the webpage that is generated at that IP address.
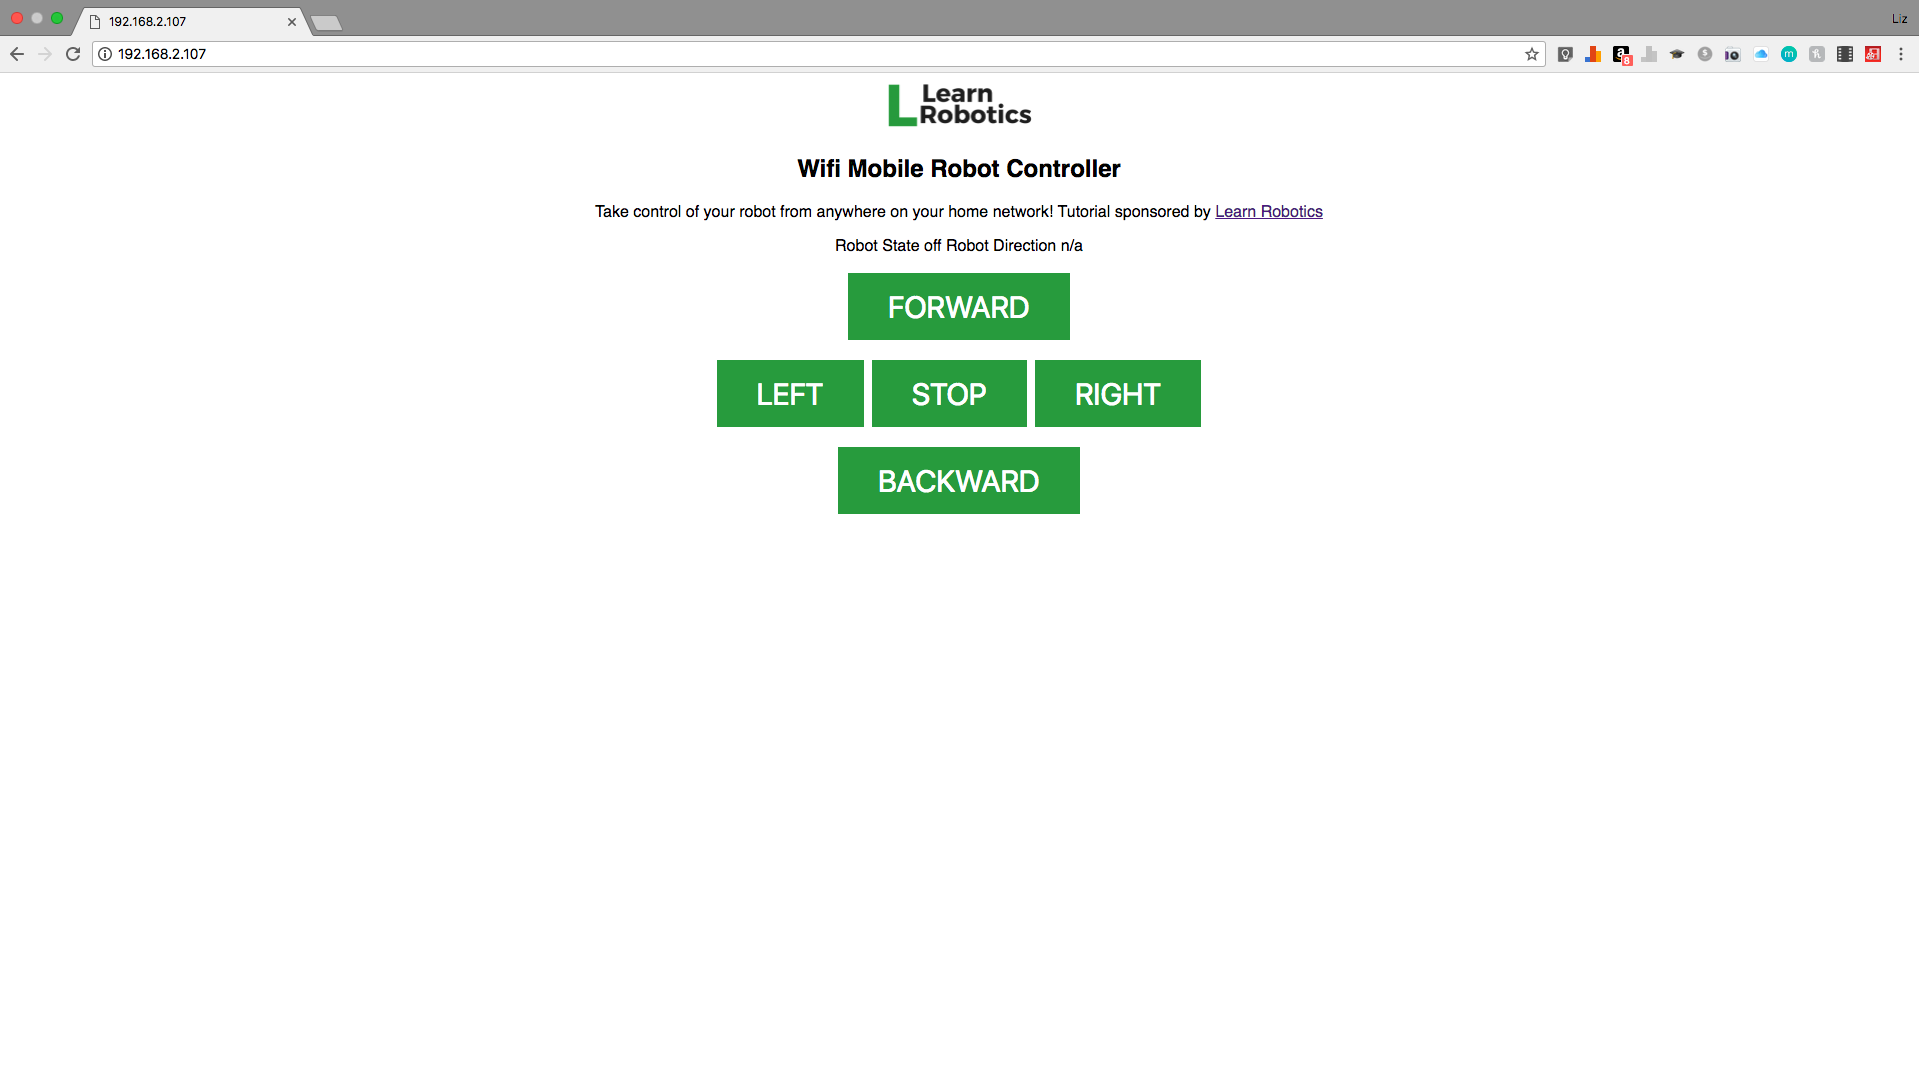
It’s the moment of truth! Time to test out the connectivity. Make sure you prop your robot up if it is on a table, or it will go flying off. Once it’s propped up, feel free to click the control buttons to try out the RC features of this Wifi-enabled robot!
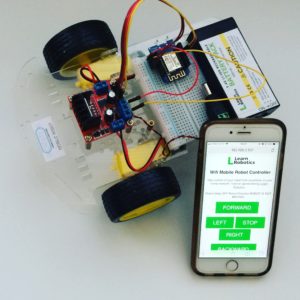
You can also unplug the USB cable from your computer, place the robot on the ground, and run your mobile robot off of batteries. The webpage will be active so long as your robot is 1) powered on and 2) connected to your home network/router.
Feel free to try out driving the robot from your wifi-connected smartphone or laptop browser page! Connectivity appears to be real-time, and it’s actually quite fun to drive around!
Step 6 – It works, now what?
This is actually a really good starting point for your Wifi-controlled robot projects. While I’m sure you’re creative and can think of at least 10 improvements, here are my top 5 recommendations for where to go with this:
- Control the type of turn the robot makes. For example, make a 90-degree turn or 45-degree turn. Use either a text input box, form, or pre-programmed button to send commands to the robot.
- Customize the Robot outputs to be visually appealing. Instead of printing out a text that says ON or OFF and a direction, find a way to visually represent this data on the screen.
- Control the motor speed. You’ll probably have to remove the jumper pins on the L298N motor controller and utilize the
analogWritefeature. - Host the webpage on a WWW website rather than your home network. Then call up a friend and have them drive your robot around from their house. I’m actually tempted to try this. I’ll keep you posted if I actually go through with it. 😉
- Clean up the webpage by generating it in PHP or a separate HTML file. I’ve seen examples of using PHP and a CSV file to write and read values for commands. Might be something I look into for the future and ease of reusability for this code.
Subscribe to Learn Robotics on YouTube
What did you think of this tutorial? IMO, it’s been probably the coolest thing I’ve worked on as of late 😉
If you’d like to learn more about building mobile robots (and work with me 1-on-1), join my online Robotics course. It’s a 30-day guided crash course to give you the tools you need to be successful within robotics. Sign up here


13 Responses
Hi
The best source I have discovered on the internet for starting with a WLAN robot using the WeMos D1, which I have bought to implement a robot for my kids – thx for that.
Our robot also has ultrasonic distance measurement and I would like to send 3 values back to the displayed webpage every 2 seconds.
Any hint where I find a sample code to implement this in addition to the robot control?
BR, Bernhard
Thanks for the kind words, Bernhard. You can set up a method to publish data to your webpage or use a service like Dweet (we have some articles about that on the blog – search “dweet” to find them and get set up). Good luck ~Liz from Learn Robotics