

In this article, we’re going to explore 3D printed drones that you can build from Thingiverse. Even though DJI is known for drones (and the Avata Pro-View FPV is Super Cool), you might be looking for a DIY drone that you can build yourself.
In this article, we’ll focus on building a drone from start to finish by 3D printing components and purchasing the electronics.
Don’t get me wrong, building a 3D printed drone will not give you the same quality as buying a drone through an OEM. And, if you’re planning on using a drone for photography or videography, then buying the new DJI makes a heck of a lot more sense.
Here are a few recommended drones (if you’d prefer to buy and not build):
- DJI Avata Pro-View Combo
- DJI Mavic 3 Classic
- DJI Mini 4 Pro Folding Drone
- DJI Air 3 Fly More Combo
- DJI FPV Combo
However, if you’re looking for a new hobby, then building one will give you a lot of hands-on experience working with mechatronic components.
Plus, you can truly customize your drone, which makes flying especially rewarding once it’s built.
You’ll need a 3D Printer to Print a Drone
Not to state the obvious, but you’ll need a 3D printer to print a drone. You can outsource prints (we do this) or use sites like 3D Hubs or Treatstock to get parts 3D printed.
However, if you plan on doing a lot of projects, it might make more sense to just buy a printer.
While this isn’t a guide on how to 3D print (we have one of those here), or a reference on which 3D printers you should buy, I did want to mention a couple of options for 3D printers.
If you’re printing drone components (or really anything), I highly recommend getting a 3D printer with a large build area that is enclosed.
Here are a few 3D printers I recommend:
- Flashforge Adventurer 4 Pro
- Flashforge Adventurer 5M
- Creality K1 Max
- QIDI Technology Max3
- Dremel DigiLab 3D45-01
Remember, if you’re new to 3D printing, there will be a learning curve associated with getting quality prints. So, I don’t recommend tackling drone building and 3D printing simultaneously unless you have a lot of patience!
And, don’t forget a few spools of PLA or PETG! I’m a fan of Hatchbox and Gizmo Dorks. Feel free to get whatever colors you like the most!
1. T4 Quadcopter Drone
A popular choice for 3D printed drones on Thingiverse is the T4 Quadcopter by Brendan22. While this project was created in 2014, it’s had over 51 makes and 37 remixes.
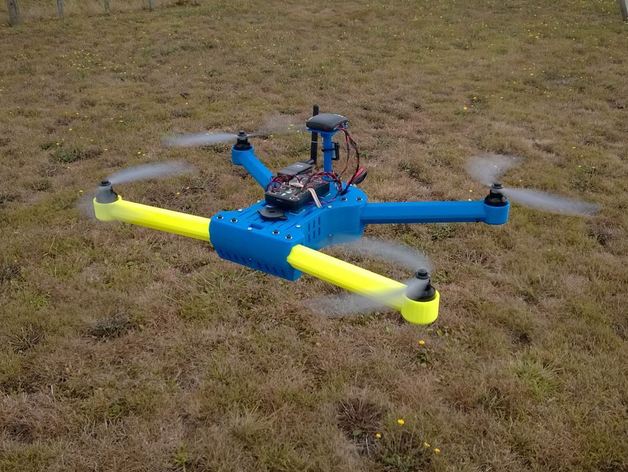
The T4 Quadcopter is a completely 3D printable without any supports and is very simple to assemble. The strong and braced tube section arms have plenty of space to conceal motor wiring.
You can even attach a GoPro mount on the nose! Grab the files and build this 3D printed drone from Thingiverse.
2. Hovership 3DFLY Micro Drone
Next on the list is the Hovership 3DFLY Micro Drone. If you’re looking for a hand-sized drone that’s perfect for beginners, then you’ll want to check out this option. Additionally, its small size makes it a great option if you have a small print bed. (100x100mm is all that’s required.)
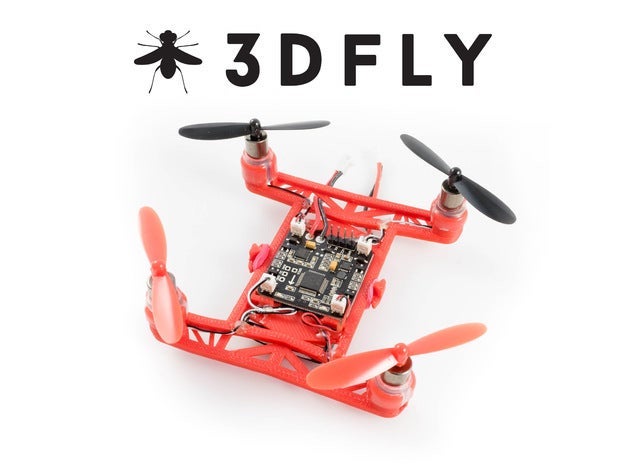
Once you have this project built, you can fly the Hovership Micro Drone indoors or outside. Be sure to take your time, as this project does require some basic soldering skills and setup on the computer.
The 3DFLY Micro Drone kit is out of stock on GetFPV.com, however, they do have a list of components that you’ll need to complete the drone. A lot of these components can be purchased on Amazon.
Get the 3D files from Thingiverse.
3. TinyTina 90m – Mini Drone
The TinyTina is a mini drone that is ready for standard 20x20mm flight stacks and can be used with an FPV camera. Out of all of the 3D printed drones, this one offers the most comprehensive tutorial guide.
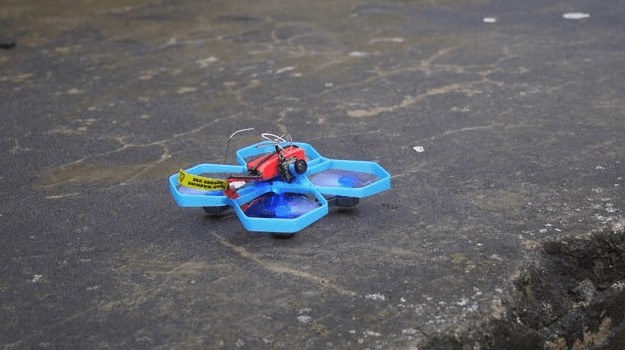
While you’re not saving a ton of money by building this particular drone—it’ll cost you just under $300 plus your time—you will gain a wealth of knowledge about drones by creating your own.
Plus, this 3D printed mini quadcopter comes in at 90mm, which makes it suitable for both indoor and outdoor flying.
Grab the files for TinyTina from Thingiverse.
Electronic Components You Need to Complete a DIY Drone
There are obvious components you’ll need when making a DIY 3D printed drone. Propellers, motors, batteries, ESCs, flight controllers, and an RC Transmitter to name a few.
Let’s take a look at each of these components.
Flight Controller (FC)
The Flight Controller controls all of the onboard electronics on your drone. It’s similar to an Arduino and includes a processor, firmware, and onboard sensors (Gyros, Accelerometers, GPS, Barometer, Current sensors, etc). You can find FCs in a variety of PCB footprints.
For 220 sized quadcopters, you’ll find 30.5×30.5mm spacing as a standard. For 70-130 sized quadcopters, 20x20mm spacing is fairly common. You can connect external components to a Flight Controller using solder, header pins, and connectors.
Here are some FCs worth checking out:
Electronic Speed Controller (ESC)
The ESC connects the flight controller and the motor.
Each brushless motor on the drone requires an ESC. This is because brushless motors because they lack the brush that acts as a commutator, which uses physical contact to spin the motor. The ESC provides an external way to convert the signal from the flight controller and power from the battery for motor control.
Here are some ESCs worth researching:
Propellers
Propellers are the blades that lift the drone in a forward direction, providing a force known as thrust. On a drone, you’ll have two propellers that rotate in the clockwise (CW) direction and two propellers that rotate in the counter-clockwise (CCW) direction.
Here’s what that looks like on the drone.
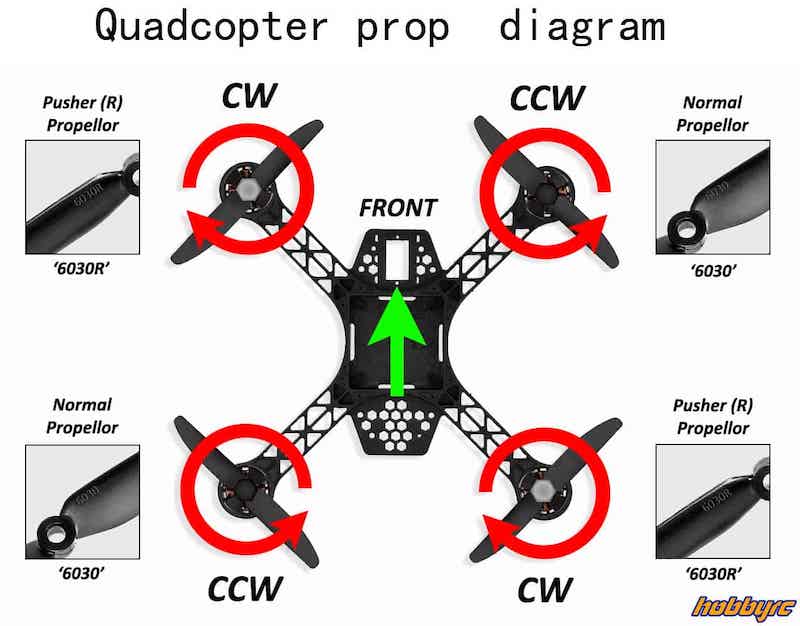
You’ll notice that there are CW and CCW propellers. Make sure that your CW propellers are mounted on CW motors and vice versa.
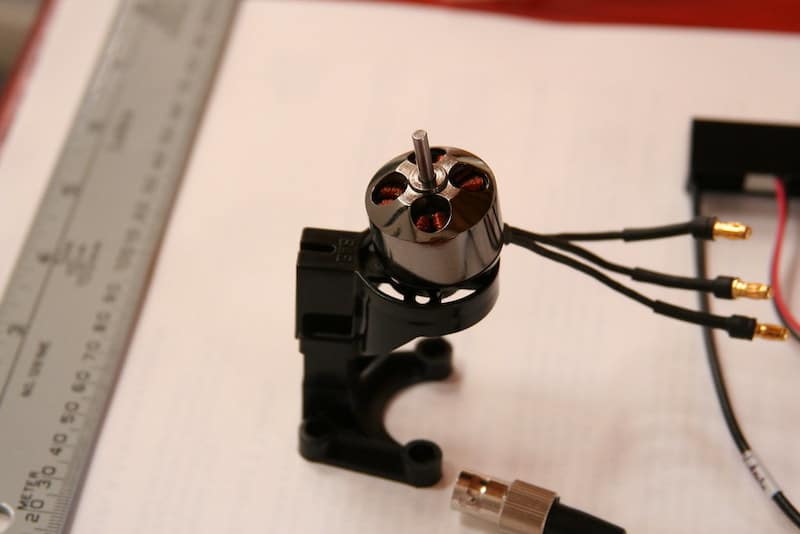
Motors
Motors provide the electromechanical power from the control board and the battery to the propellers. The motors are attached to the flight controller (FC).
For small drones, you’ll see that 8.5mm and 11mm diameter brushed motors are pretty common.
On a drone, there are four motors. Two rotate CW and two rotate CCW. On each set of motors, there’s a set of corresponding push and pull propellers. Ideally, you’ll want to generate enough thrust that’s at least double the drone’s weight.
(A 1:3 ratio tends to be a sweet spot, but racing drones tend to go much higher than that.)
Drone Batteries
To power the motors, you’ll need a battery. However, if you want to spin the motors faster and longer, you need a larger battery, which then adds more weight to the drone.
This makes it an infinite loop of determining the best power-to-weight ratio for drone agility.
Find Drone Batteries on Amazon
RC Transmitter
The RC Transmitter is what you’ll use to “fly” or control the drone. While there are many types of RC radios on the market, it’s difficult to choose the best one to buy.
Here are a few RC Transmitters to check out:
If you’re a beginner (and not sure that you want to play with drones forever), then you may want to stick with a simple 6-channel option. You can get better RC radios with 10 channels. In this case, price dictates quality, so if you plan on getting into drone racing, then it’s better to invest in a better radio at the beginning.
Cheaper RC transmitters use the FlySKY protocol, but you’ll often see FrSKY and DSM-X protocols as well. Just make sure you choose a receiver that’s compatible with the same protocol as your transmitter.
Camera and FPV Goggles
Some drones also have built-in cameras. You can add a camera to collect images or video footage. Or, you can use the camera for First Person View (FPV) for drone racing and leisure.
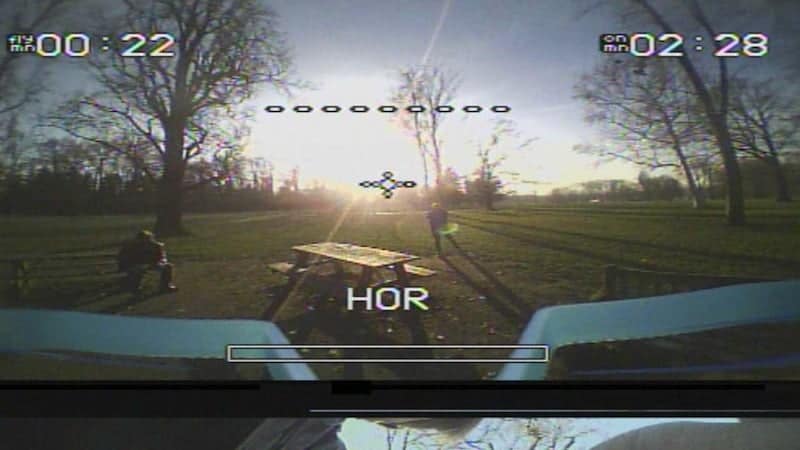
If you have a set of FPV goggles, then you can wear them while you’re piloting your drone, as if you were sitting in the cockpit! This makes flying drones a lot more interactive and a lot of fun!
Here are some FPV googles we recommend:
Additional Parts and Tools
Finally, you’ll also need cable ties, Velcro, adhesives, assorted hand tools, and fasteners.
Time to Build Your 3D Printed Drone
Once you have the design selected, and the components ordered, it’s time to get to work!
Go through the design guides and build your 3D printed drone. Don’t rush the process! You’ll want to make sure that the motors are rotating in the correct direction and the right props (CW and CCW) are attached to the correct motors.
After you have your drone built, place it on the ground, and gently raise the throttle.
Keep the drone low, and keep it flying safely. You should start to see it taking off at about 30% throttle.
If you’re new to piloting drones, they have a lot more power (and are more agile) than you think.
Also, as the pilot, it’s your responsibility to ensure that you stay out of inaccessible and restricted air spaces. Make sure you follow all local laws and regulations. And, most of all, take things slowly, and remember to have fun with it!
Which one of these drones are you going to 3D print?
Let me know what you think in the comments below.
And, if you enjoyed this article, please share it on your favorite Social Media platform!


