

Are you looking for a quick way to learn Arduino? We have a lot of beginners who visit the site looking for a complete, yet easy-to-understand guide on how to write Arduino programs. If you’re a hobbyist, just getting started, this article is for you. Then, when you’re ready to professionalize your hobby and start earning money with your technical skills, you can check out our Robotics Certification.
I wrote this tutorial to help people build Arduino programming skills in about 15 minutes.
Read through this guide, follow the steps, and you’ll be off to the races with creating your next device!
One of my favorite platforms to work with (for beginners and more advanced students) is Arduino. That probably comes as no surprise to most of you – practically all of my examples relate to Arduino in one way or another.
The reason why I’m an advocate of using Arduino vs LEGO Mindstorms or VEX comes down to the following points:
- Arduino is AFFORDABLE relative to other systems with the same features;
- It’s Open-Sourced Software, which means there’s a COMMUNITY supporting it; and,
- Arduino is fairly easy and straightforward to learn versus other platforms.
So with all of that said, I’m going to spend the remainder of this article showing you the four steps to writing an Arduino program. For those of you who have read my previous article, The Simple Guide to Writing an Arduino Program, this article will be a follow-up to that; instead of giving you a program to work with, I will teach you the steps to writing a program from scratch. All and all, this article will provide the “secret sauce” that you need to master to become good at creating ANY device using Arduino (robots included!).
Ready to get started?
The Four Steps to Writing an Arduino Program
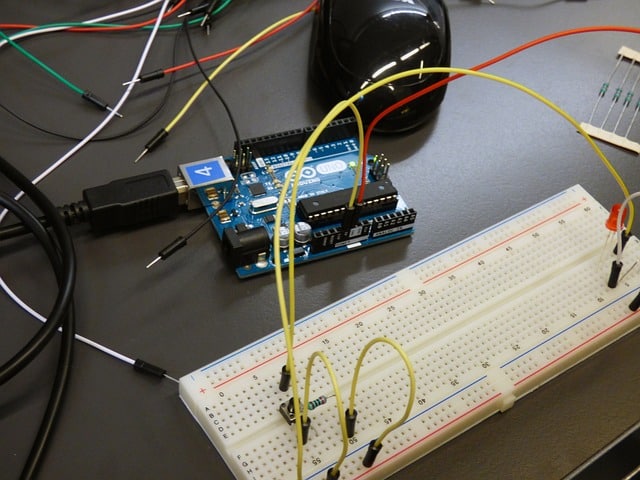
You will need an Arduino microcontroller to follow these steps. I recommend starting with a kit (like this one) because it includes a bunch of sensors and modules that you can use to build projects.
Here we go! The magic lies within the following four steps. Be sure to read each step carefully and memorize them. If you master this thought process, you’ll be able to create thousands of devices using Arduino!
- 1) Define Your Program
- 2) Declare Each Input/Output (I/O)
- 3) Create an Appropriate Method(s)
- 4) Call Your Methods in
loop()
Step 1 – Define Your Program
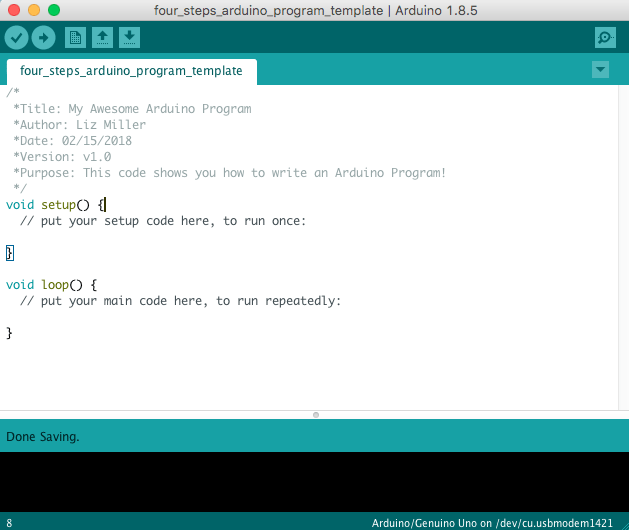
Let’s picture this empty sketch. You’ve launched the Arduino IDE and you’ve created a new sketch (File > New). Now what?
P.S. We now offer a cloud-based Arduino Editor if you prefer to program in the browser (or are switching between different computers). You can check that out here.
The first step is to define your program by creating a “block comment.” While seasoned programmers know that this isn’t a requirement, it does help you and your peers understand what’s going on with this code.
A block comment uses the following syntax:
/*
 * Your message goes here
 *
 */
You can use block comments anywhere in the code. They’re used to provide notes to other programmers and are disregarded by the program compiler. The reason why this step is a step is that months from now when you pull up this program, you might forget what it’s supposed to do. Therefore, if you describe at the top, you can quickly read that instead of reading through the body of the code. Plus, it’s good practice in computer science to use comments throughout your code.
There’s another type of comment called a “single-line comment,” that you can use throughout your program as well. Single-line comments use the following syntax:
// Your message goes here
Again, it’s good practice to include comments whenever you want to explain how your code works or what it’s supposed to do.
Step 2 – Declare Your Inputs and Outputs (I/O)
Now that we have a structure to our code, we’re going to declare the inputs and outputs or I/O connected to our Arduino.

For this example, I’m going to assume we have the following devices connected to the Arduino Uno:
Inputs
- Ultrasonic sensor on Digital Pin 5
Outputs
- LED on Digital Pin 6
- Servo motor on Digital Pin 3
To configure our I/O, we’ll use a combination of objects, and global variables.
In most cases, using a constant global variable will be sufficient. Here’s how we’ll define our devices:
const int = <pin#>;
The main reason why we use a constant integer is that typically the value of the pin location will remain constant throughout the program execution. Some of you might have heard of using #define instead of global variables, and that’s fine, too. Just be wary of its limitations. So for our LED and ping sensor, we will use the following lines of code.
IMPORTANT! This code will be placed BEFORE the setup() method declaration.
/*
 * My block comment from step 1
 *
 */
//declare variables here!
const int led = 6; //led is connected to digital pin 6
const int ping = 5; //ping is connected to digital pin 5
void setup(){
//code here ...
}
Then we will define our servo as an object from the Servo class. To do this, we will first include the Servo header file at the top of our sketch. Place this in line #1 of the sketch.
#include
Then go underneath your last const int declaration and put this code:
Servo myServo; //declare a servo object
You should end up with a file that looks like this:
Step 3 – Create Appropriate Method(s)
Now that we have our I/O defined, we can create appropriate methods to provide the functionality for our device. To determine what methods to write, we need to think about the purpose, objectives, and requirements of the project.
But first, what is a method?
A method is a set of code that performs a specific function and can be called or reused throughout the program.
Rather than re-writing the same five lines of code, we’ll write it once inside the body of a method, and then call that method when we want to use it.
Our Goal for this Example
Let’s pretend that we want to turn the red LED on when an object is detected less than 6 inches away. We’ll also move the servo when the object is between 8 and 12 inches.
Next, we will break down this objective, into smaller tasks and create methods to accomplish each.
Wise Tip! Use Methods to Divide Your Program
We create methods so that our loop() method isn’t miles long. Readable code is a priority when you’re creating prototypes because debugging can become a nightmare if your code continues forever.
Create a method for every new functionality you want to provide to your device. That way if one portion of the project doesn’t work, you can look up the methods that control that functionality and fix those, rather than deciphering every line of code.
Based on our goal, we want to accomplish the following things:
- Turn on an LED
- Move the servo
- Detect an object
- Less than 25 inches
- Between 20 and 40 inches
So now that we have all of the functions listed out, we’ll create a method for each. Here’s the syntax for a method in the C programming language:
<returnType> <name>(){
   //code goes here
}
returnType is what you want to return (typically void, int, String). Name is the name of your method, and parameters are any inputs you want to provide to the method. Parameters are optional. Remember to include an open curly brace and closed curly brace to contain your method.
The first functionality, turn on an LED, can be done without a method using the code digitalWrite(led, HIGH);, however, I want to demonstrate to you what this would look like using a custom method that isn’t 10+ lines. Refer to the code below.
void ledOn(const int led){
   digitalWrite(led, HIGH); //set led to ON
}
Now if you want to use the ledOn() method, you can call the method using the following code:
ledOn(led); //turn the led on
The parameter led, is the same name as the led we defined in Step 1. Go ahead and attempt writing the second and third methods for the functions listed above.
When you’re finished, continue with Step 4. Try to solve this problem yourself before watching the video below! Here are some hints to get you started!
- Create a method called,
moveServo()that moves the servo 180 degrees. - Create a method that checks the readings from the ping sensor.
- Refer to this article for more information about how ping works.
Step 4 – Call your methods in loop()
Click to Subscribe to Learn Robotics on YouTube
Once you have your methods written, it’s time to call them in loop(). All code included in loop() will be executed on the Arduino. So if you forget to call something in loop(), your device will not run as expected.
For this project, we need to include the conditional logic that will initialize the LED and the servo based on the distance read by the ping sensor. We’ll use a set of if-statements alongside our methods to achieve this.
Here’s the syntax for an if-statement:
if(<condition>){
  // do this
}
else{
  // do that
}
If the defined condition is met, the first part of the statement will run, otherwise, the second part of the statement will run.
For our case, we want to turn the LED on if the distance reading is less than 25 and run the servo when the reading is between 30 and 40 inches. Here’s what the code looks like:
After completing all of these steps, you should have a full grasp of how to write an Arduino program. This methodology works for any electromechanical system.
It all starts with a plan and the logical steps through a solution. It’s important to create pin references and declare methods so that your code is reusable and easier to modify for future iterations.
And, if you’re ready to go beyond basic tutorials and start learning the best practices for prototyping robots, be sure to check out our Robotics Certification for serious beginners.
🤖 Exclusive for our blog readers: Dive into robotics for just $19 (reg. $369) and earn your first certificate in the next 7 days – secure your spot now.


14 Responses
Hi Liz,
What is the rating for the capacitors You used in the pan and tilt using the joystick?
MY eyes are good, but I cant see the writing on the wall.
Your projects are awesome, thank-You.
Hey Ernie, thanks! I used 100 μF capacitors in the project. I’ll update the drawing to make it clearer. Good luck! ~Liz from Learn Robotics
Hi Liz,
your way for programing is very interesting. You let me to love to come back to programing. But the question is ” how can I enter the program to the Arduino device?
2 Thank you for your efforts
Ata
Hi Ata, You’ll need to write your code in an IDE, compile, and upload it. You can connect the Arduino to your computer with a USB cable. Good luck ~Liz from Learn Robotics.