

If you’re a creative person like me, then you’re probably curious what tools I use in my robotics projects. In this article, I’m going to share with you seven of my favorite tools that can help you build a prototype. These tools will help you become more productive and allow you to focus on making.
Let’s hop into it!
#1 – (Un)Fasten screws with a drill
This little trick, isn’t very little, but it will SAVE your hands. A lot of mobile robot kits (especially my favorite one) has like 403 bagillion screws that have to be fixed onto a frame. (More like 20, but, you get the picture).
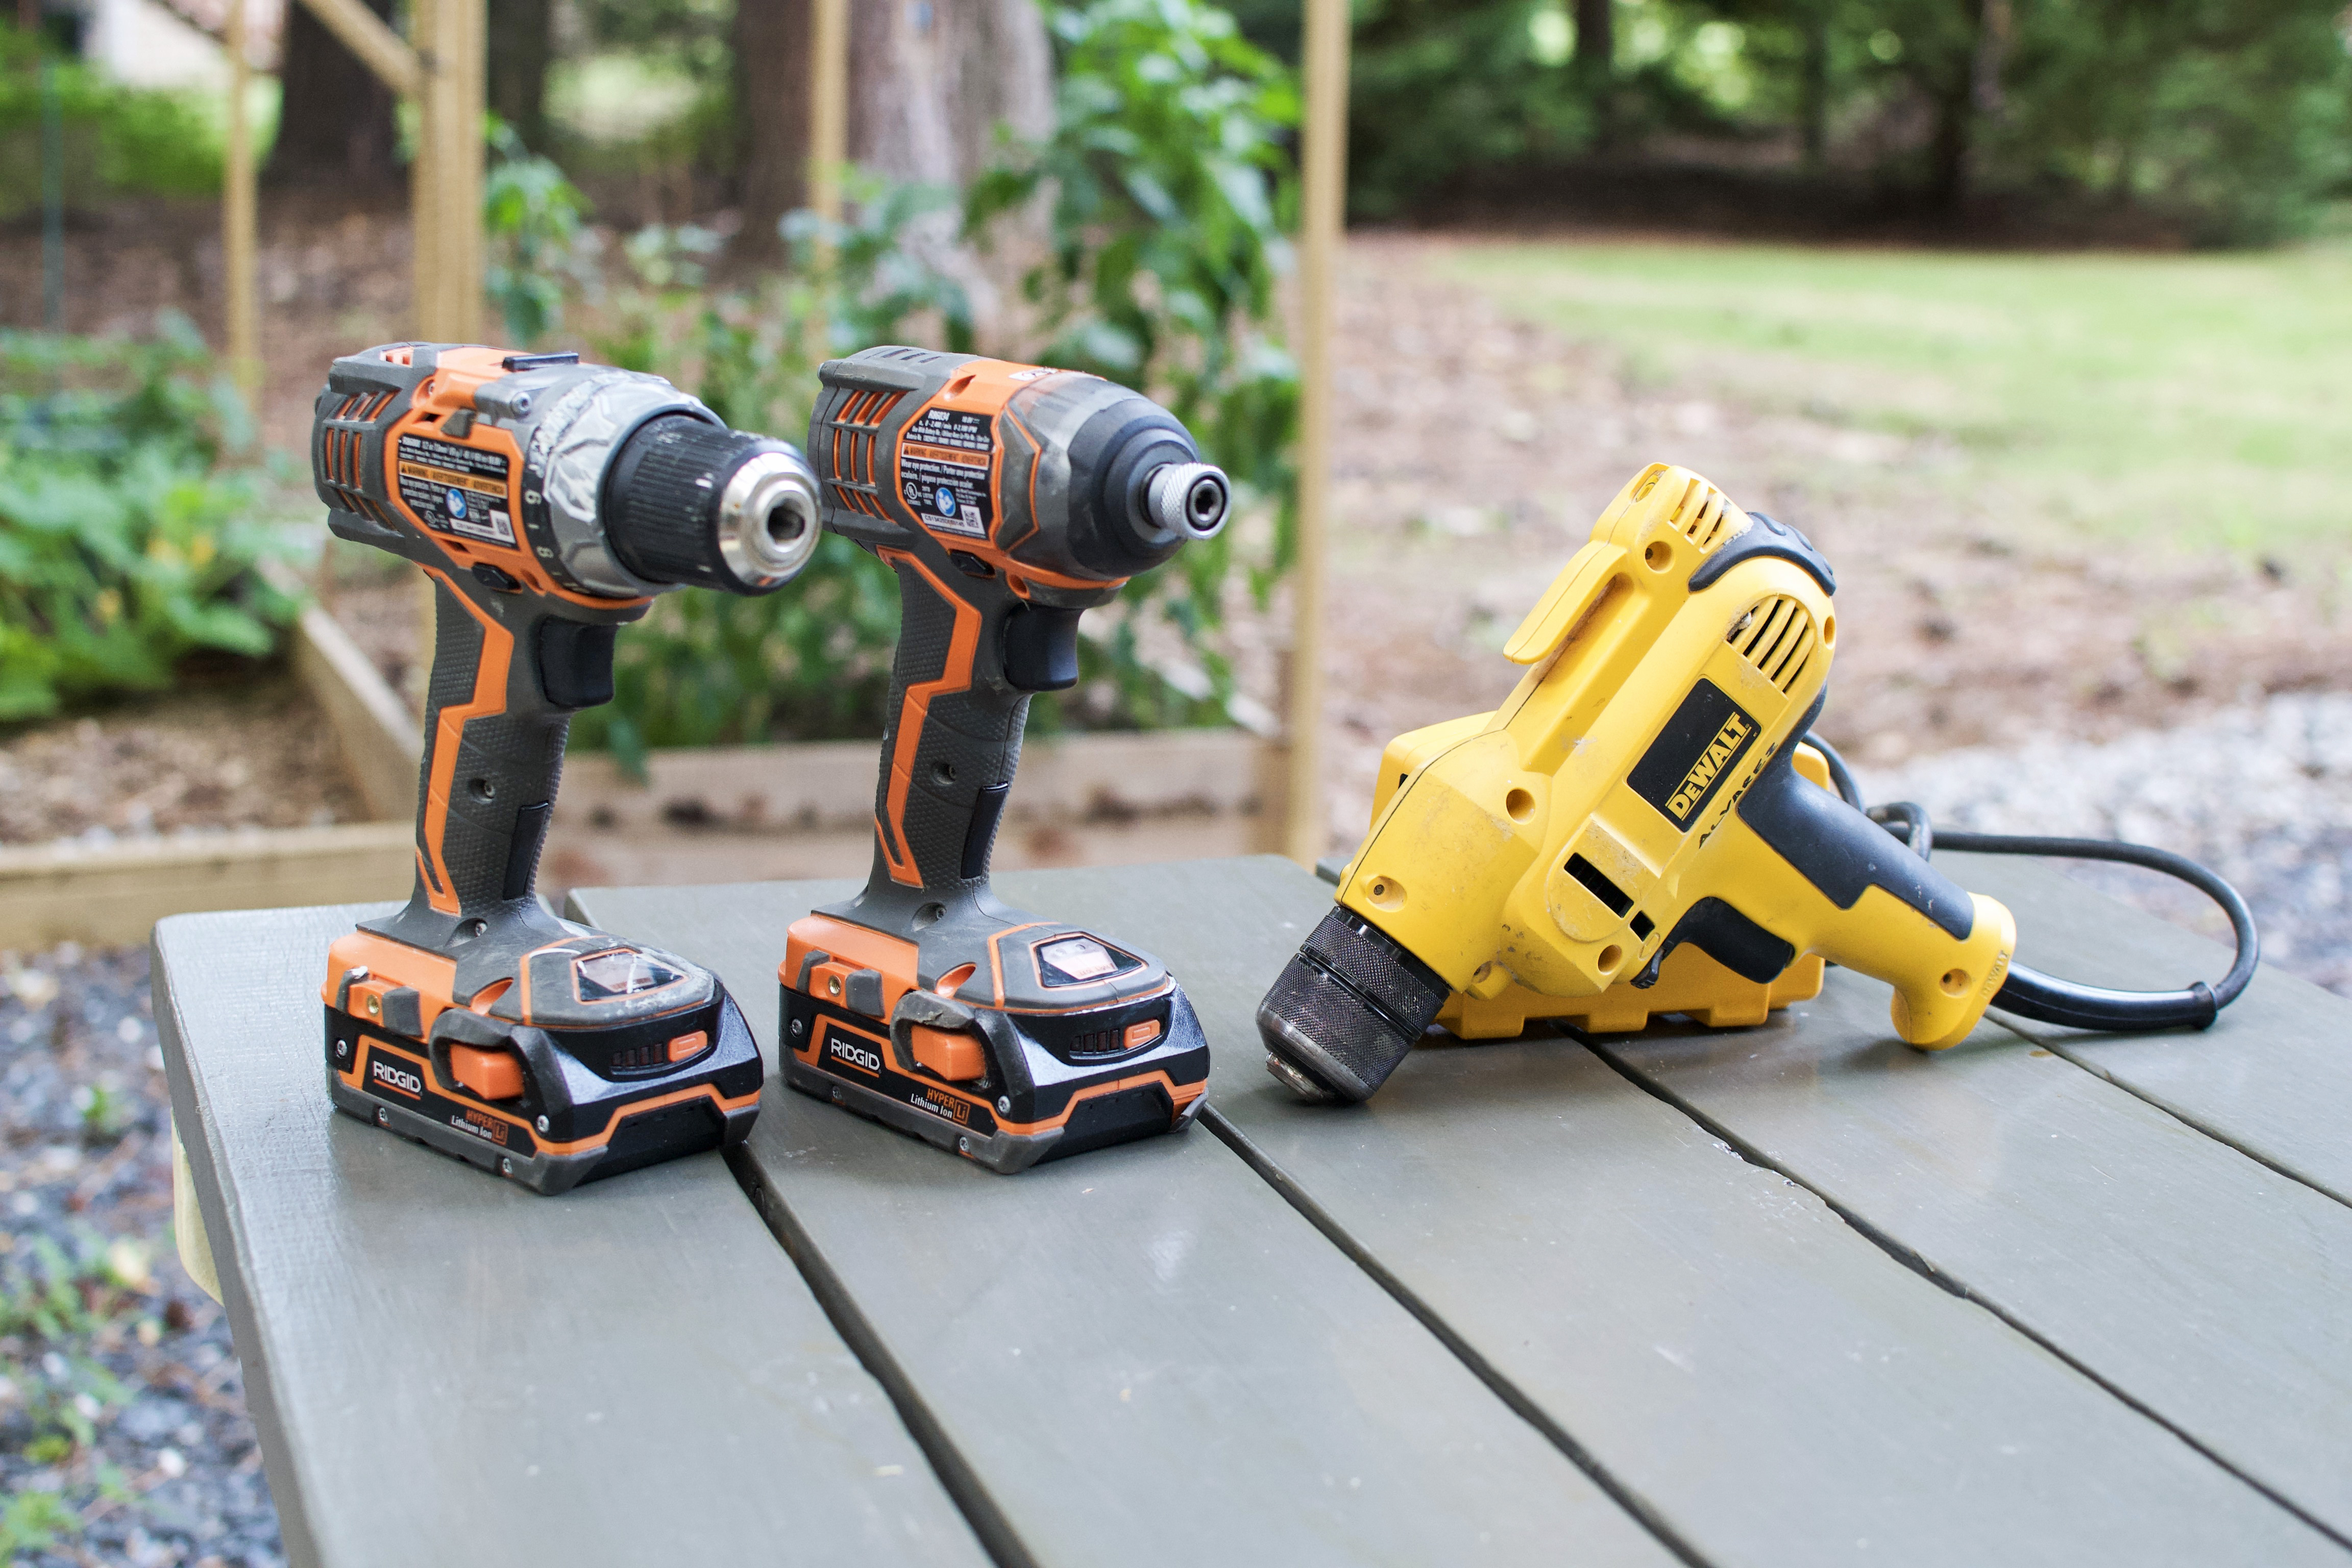
If you use a drill, then the assembly will be faster and less painful on your fingers. Plus, the screw can be fixed tighter to the frame allowing a better, more secure connection. I’ve used both DeWALT and Milwaukee drills, and I personally like the Milwaukee better. (This is the model I have.)
Either way, I’d recommend investing in a quality drill because you can use it for fastening, drilling, loosening, and general purpose applications around your home. Secondly, you’ll want to pick up a second battery pack so that you always have one charged. There’s nothing worse than going to use your drill and the battery is dead!
#2 – Clamp down on parts with a Grip
Ever have a screw that is so tightened down you can’t get it out? Well, that’s what Vice Grips are for. I recommend having two pairs of Vice Grips at your disposal. One pair that’s smaller and then a standard size pair. Then, when you need a good grip on a screw or component you can grab that part with the Vice Grips. It makes working on things so much easier than trying to hold onto it with bare hands. If you’ve ever stripped a screw, you’ll know how great it is to have a pair of Vice Grips.
#3 – Fix almost anything with a Leatherman
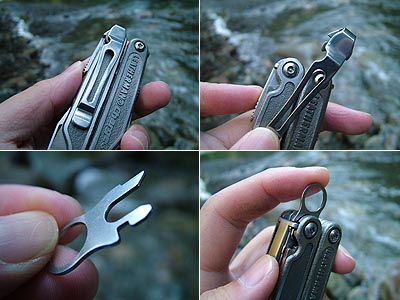
If you’ve read my article on two tools used by Manufacturing Engineers, you’ll know that I take my Leatherman everywhere! It’s probably the most invaluable tool that I own. The small footprint combined with the many features makes it super convenient when building a prototype. I’ve used both SWISS Army Knives and Leathermans, and I personally believe the Leatherman is tougher and better quality. You can choose from an assortment of models, but this is the one that I use regularly.
#4 – Make things easier to see with Light
Growing up, some how I managed to build prototypes and devices in the dark. I’m not sure if it’s because I’m just old now, or I didn’t eat enough carrots, but having a dedicated light source makes prototyping a million times easier. My workbench has an overhead LED, which makes reading wires and building devices so much easier. I can actually see what I’m doing! Imagine that! You don’t have to be fancy with lighting either. I just recommend picking up a lamp or a workbench light to make your workspace brighter while prototyping.
#5 – 3D Print Components to unleash your creative side
Most of you know I have an Anet A8 3D printer. I highly recommend investing in a 3D printer if you plan on being a maker for more than a couple months. Buying a 3D printer kit will allow you to build a solid understanding of Additive Manufacturing, plus you’ll be able to manufacture components on-the-fly.

If you’re looking for a learning experience, I recommend picking up the Anet A8. If you want something that has more of a “set-it-and-forget-it” or semi-professional feel, then I recommend picking up a FlashForge Creator Pro. 3D printing is probably one of those fields I wish I had gotten into sooner! As a maker, it’s an awesome tool to have at your disposal.
#6 – Connect electrical components with a Soldering Iron

I held out on buying a “nice” soldering iron for the longest time. If you plan on going to engineering school and working on electronics, I HIGHLY recommend investing in a nicer soldering iron. Usually the ones in shared labs are junky because people forget to clean them after use. If you’re looking for an entry-level soldering iron, I recommend this model. Otherwise, if you’re going to be soldering a lot or just want a better tool, I recommend a temperature controlled model. You’ll also want to consider getting a pair of helping hands if you’ll be working on PCB’s a lot.
#7 – Model accurately with Calipers
Calipers are probably the most underrated tool you can own. You’ll only need them if you need them. I recommend picking up a pair of digital calipers if you plan on doing a lot of 3D modeling and prototyping. They make measurements a whole lot more accurate than a ruler or tape measure. Plus, some engineering programs require them. Might as well have them on hand. Try to find a pair in your shared lab; calipers are usually the first tool to magically walk away. If you’re on a budget, I recommend this pair. Otherwise, splurge and get this model.
Which of these tools do you own? What would be the next addition to your lab? Leave a comment below! And if you found this article useful, don’t forget to share it with a friend!


2 Responses
No multimeter?
Yes, multimeters are important. We’ll have to add that to the next list 🙂