

Do you have a 3D printer kit? Maybe the popular Anet A8 like me? Then you might have run into the infamous leaking nozzle problem.
I decided to write this article because of the leaking nozzle problem I was facing with my Anet A8 wasn’t properly documented online. I either couldn’t find an appropriate solution or had to dig through many blog posts, articles, forums, or YouTube videos to find the most appropriate fix. This ultimately wasted months of my time and created this frustrating relationship around 3D printing.
So, after figuring out how to fix the leaking nozzle problem, I decided to outline the correct steps to banish this problem for good and get on with life. 🙂
Without further ado, let’s get started!
Fix your Anet A8 3D Printer Leaking Nozzle
The Problem: Filament Leaks or Oozes from the Extruder Nozzle
If you’ve ever built a 3D printer, either from a kit or using parts you’ve acquired on your own, a leaking nozzle is no joke. While the problem within itself is very frustrating, it’s a fairly easy fix if you know what to do.
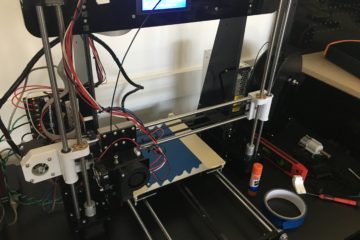
Example of a leaking nozzle. How frustrating!
The Solution: Install the Extruder Nozzle Assembly Correctly
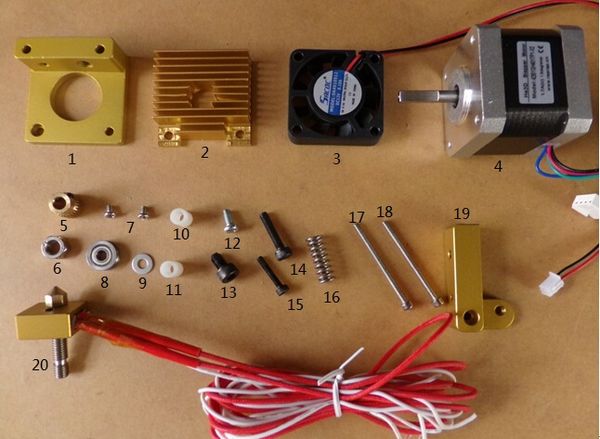
Reassemble your hot end. Most hot end assemblies come pre-assembled but aren’t assembled correctly. Go figure, right? You’ll need to take this assembly apart and reassemble it correctly to prevent leaks. We will be modifying the hot end assembly (part #20 shown below).
A good reference video for installing your 3D printer Nozzle
After months of searching for a solution to my leaky printer nozzle, I realized that my extruder nozzle was assembled incorrectly. And trust me, I tried everything from buying new assemblies to Teflon tape to new nozzles, etc. Nothing worked. The only way to fix this problem is to properly assemble the nozzle and heat break to the heat block.
Here’s how to do it.
Subscribe to Learn Robotics on YouTube
If you have an Anet A8 and are looking for the correct extruder assembly to buy, I recommend this one.
Step 1 – Remove any filament from the extruder.
This is easiest to do when the extruder is at temp (~190°C).
Step 2 – Shut off your 3D printer.
Ensure that the extruder temperature has cooled before continuing.
Step 3 – Disassemble the Extruder Assembly
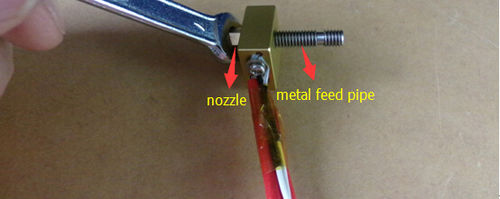
Remove the hot end (cylindrical heating element) and thermistor (sensor) from the heat block. Then, disconnect the heat break/metal feed pipe and nozzle from the heat block. You may need to use a 6mm wrench to get the nozzle off.
Step 4 – Start Reassembling the Extruder Assembly
Part A: Connect the metal feed pipe to the heat block. Hand tighten 1 or 2 turns.
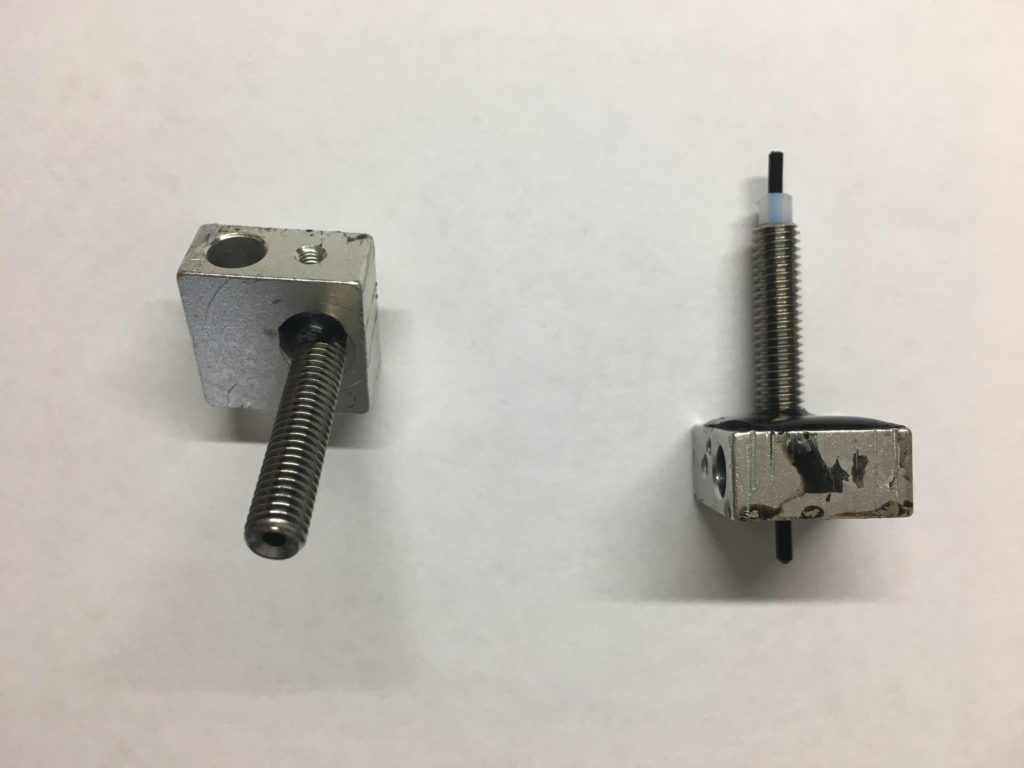
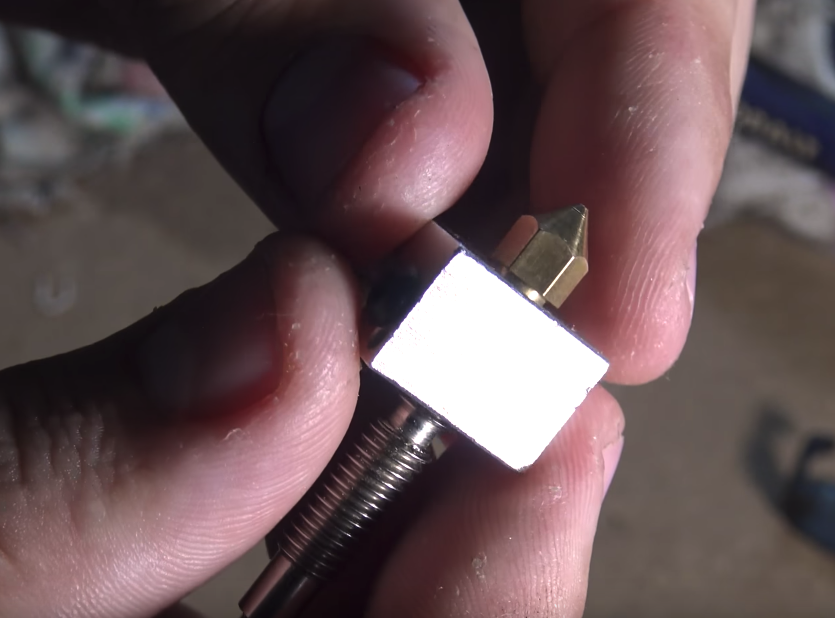
Part B: Attach the nozzle to the heat block. Hand tighten to the block, then unscrew the nozzle about 1mm. We want a small gap to help with heat expansion. This will prevent the filament leaks you’ve been having. Refer to the pictures below.
Incorrect: Nozzle is flush against the Heat Block
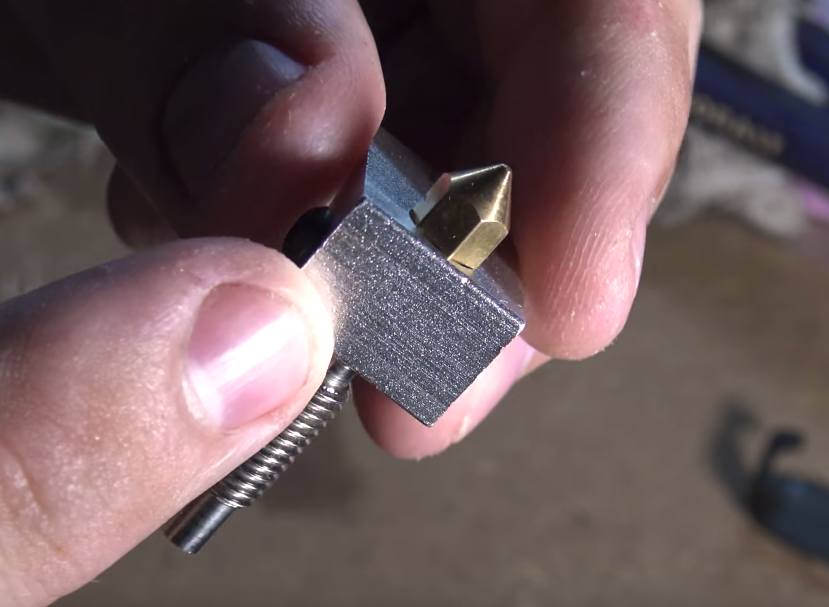
Correct: Nozzle is backed off 1mm from the Heat Block
Part C: Hand tighten down the metal feed pipe until it’s touching and flush against the nozzle. The nozzle and the metal feed pipe should feel solid & almost “connected.”
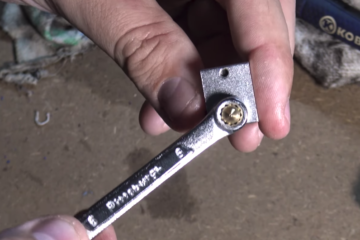
Part D: Grab a wrench to place around the nozzle. (6mm is a good starting point.) Hold the heat block and use the wrench to tighten the nozzle. We want the nozzle to be snug while maintaining that 1mm gap. You can also grip the heat block using some vice grips or pliers. Just try not to damage, scratch, or break the heat block assembly.
Step 5 – Reinstall the Extruder Assembly on your 3D Printer
Reinstall the hot end tube and thermistor and connect the extruder assembly to your printer. For more in-depth instructions for assembling the extruder, visit RepRap’s page.
Once you have your assembly back up on your 3D printer, go ahead and do a preheat cycle, feed in some filament and test for leaks. If this doesn’t work, I strongly recommend re-watching the video, or sending me a direct message on my Instagram page (@learnrobotics).
5 Month Update
After implementing this fix, my 3D printer is still leak-free! I hope you enjoyed this step-by-step guide to fixing your leaking nozzle. If it’s helped you in any way, please share it with a friend who may be struggling with this problem!


16 Responses
Forgot to mention – on those older A8’s, after extensive testing, we found that the heatbreak cooler had the opposite of the intended effect. The hotend assembly on that printer has enough thermal mass that the heatsink, with it’s very limited contact area, basically just shields the heatbreak from getting air. We removed ours entirely and did some marathon PLA prints. Temperatures stabilized after about 45 minutes and wouldn’t increase beyond 120c at the heatbreak-to-extruder mount interface. With the fan and heatsink, that interface got to 127c. On an E3D V6, running without the fan is suicide. On the A8 extruder, it’s actually better.
On the other hand, the A8 is now renowned for being a fire hazard, so your mileage may vary.
Good information to know – thanks for sharing! And yes, I’d choose something other than the A8 as a 3D printer in 2022. 3D printing has come along way — no need to mess with the A8 now. ~Liz from Learn Robotics
Often, it’s necessary to preheat the nozzle to something 60c above your regular print temp and then snug up the nozzle while the heatblock is still hot.
My A8 was leaking until I hot-tightened it, and this was despite literally lapping the parts together first.
Yes – just be careful with a hot assembly. I’ve had good luck with the cold assembly method shown in the post. YMMV ~Liz from Learn Robotics