

If you’re like most people with an Anet A8, the second you have it built is the second you’re ready to upgrade it. The Anet A8 is probably the most popular Prusa i3 clone. Because it’s made of low-cost parts, it’s a great option for those on a budget.
In this article, we share our picks for the Top 10 Anet A8 upgrades on Thingiverse. Improve print quality, aesthetics, & more with these 3D printer upgrades!
Top 10 Anet A8 Upgrades on Thingiverse
We know how fun 3D printing is, so we decided to whip together an article to give some TLC to our Anet A8’s. Whether your 3D printer is fresh out of the box or has hit it’s 3,000th hour of printing, check out these awesome upgrades.
Let’s get started!
Anet A8 Frame Upgrades
Let’s start with the frame and support features for the Anet A8. These parts are designed to secure the Anet A8 frame. As a result, you’ll achieve cleaner prints with higher quality.
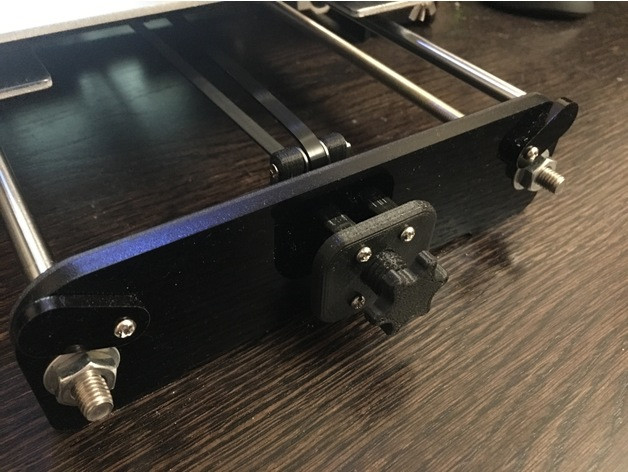
#1 Front & Rear Frame Braces
These braces were designed to keep the front and back parts of the frame secure. The design features an angular bracket that connects directly to the acrylic frame. I like this front frame brace because it not only compliments the design of the Anet A8, but it makes the frame rugged and secure. Also, the designer created a matching rear frame brace if you’re looking to secure both sides of the printer.
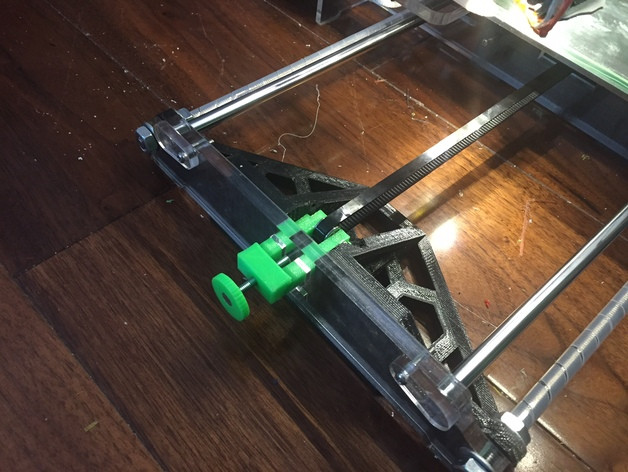
#2 Belt Tensioners for X and Y axes
Belt Tensioners help remove slack from the X and Y belts. If you’re looking to improve print quality, upgrading how your belts are fixed on the printer is a good place to start.
The original configuration on the Anet A8 doesn’t allow for adjustment or tightening. Belt Tensioners allow you to make adjustments on either axis without removing parts of the frame or reassembling. Check out this belt tensioner for the X-axis, and this belt tensioner for the Y-axis.
Anet A8 Heated Bed Upgrades
The four corner screws that adjust the height of the heated bed can be a pain to tighten. Therefore, we recommend printing out some adjustment knobs or picking up a level sensor. Save your fingers from the pain of setup with these upgrades!
#3 Heated Bed Leveling Thumbwheel
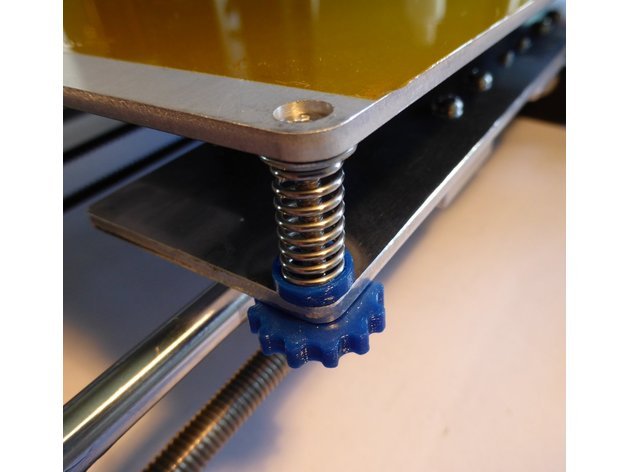
Prior to every print, you should ensure the hotbed is level. Use a level to measure left-right, back-front, and diagonally. If either side is too high or too low, tighten or loosen the corresponding screw. I typically have to use a drill to make adjustments. That’s where the bed level thumbwheel comes in handy. This upgrade helps tighten or loosen the hotbed without the need for additional tools.
Find the printable file, here, on Thingiverse.
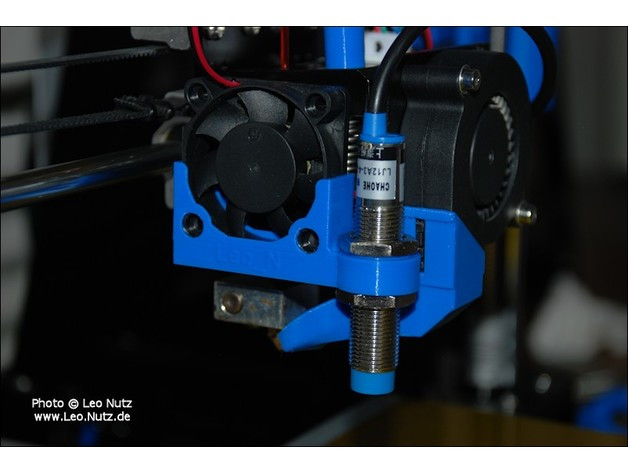
#4 Z-axis Endstop Replacement
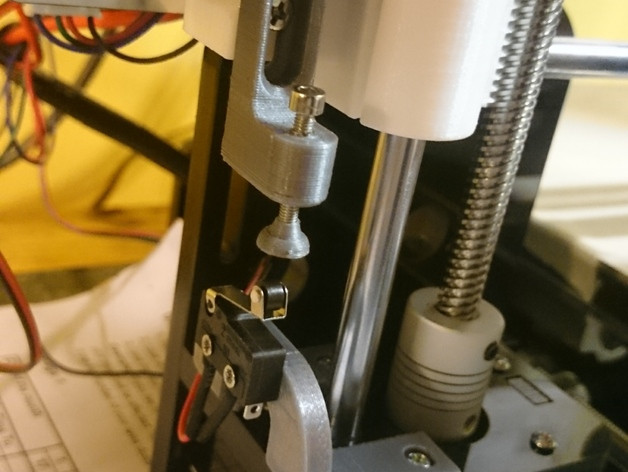
Setting the Z-height end-stop is another step to take before each print. This can be challenging using the original Z-height sensor and mounting bracket. Because of this design, it’s difficult to fine-tune the Z-height.
Therefore, we recommend checking out this end-stop replacement on Thingiverse. Rather than fiddle with the screwdriver, you can adjust the height with this nifty set-screw arm. Save time and forget the frustration with this upgrade!
#5 Leveling Sensor Bracket
And lastly, to conclude our heated bed upgrades, if you HATE going through the process of leveling and adjusting the hotbed, you may want to consider adding on a level sensor. Level sensors perform a calibration cycle prior to the print. Calibration helps with alignment and orientation to improve print quality.
Anet A8 Filament & Extruder Upgrades
Next, let’s talk about filament rolls and the original extruder assembly. The included filament roll does the job, but can require some manual intervention. Rather than periodically feeding the printer by adjusting the roll, check out our pick for GRAVITY-fed filament mounts. The rest of our suggestions make it easier to load filament into the extruder.
#6 Filament Roll Mount
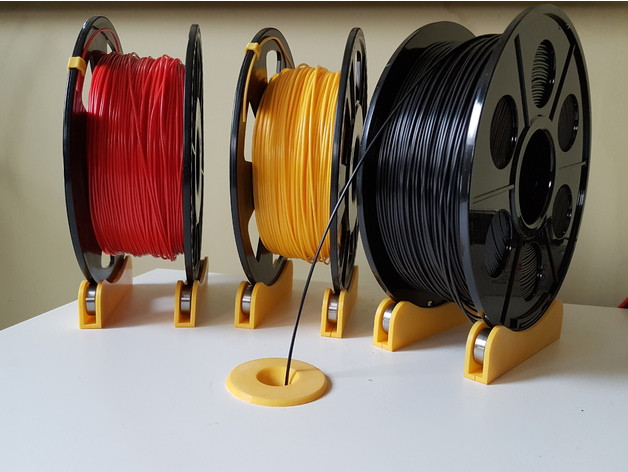 The standard filament holder for the Anet A8 is OK, but I find myself checking on it every 5 minutes. If you find yourself in this same situation, you may want to consider printing a filament holder or mount. The one above uses bearings to spin the wheel as needed. Check out this design on Thingiverse.
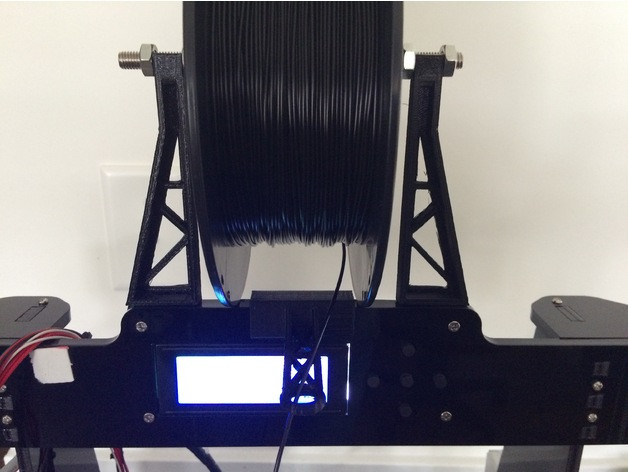 Other types use gravity to feed the filament into the printer. I’ve experimented with this design, and recommend that you choose an arm height longer than the radius of the spool. (I use Hatchbox PLA, and these arms were too short.) Otherwise, the spool will sit on the top of the printer, and cannot spin freely.
#7 Filament Guide
I’ve also used Filament Guides. The purpose of a filament guide is to help position and guide the material while reducing strain on the extruder motor.
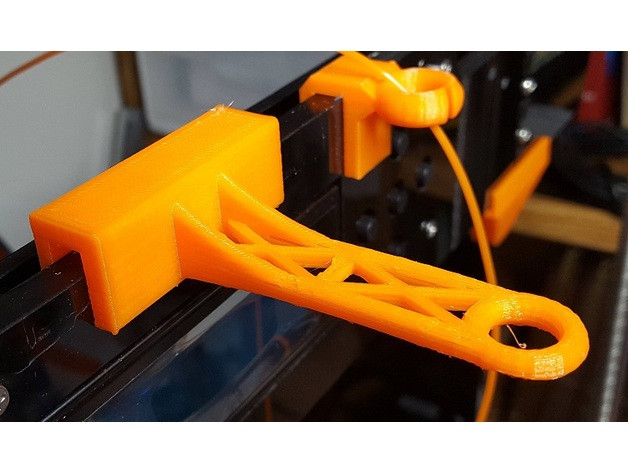 Here’s a design that snaps between the frame and the LCD. Just be careful when installing it that you don’t disconnect the wiring for the LCD!
If that design is too plain for you, I found this Hand Filament design, which is actually quite amusing.
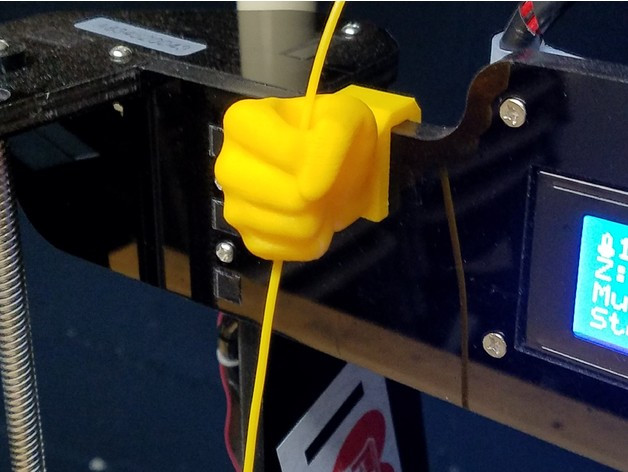 If you can achieve good quality on this print, then props to you! This design is a good tester print that serves a purpose.
#8 Extruder Button
The standard extruder configuration uses a screw to feed in the filament. If you’ve ever played around with this, it can be quite painful to add or remove filament from your printer. That’s why I recommend printing out an extruder button.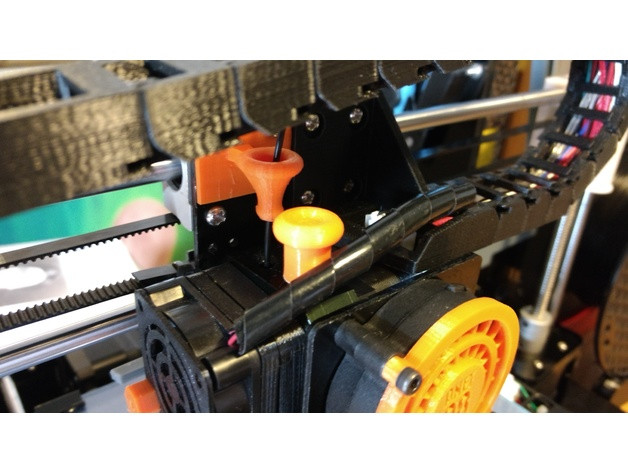 It’s a really fast print and can save your fingers the pain of changing filament. Check out the full details on Thingiverse.
Anet A8 Safety Upgrades
And last, but most certainly not least are our picks for SAFETY. If you haven’t considered adding in a MOSFET, you may want to add that to the top of your upgrade list. We’ve also provided some stylish solutions for adding and enclosing a power switch to your Anet A8.
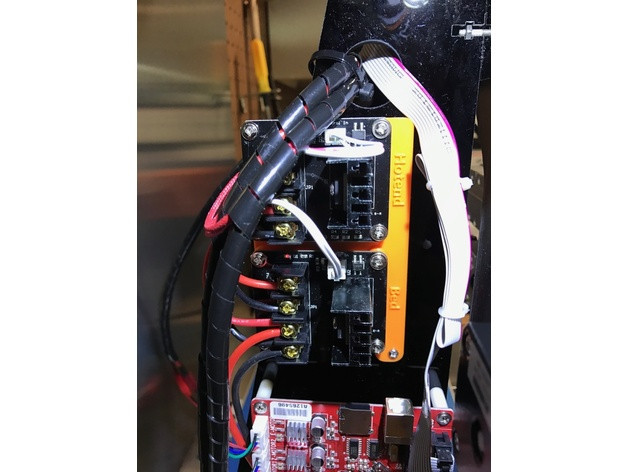
#9 MOSFET Holder (Single & Dual)
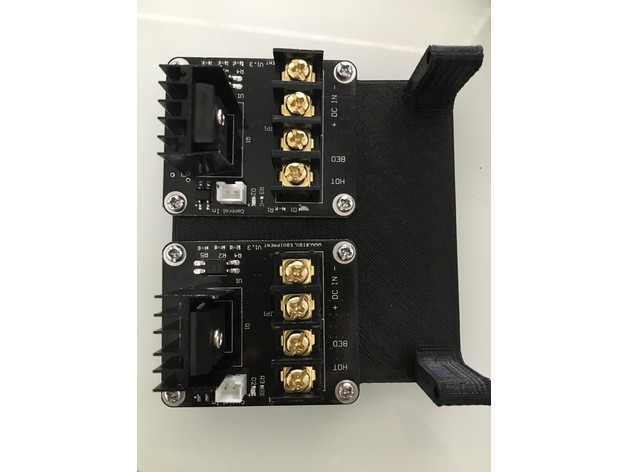
We’ve added a dual MOSFET holder onto our Anet A8. I personally like the design. It’s simple, yet effective. One thing to note is that it can be difficult to (un)plug various components on the main controller. So if you have plans of constantly adjusting these modules, you may want to select a mount like the one below.
Also, here’s an option for a Single MOSFET mount if you only have one installed on your printer.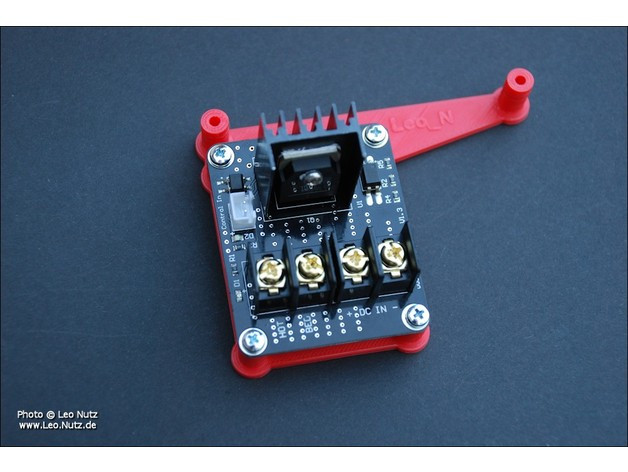
#10 Power Switch
You’d think having a power switch as part of the kit would be a no-brainer, but most Anet A8’s do not include one. Who thinks of these things?
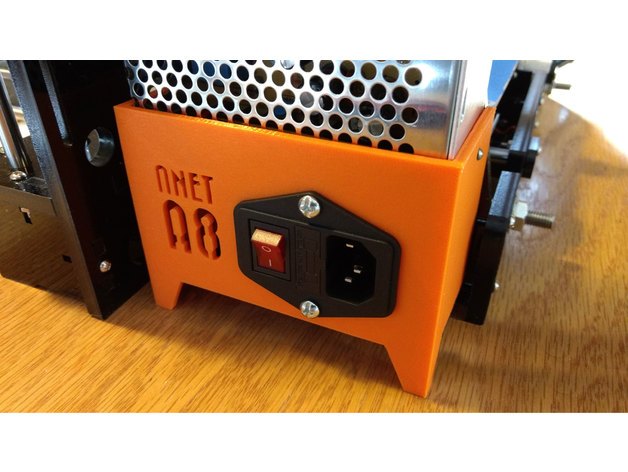
But if you’re like 99.999% of humans and like to have a button to turn your printer on & off, then you’ll want to create a mount to hold your power switch. Thingiverse has a huge selection to choose from, so depending on which power switch you buy, you’ll probably find a mounting bracket that’s compatible. Once you purchase a power switch, you can head over to this tutorial to get it installed.
What mods have you added to your Anet A8?
Thingiverse has thousands of options when it comes to upgrading the Anet A8. While we did our best to include our top picks, we’ve barely scratched the surface on what you can do. With that said, did we miss a really cool upgrade? If so, go ahead and leave a link to your favorite Thingiverse upgrade below. Then, Tag Us on Facebook & Instagram (@learnrobotics) with pictures of your sick Anet A8 mods!


