

With technology getting smarter, and everything having a voice control feature, it is no wonder you want to add Siri to your Arduino project. Rather than press a button or read a sensor, you can tell Siri to turn on an LED attached to an Arduino controller.
In this tutorial, I’m going to share with you an easy way to add voice control to your device or prototype. This can be added to an existing Arduino project with just a couple of steps. To explain how to configure Siri and Arduino, we’ll use an LED attached to a NodeMCU or ESP8266.
This tutorial will also focus on using an iPhone XR with the Shortcuts app installed. You can also use an iPhone, iPad, or iPod touch that’s running iOS 12.0 or later.
We will be working with some intermediate and advanced concepts of the Internet of Things. So, if you’re new to IoT, connected devices, or Arduino, I highly recommend reading these resources before diving into this tutorial.
- Four Steps to Writing an Arduino Program
- How to use the NodeMCU (ESP8266)
- How to send data to dweet.io
- How to parse JSON files with Arduino
If you’re brand-new to circuits and coding, be sure to check out my Arduino for Beginners course. This course will reduce your runway for learning how to build and program custom devices without confusion!
1. Set the webhook URL using dweet.io
For this project, we will use dweet.io to publish and subscribe to our data. This service is free to use and simple to set up.
There are probably a bunch of other websites with webhook services that you can use for this project (including IFTTT), but for simplicity, we’ll stick to dweet.io.
There are two ways to populate data for your device (called things on dweet.io).
First, you can add query parameters to the request URL, and the data will be added as key-value pairs to the content of the dweet.
Another option is to POST valid JSON data to the body of the request. We’ll use this method for this project.
Because you don’t need an account to use dweet.io, things are given a unique name. For this project, we’ll use the thing name, “learnrobotics.”
The URL we’ll POST to and GET from is in this format. Replace “thing-name” with your thing’s name.
https://dweet.io:443/dweet/for/thing-name
2. Configure Shortcut to send Data to Webhook
Now that we have our webhook URL, we can open up the Shortcuts app on our iPhone and create a new Shortcut.
Shortcuts use apps and action blocks to complete a sequence of tasks. Configure this Shortcut as follows:
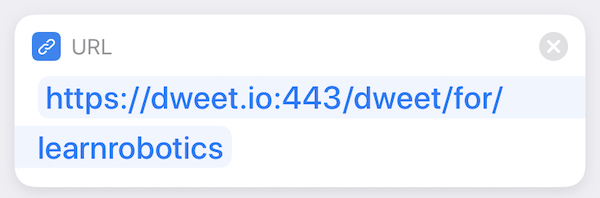
First, add a URL block and set the URL to the dweet webhook from Step 1 (https://dweet.io:443/dweet/for/learnrobotics).
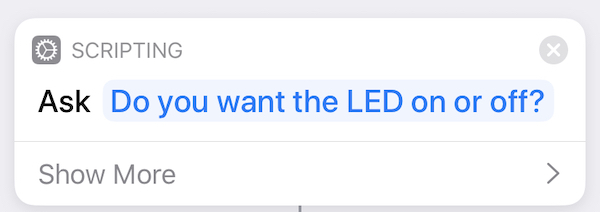
Next, add an “Ask for Input” block. This is where Siri will ask you to set the status of your device. We’ll have Siri as “Do you want the LED on or off?”
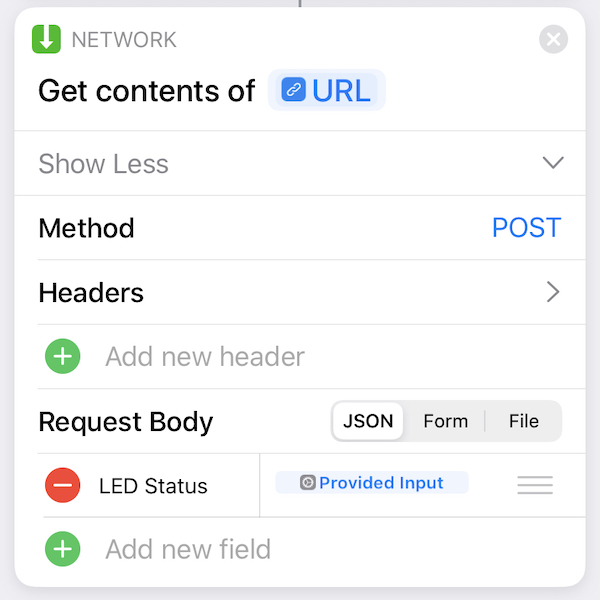
Then, search for the “Get contents of” Network app. We want to get the contents of the URL app we added first. Use a Variable to set this field.
Expand the “Show more” tab and change the Method option to POST. Next, under Request Body, choose JSON and Add a new Text field. The Key is the String “LED Status” and the Text is the variable, Provided Input.
Here’s what it should look like when it’s configured:
The last block we need is called, “Speak Text.” This will give the user a confirmation that the POST request is complete. Add that block and type in a message.
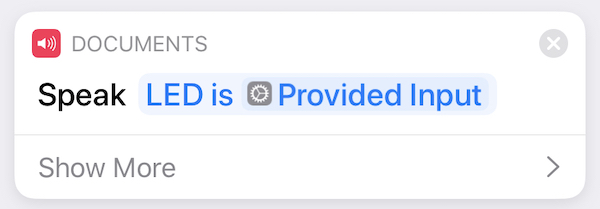
I set mine to Speak “LED is ” Provided Input. If the LED is set to ON, Siri will say “LED is ON.” Otherwise, Siri will say “LED is OFF.”
Finally, click the three dots in the top right corner to open up the Shortcut settings. Type in the phrase you’d like to say to Siri. I called mine “Set My LED.”
You can choose to set an Icon Color and Glyph by clicking on the icon next to the text field. When you’re finished hit Done (top right corner).
[amazon box=”B081SHTCPR,B07Z4681LQ” template=”list”]3. Test the Connection between Siri and Dweet.io
It’s time to test out the connection to dweet.io.
On the first run, you might be asked to grant web permission to dweet.io. It’s important to authorize access otherwise the Shortcut won’t run.
Open up a web browser and go to dweet.io/follow/thing-name (For this example, the URL is dweet.io/follow/learnrobotics.)
Then, recite the Shortcut command to Siri. In our example, the voice command is, “Hey Siri, Set My LED.”
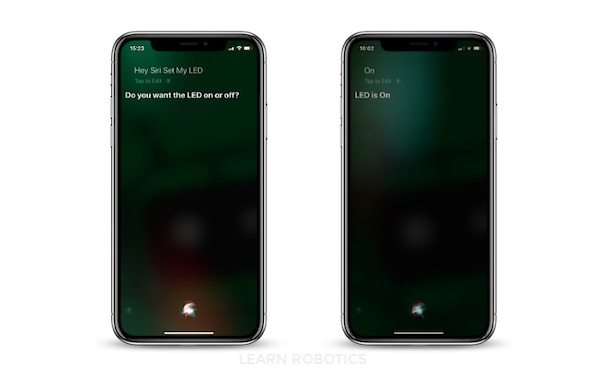 Siri will ask you “Do you want to set the LED on or off?” Provide an answer (i.e. “on” or “off”).
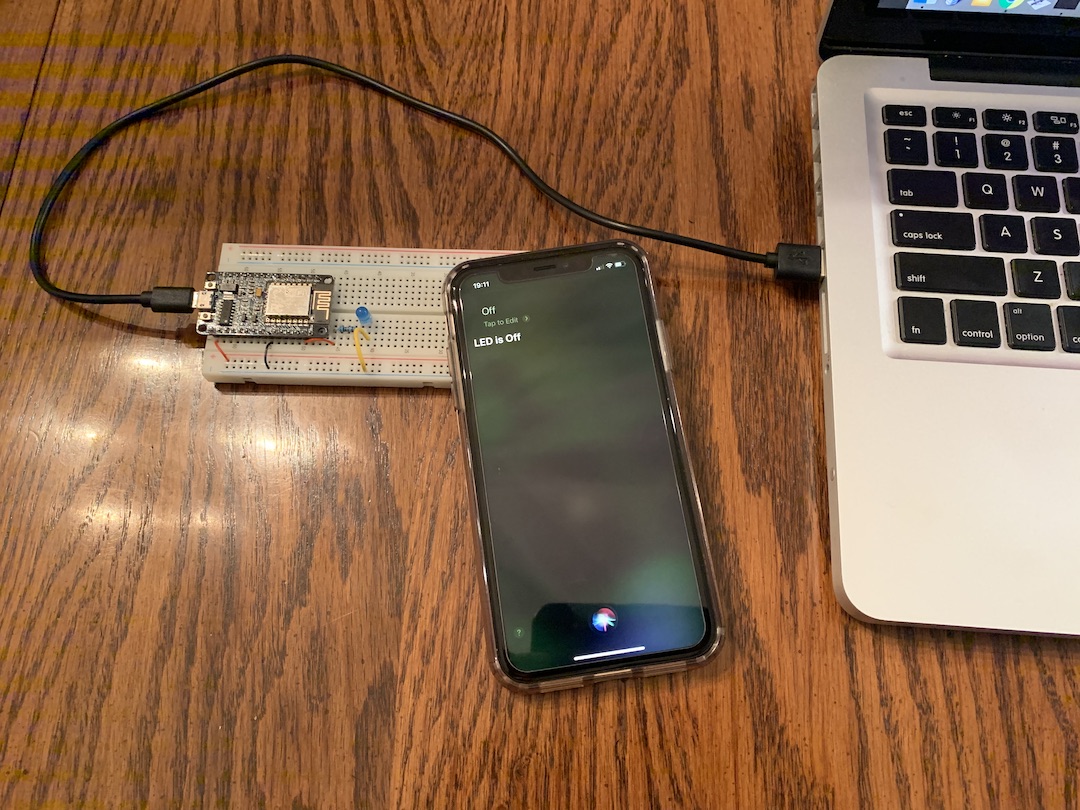
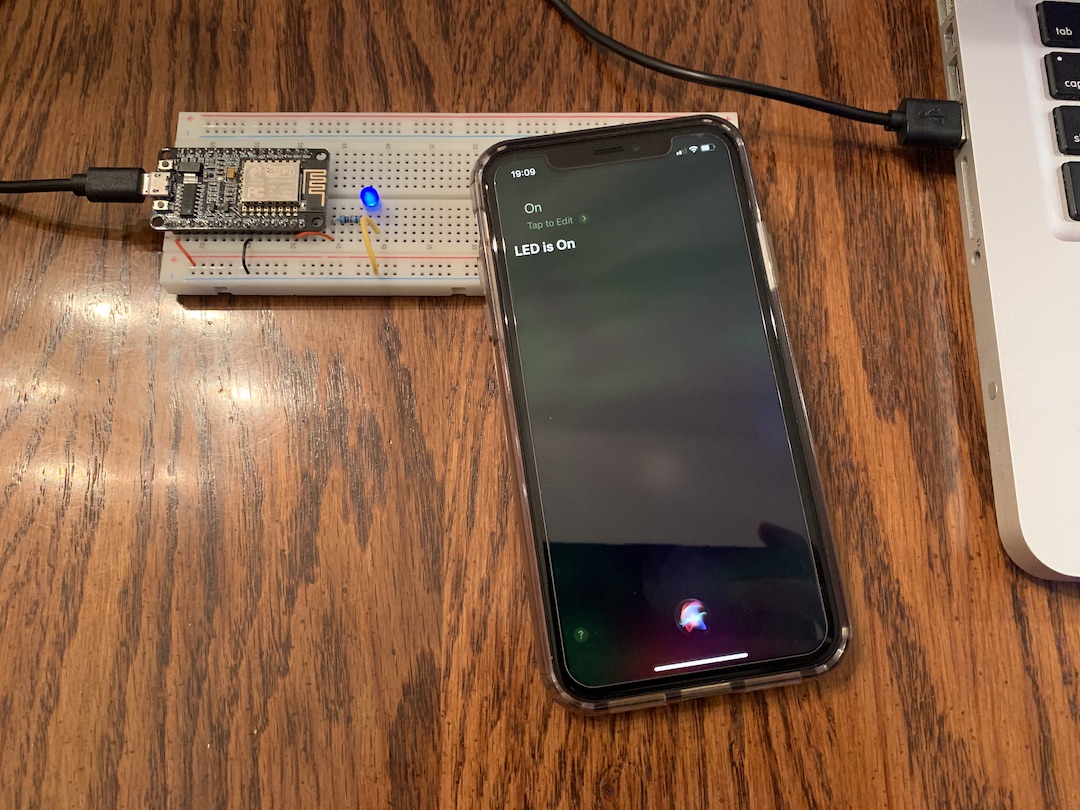
Siri might take a few seconds to POST the data. When it’s complete, Siri should recite “LED is ON” or “LED is OFF” depending on what you said.
The dweet.io webpage should update with your answer. LED Status should be set to “On” or “Off” corresponding to what you said using Siri.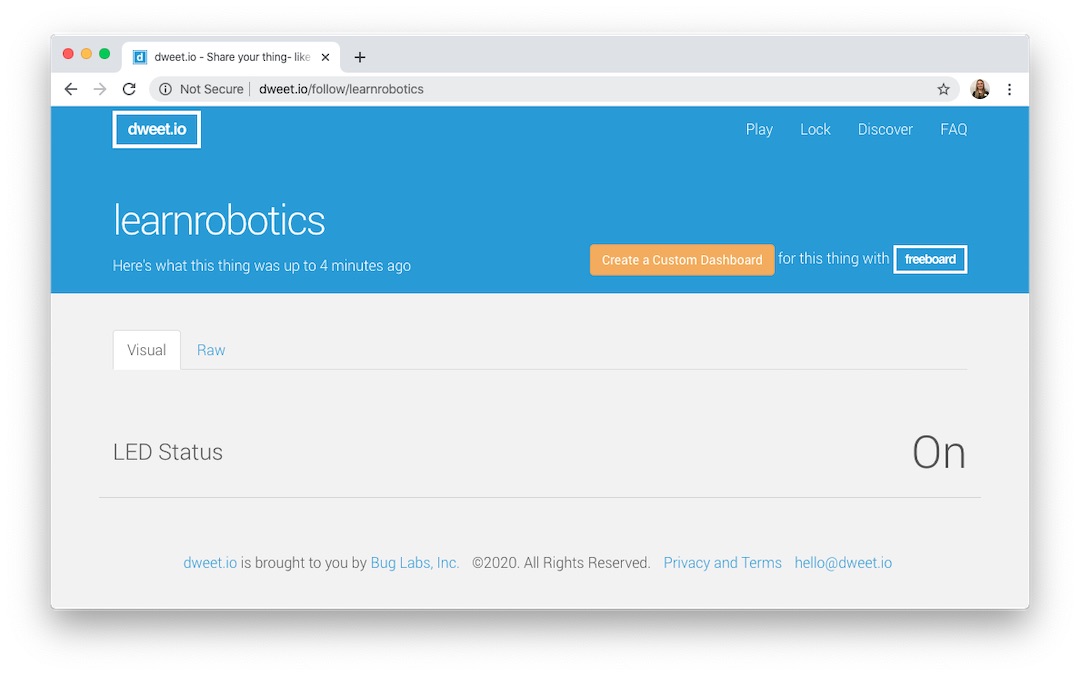 If everything is working as it should, you’re ready to move to the next section to set up the controller and LED.
If not, go back and review all of these steps before continuing. The voice control must work before moving to the electronics.
4. NodeMCU and LED Wiring
We’re going to use a simple LED configuration for this project. Here’s the wiring diagram.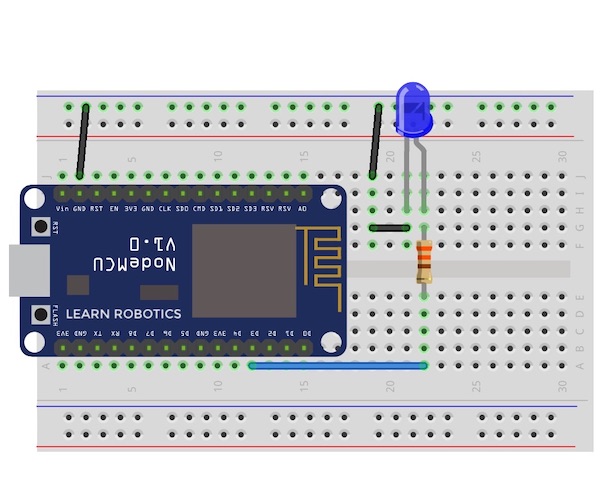 The LED is on pin 3 or GPIO-0 (what we’ll reference in the program).
5. Connect to the Internet
Once the LED is wired, it’s time to get it connected to the Internet.
Here’s a simple method to connect your NodeMCU to your home network. Replace “your-SSID” and “your-password” with your Network name and credentials.
//WiFi parameters
const char *ssid = your-SSID;
const char *password = your-password;

void connectToWiFi() { //Connect to WiFi Network Serial.println(); Serial.println();
    Serial.print("Connecting to WiFi"); Serial.println("...");
    WiFi.begin(ssid, password);
    int retries = 0;
    while ((WiFi.status() != WL_CONNECTED) && (retries < 15)) {
        retries++; delay(500); Serial.print(".");
    }
    if (retries > 14) {
        Serial.println(F("WiFi connection FAILED"));
    }
    if (WiFi.status() == WL_CONNECTED) {
        Serial.println(F("WiFi connected!"));
        Serial.println("IP address: ");
        Serial.println(WiFi.localIP());
    }
    Serial.println(F("Setup ready"));
}
Call the connectToWiFi() method in setup() after you initialize the Serial monitor to 115200 baud.
6. Fetch data from Dweet.io
Now that the NodeMCU is connected to the Internet, it’s time to GET data from our dweet webhook.
Here’s some logic for a getDweets() method that we can use to make a GET request to our dweet.io webhook. Remember to replace the “learnrobotics” with your thing name.
void getDweets(){
    WiFiClient client;

    client.setTimeout(10000);
    if (!client.connect(host, 80)) {
        Serial.println(F("Dweet connection failed"));
        return;
    }
    client.println("GET /get/latest/dweet/for/learnrobotics HTTP/1.0");
    client.println("Host: dweet.io");
    client.println("Connection: closed");

    if (client.println() == 0) {
        Serial.println("Failed to send request to dweet.io");
        return;
    }
    /*
     * parsing program goes here from ArduinoJson lib
     */
}
This code works by setting up a client that will connect to dweet.io/get/latest/dweet/for/learnrobotics. If you go to that raw URL, you’ll see a raw JSON response. This is exactly what we want because JSON files are notoriously easy to work with.
Nested inside the JSON data is the LED Status, which is what we’ll use to control the LED attached to the NodeMCU.
We’ll use the ArduinoJson library to assist in obtaining the raw LED status value.
First, install the ArduinoJson library using the Library Manager in the Arduino IDE. Then, include the library in your sketch.
Next, use the ArduinoJson Assistant tool to figure out how to parse the data from the JSON in the body of the request.
After that, go back to dweet.io and click the Play button in the top navigation bar.
Then go to the dweets section and look for the /dweet/for/{thing} command and create a POST request.
Type the name of the thing (learnrobotics) and the content of the dweet is in application/JSON format.
{
"LED Status": "On"
}
Then press the “Try it out!” button. Copy the Response Body and paste it into the ArduinoJson Assistant.
You can use the ArduinoJson Assistant to figure out the memory pool size. It also generates a parsing program, which is useful for obtaining status values.
If you’re interested in how this works, be sure to check out our article on how to parse JSON files using Arduino.
Once we have the LED status value from dweet.io, we can use a conditional statement and a digitalWrite() on the LED to toggle the state.
Here’s some pseudocode to get you started:
if( ledStatus is on){
    TURN LED ON
else{
    TURN LED OFF
}
You can send a couple of manual POST requests to your dweet thing to verify that the LED turns on and off. Add the getDweets() routine to loop(), compile, upload, and test!
7. Voice Control Your Arduino Project
Finally, we can tie everything together and use Siri to toggle the LED state.
Command Siri by saying “Hey Siri, Set My LED.”
Siri will ask you what state you want to set the LED to. Say “On.” Expect a few second delay, and the LED should illuminate.
Wait a few more seconds and command Siri to turn the LED off. Again, there will be a delay due to rate limits and network speeds, but the LED should turn off.
And that’s it!
Bringing it Together: Siri and Arduino
In this project, we explored how to add voice control with Siri to Arduino projects. We used an auxiliary tool called dweet.io to publish and subscribe to IoT data.
Then we configured a Shortcut on our iPhone to send voice data collected by Siri to our webhook. Finally, we used a GET request on our webhook to retrieve and parse a JSON file to set the status of the LED connected to a NodeMCU.
While this project might seem complex, it combines a bunch of individually simplistic concepts.
Once you understand how this system works, you should be well on your way to adding Voice Control and Siri to a multitude of Arduino projects.
In the next tutorial, we’ll look at how to retrieve data from an Arduino sensor and recite that data using Siri.
Did you enjoy this project? Have a question? Leave a comment below.
Also, be sure to share this tutorial with a friend who enjoys adding high-tech features to their Arduino projects!


2 Responses
Hello Liz
I was able to follow you instructions till the part with the ArduinoJson Assistant.
I don’t know what u made with the code, if you added it to the Arduino code or anything.
Can you maybe show me ur whole Arduino code or explain to me what to put in the code?
So far i’ve connected my arduino mkr wifi 1010 to the internet.
I want to move a servo to open a door so i would make the code
{
“Door Status”: “Closed”
}
Or Open
But i don’t understand what code i have to enter after my wifi connection code to read if the Door status is closed or open so i can move de servo .
Best regards
Danny Vivas
Hi Danny, you’ll need to set up your Arduino to read states from a dweet thing, first. This article should help you out. Once you have that setup, come back to this article and set up your iPhone for voice control with Siri. Good luck ~Liz from Learn Robotics