Lately we have been creating projects that use the Raspberry Pi computer. Unlike Arduino, the Raspberry Pi is a computer, so it won’t work without installing the Operating System. In this article, you’ll learn how to start with Raspberry Pi by creating a bootable Raspbian SD card.
What is Raspberry Pi?
To start, the Raspberry Pi is a single-board computer introduced in 2012 by the Raspberry Pi Foundation. Its small footprint and affordable price makes it great for prototyping. That’s why it’s very popular among the maker community.
There are many models of the Raspberry Pi. We’ll take a look at these models in more detail in the next section.
Raspberry Pi 3 Model B+
The Raspberry Pi 3 B+ is the most common Raspberry Pi board you can get. It has a slew of built-in ports and GPIO pins, which makes it great for a variety of home automation and robotics projects. Here are the specifications:
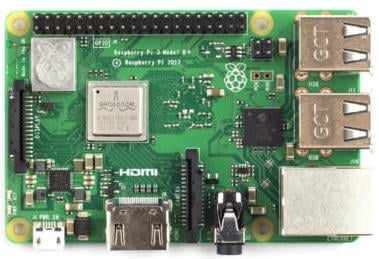
- ARM cortex-A53 1.4GHz processor
- 1GB RAM
- Integrated WiFi 2.4GHz/5GHz
- Bluetooth 4.2
- 300Mbps Ethernet
- 4 USB ports, 1 HDMI , 1 earphone jack and a micro USB power port
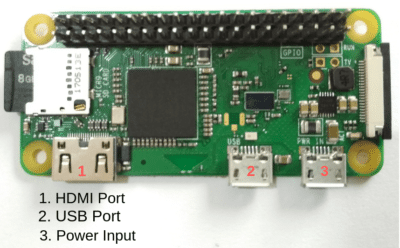
Raspberry Pi Zero W
The Raspberry Pi Zero and Zero W are incredibly small boards. You’ll notice that there are less ports, memory, and processing power. But, for some projects, having the smaller footprint is worth it! Check out the spec’s below.
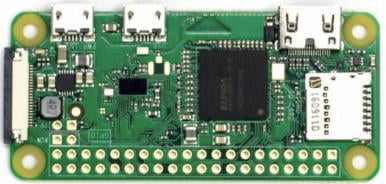
- BCM2835 1GHZ processor
- 512MB RAM
- Integrated WiFi 2.4GHz
- Bluetooth 4.0
- 2 USB ports, 1 mini HDMI
You can learn more about these boards on the Raspberry Pi Foundation’s official website.
Hardware & Software Setup for the Raspberry Pi
Check out the list below for the materials you’ll need. Some products are optional depending up which board you are using (3 B+ or Zero W).
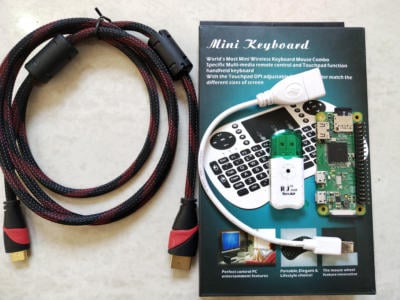
You can also elect to pick up a Raspberry Pi 3 B+ Kit or Raspberry Pi Zero W Kit that includes all the components to get started.
-
- Raspberry Pi (Raspberry Pi Zero W or Raspberry Pi 3 Model B+)
- Micro SD card (8GB or higher, preferably Class 10, with Adapter)
- Micro SD card Reader
- OTG cable (for Pi Zero w)
- HDMI cable
- HDMI to mini HDMI (for Pi Zero w)
- Mini Wireless Keyboard
Once you have the hardware, you’ll need to configure the Raspbian OS. If you’re on Windows, you’ll need a copy of 7-Zip and Win32diskimager. I also recommend using Etcher for flashing the SD on Linux/macOS.
Installing The Operating System
Because the Raspberry Pi is a computer, it requires an Operating System (OS) to work. In this project, we will use Raspbian, which is the official OS by Raspberry Pi Foundation.
To create your bootable SD card for Raspberry Pi, follow the steps below.
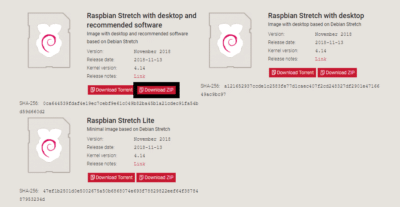
- First download the Raspbian Stretch
- Next download and install 7-Zip (Skip this step if you already have a file extractor.)
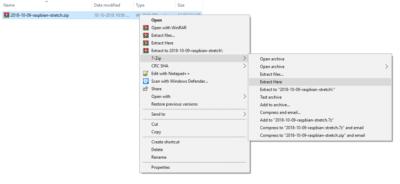
- Extract the Raspbian Zip file using 7-Zip
- Next download and install Win32diskimager or Etcher.
- Insert the SD card into the card reader and plug it in the computer Note the name of drive, in my case it is (I:) drive.
- Open the disk imager and select the SD card drive.
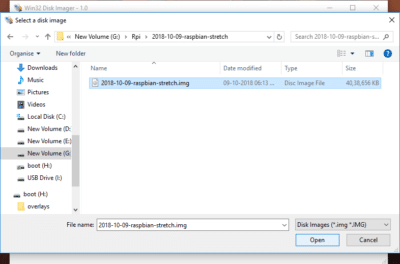
- Click on the file icon and navigate to the folder where Raspbian image is extracted.
- Select the image and click on “write”.
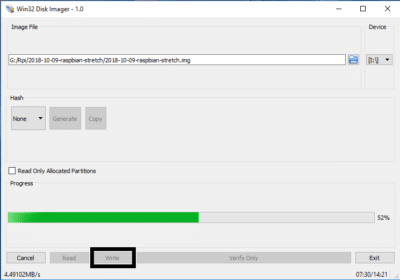
Now it will take few minutes for the completion of burning process. Make sure you do not cancel it or unplug the card reader.
Boot the Raspberry Pi Running Raspbian
Once the Raspbian image is burned on to the card successfully, insert the SD card into Raspberry Pi. Now follow the steps below.
- Connect HDMI to the port on board and a monitor.
- Connect the wireless module of keyboard into the USB port of the Raspberry Pi. If you have Pi Zero W use an OTG adapter.
- Finally power the board using a micro USB. Make sure you use proper power supply. I used a 5v 2A smartphone charger which works perfectly. Be sure to plug the monitor BEFORE applying power. Otherwise, the monitor won’t be recognized.
The Pi will take a while for the first boot so be patient and do not power it off or remove the SD card. Once the boot is successful, you will see the home screen of Raspbian. You can use a mouse or track pad to navigate.
More of a visual learner? Download a Free Copy of the Raspberry Pi Cheatsheet below!
[pretty-locker id=”339508″]Raspberry Pi Quick Start Guide (.PDF)
Final Note
The goal of this project was to show you how to setup Raspbian on an SD card for your Raspberry Pi.
In the next tutorial, I will show you how to use the Raspberry Pi to control various projects. You’ll also learn how to enable the headless mode where you can access and control the pi over a network without having to connect a monitor and keyboard.
Looking for an AWESOME Robot to Build?
If you are interested in robotics and want a cool project to build, then check out my Mini WiFi Robot eBook. I wrote this eBook to teach you the basics of CAD modeling, electronics, and programming, all while building your own, custom robot car. You don’t want to miss this!
Have a question or problem? Leave a comment below!