

I’ve always been fascinated by technology, specifically robots (hence why I started Learn Robotics). And one of the critical things about being good at robotics, is becoming good at a variety of skillsets.
I speak a lot about how robotics is an interdisciplinary subject that touches on all aspects of mechanics, electronics, and programming. Therefore, if you want to be a great roboticist, you’ll need to master skills within each category.
That is why in 2018, I’ve set on a mission to improve my electronic skills. One of my goals is to become better at soldering, Surface Mount Soldering, and Printed Circuit Board (PCB) design.
Over the next few months, I’m going to walk you through some of the projects that I’m personally working on to improve my soldering skills. That way, in case you’re in the same boat, and you’re wondering how to be better at robotics or engineering, you can follow along with my journey.
For today’s project, I’m building an electronic (digital clock) using a kit that I picked up on Amazon. You can find the list of materials that you’ll need for this project listed below.
Things you’ll need to Power your Arduino Robot
- 5V Power Source
- Red & Black 28 or 30 AWG Gauge Wire
- Wire Cutters/Strippers
- Solder & Soldering Iron
- Small Phillips Head (+) Screwdriver
Digital Clock Kit (click here for the one I used)
Step 1 – Solder the Components
I’m going to outline the general process of soldering in the video and down below. If you need additional help with your soldering, feel free to leave a comment, and I’ll create a detailed video showing this process.
SOLDERING IRONS ARE HOT – READ THIS!
Never touch the tip of a soldering iron. Soldering Irons heat up over 200°C and can cause burns.
Always wear proper Personal Protective Equipment (PPE) such as gloves or safety glasses while working with soldering irons.
General Process for Soldering
- Plug in your soldering iron and set to a low-medium heat (200-300°C).
- Then grab the circuit board and place a component in the correct spot through the top.
- Flip over the circuit board and heat the pad that you want to solder using the soldering iron.
- Place some solder onto the hot pad. Hold until the solder has hardened the component into place.
- Repeat for the remaining components.
Polarity Matters!
Note: Some components are directional and have to be placed on the board properly. For the digital clock, ensure that the electrolytic capacitors, buzzer, LEDs, and rectifier diodes are connected with the proper polarity in mind.
Step 2 – Connect the Battery (5V Source)
As shown in the video, I used my Arduino Uno to power the Digital clock. This was primarily because I didn’t have a 3.3-5.5V battery pack or power source available other than my Arduino.
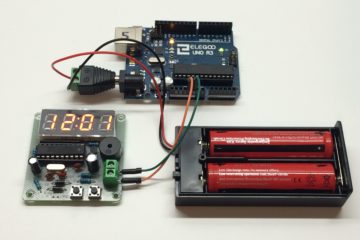
Feel free to use whichever power source you have for this step. You’ll want to plug the positive side of the power supply into the bottom + terminal connector and the negative side of the power supply into the top – terminal connector. Read the markings on the circuit board to determine which terminal is positive and negative.
You don’t want to plug this in backwards because you could damage the board.
Step 3 – Set the Clock & Enjoy!
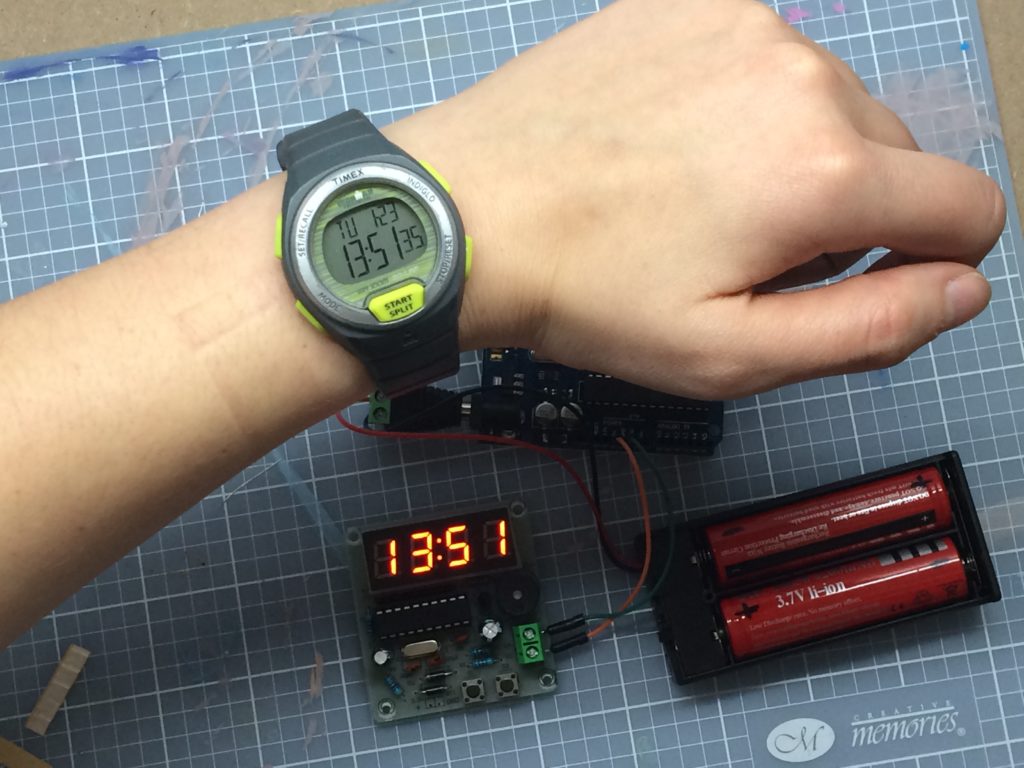
The hardest part about this project was deciphering the Chinese-translated instructions for setting the clock. There are many features to this particular clock: stopwatch, countdown timer, and a buzzer beep on the top of the hour. I plan on getting a wall wart for my clock and displaying it in the Learn Robotics Studio (my lab!).
Wrap-Up & Thoughts
And that’s it.
If you’re like me, and you’re trying to improve your engineering skills, the best way (in my opinion), is to go out and find a project, and do it! There’s nothing like gaining experience through the grit of “doing.” I like simple projects like this one because they provide that little bit of confidence that I needed to get back into practicing my soldering. Plus, I got a pretty cool little clock out of it!
On Deck: Crawling Bug Project!
In my next Soldering Adventure, I’m going to be making a Crawling Bug! So stay tuned for that one.
If you haven’t subscribed to updates, go ahead and drop your email below, and I’ll send you a free copy of my Arduino Project eBook as a Thank You! Plus, you’ll receive an email from me each week showcasing the projects, tutorials, and cool stuff I’m working on here at Learn Robotics!
Finally, if you liked this article, RATE IT 5 STARS. That’s the only way I know if you enjoy this type of content, and want to see more of it! 🙂


2 Responses
Very helpful! Thanks for sharing the details.
Glad you found it helpful, Betty!