

The epitome of robotics is obstacle detection and avoidance. Using the HC-SR04 sensor with Arduino, you can detect objects using ultrasonic waves (sound). In this project, we will use the HC-SR04 sensor and write software for our Robot Tank to avoid obstacles. We’ll make it a bit more complex by utilizing a servo motor to scan around the tank before responding.
For this tutorial, I used the Kookye Robot Tank kit from Amazon. You can also pick up an Arduino, Arduino Sensor Shield, and L298N motor controller to complete this project.
You’ll need to get some hardware (Arduino, Motor Controller, HC-SR04, etc.) to build the project. This is a good option for those of you who already built an Arduino robot car and now want to build a tank.
This tutorial assumes that you have already:
- Built and wired your Tank Robot;
- Written some code to control motors autonomously; and
- Have an understanding of how to create and upload an Arduino sketch.
Refer to our tutorial on how to use an L298N motor controller article for tips on wiring and programming the motors.
Tank Robot Programming Logic
Here’s an overview of the programming logic for our tank robot.
- Scan to see if anything is in front of us
- If not, keep driving
- If so, figure out which side of the robot the object is on
- If the object is on the right, move left; if the object is on the left, move right
- Repeat the process continuously
We can first develop code using just the HC-SR04 ultrasonic sensor. Then, we can make it more sophisticated by integrating a 9g Servo for 180-degree scanning capabilities.
Let’s keep things simple by first implementing the HC-SR04 servo detection code.
You’ll need to have your autonomous move commands configured prior to this step. I’ve also already declared my pins & global variables required for the code.
Not sure what all this means? Refer to our Arduino Programming guide before continuing on.
Integrate HC-SR04 with Arduino
First, we’ll create a method to get the distance between the ultrasonic sensor and a detected object. We can send out a 10 mSec pulse on trig and then receive that pulse on the echo pin. Here’s what that method looks like.
int captureUltrasonic(){
  digitalWrite(trig, LOW);
  delayMicroseconds(2);

  digitalWrite(trig,HIGH);
  delayMicroseconds(10);
  digitalWrite(trig, LOW);

  duration = pulseIn(echo, HIGH);
  return duration;
}
Then, use the HC-SR04 datasheet and the speed of sound to convert the time duration into a usable distance measurement.
int getUltrasonic(String units){
  int duration = captureUltrasonic();
  if(units == "cm"){
    return duration*0.034/2; // these values are from the data sheet
  }
  else if(units == "in"){
    return duration*0.0133/2; //from data sheet
  }
  else {
    return -1;
  }
}
This method takes in a unit measurement (inches or centimeters) and returns the distance as an integer in the chosen units. We can use this to determine whether or not we are too close to an object.
If the distance obtained is less than our threshold, then we can stop the robot, back up, and turn in a different direction. Then we can proceed forward and run another scan. Make sense?
For this project, the Tank has a pretty long body, and the ultrasonic sensor is mounted towards the middle of the frame. Therefore, we’ll need to consider the nose in our threshold distance. I’ve set this to 10 inches in the code. That way, the nose won’t bump into the object as the tank is moving around. Adjust this threshold for your particular robot.
Want to professionalize your robotics hobby into something you can show off (and get paid for) in your career? Check out our Robotics Specialist Certification for serious beginners.
Put the Logic Together and Run Tests
Now that we can determine our distance, we can command the robot to check the ultrasonic sensor and react accordingly.
Create a global variable to store the threshold. Then capture the current measurement from the ultrasonic sensor. If this measurement is greater than our threshold, we’ll move the robot forward. Otherwise, we need to stop the robot, back up, and turn.
Give this method a try on your own before proceeding. You’ll need to call the method in loop() in order to get it running on your robot.
Once you have this part working, you can move on to using the 9g Servo as a scanning mechanism for the HC-SR04.
Configure the 9g Servo
In order to use the servo, we’ll need to capture measurements in three places: center, left, and right. We’ll then compare the measurements to determine where the obstacle is, respectively.
First, let’s focus on the left and right logic.
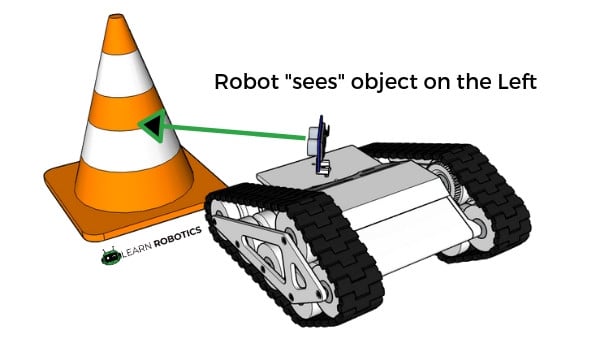
If the object is on the left side of the robot, and we are scanning on the left side with the servo positioned in the left direction, then that means the left side measurement will be lower than the right side. As a result, we’ll drive the robot right. The opposite is true for the right side of the robot.
Otherwise, we will check the center of the robot. If nothing is there, we can keep driving forward. Otherwise, we’ll need to stop, back up, and move in a direction (away from the object).
Take these steps, and translate them into code. You can use the sample code below to get you started.
if(right_distance < left_distance){ //on the right side
  backward();
  delay(1500);
  left();
  delay(1400);
  stop();
  forward();
  delay(500);
}
Create conditions for right < left, left < right, object in center, and no object detected. Then call the move methods to command the robot in the appropriate direction.
It’s a smart idea to test your logic a bunch of times to verify it’s working the way you want it to. It’s easy to get “stuck” in an infinite while, if, or for loop if you’re not careful.
You can use print statements to help debug your code without actually driving the robot around.
Final Touches & Next Steps
I recommend spending some time tuning the distances, timings, and response moves. You can grab a copy of the demo code below, and tweak it to your liking.
You’ll need to adjust the pins to match your wiring configurations!
As always, if you have a question, drop them below, and be sure to tag @learnrobotics in your project photos on Facebook and Instagram.
In a future tutorial, we’ll take a look at modifying our motor control to tackle a variety of terrains (carpet, tile, wood floors, pavement, etc.). We’ll also add a joystick control to provide manual control.
– – –
Lastly, if you’re a serious beginner and see yourself working in engineering (or going to engineering school), I recommend checking out our Robotics Certification. It’s designed to guide you through building, wiring, and programming mobile robots. We cover everything from insider know-how to best practices in creating robots. It’s like your freshman year of studying robotics engineering, without the $50k+ price tag — all from the comfort of your home. Check it out here.


One Response
What’s the issue you’re having?