

If you want to build a robot, create a weather station, make a moving Skull, or build prototypes with Arduino, then you’ll want to read data from analog sensors.
In this article, we’re going to explore how to read analog sensors using Arduino. Then, we’re going to take a look at some popular Arduino sensor kits you can purchase for your next project.
How to read Analog Sensors using Arduino
The Arduino has built-in analog and digital input and output (I/O) pins that you can interface to a variety of sensors and devices.
The difference between analog and digital sensors is that an analog sensor collects readings over a range of values, and a digital sensor only reads a HIGH or LOW signal (a bit of data).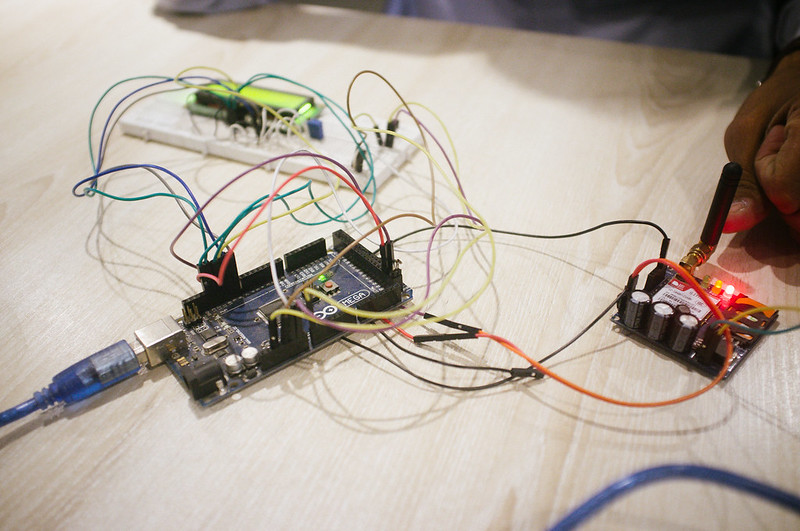
The Arduino has a 10-bit Analog-to-Digital-Converter (ADC), which maps sensor readings between 0 and the operating voltage (5V or 3.3V) into integer values between 0 and 1023.
This is derived using the calculation 2^10 = 1024, so the range ends up being 0-1023. The resolution of an Arduino is about 4.9mV per unit (5/1024 = 0.0049 or 4.9mV). You can read more about the specifics of the Analog pins on the Arduino in the Arduino Reference guide.
Step 1. Wire Analog Sensors to Arduino
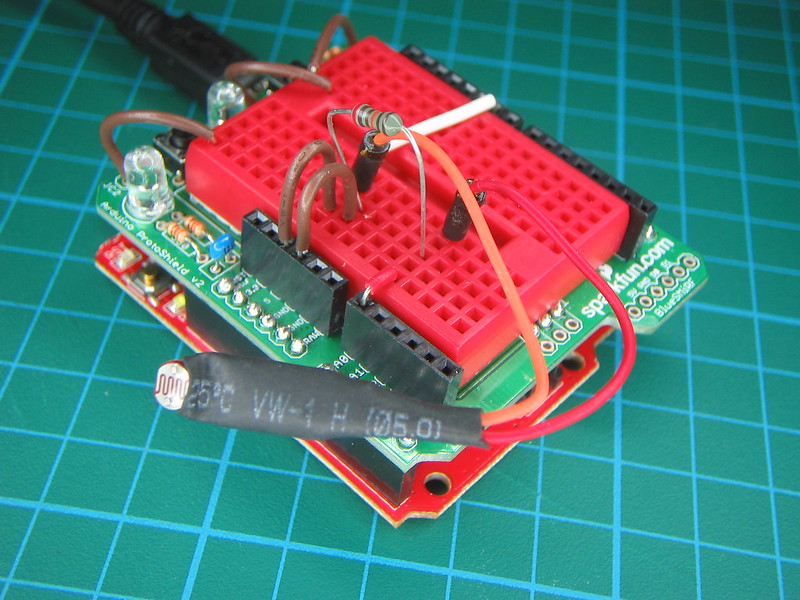
The majority of analog sensors for Arduino are wired and programmed the same. So, once you learn how to wire and read data from one analog sensor, you’ll be able to wire and program thousands of additional sensors to collect a whole bunch of data. For this example, I’ll walk you through wiring and programming a light-dependent resistor (LDR) also known as a photoresistor.
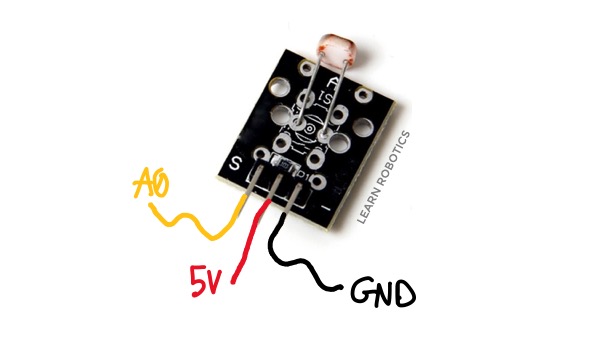
The first step is to connect the analog sensor to the Arduino. Analog sensors for Arduino have three wires (Ground, Signal, Power). Refer to the sensor’s datasheet to figure out which wire is which. Then, connect the ground wire to GND on the Arduino. Next, attach the Signal wire to an analog pin on the Arduino. Lastly, connect the power wire to the 5V on the Arduino.
Step 2. Setup your Arduino Sketch
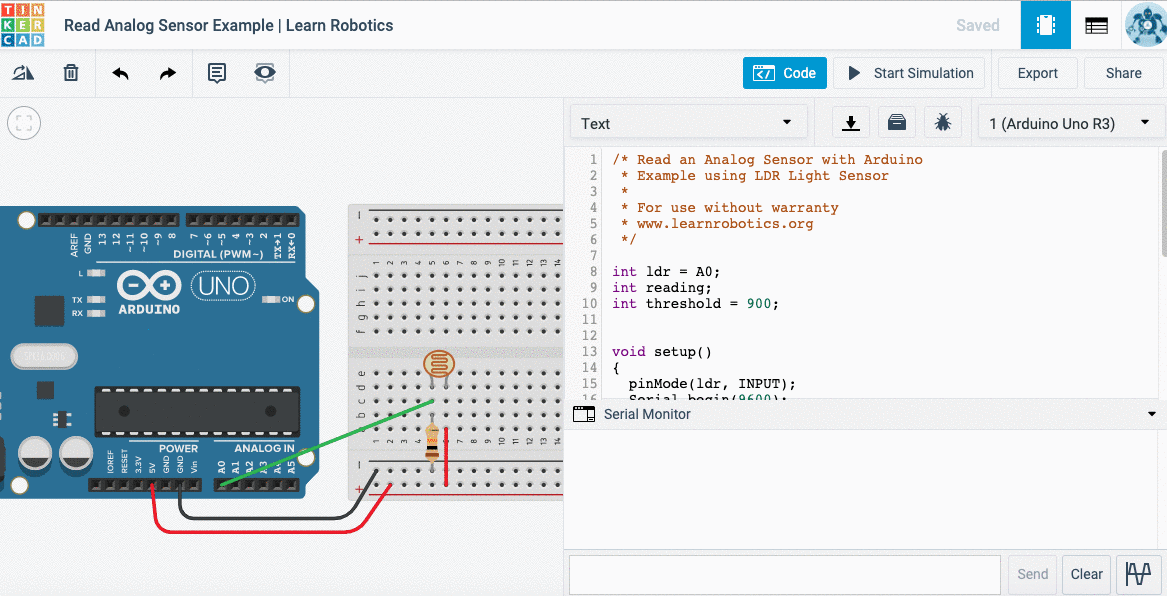
The next step is to set up the Arduino Sketch. First, configure a global variable for the analog sensor. I’m going to use the name LDR for short.
int ldr = A0;
Then, in the setup() method, initialize the sensor as an input and start the Serial monitor.
void setup(){
    pinMode(ldr, INPUT); //initialize ldr sensor as INPUT
    Serial.begin(9600); //begin the serial monitor at 9600 baud
}
The Arduino Uno has a baud rate of 9600. We can use the begin method to start the Serial Monitor. Now, we’re ready to write the Arduino code to collect readings from our analog sensor.
Step 3. Write code to collect readings from Analog Sensors
Next, collect a sensor reading using the analogRead(ldr) method, and store it in an integer variable. I called this variable “data.”
We will use a few print statements to show the readings in the Serial Monitor. Serial.print() will print data horizontally across the screen. Serial.println() will print data vertically down the screen. I used both to label the data while making it easy to read.
void loop(){
    int data=analogRead(ldr);
    Serial.print(“ldr reading=“);
    Serial.println(data);
    delay(1000);
}
Finally, add a delay. This prevents the Arduino from taking readings faster than we can see them. Feel free to adjust this delay to whatever interval makes sense for your application. Once you have the test code written, save the sketch and upload it to the Arduino. Open up the serial monitor and you should see values from 0-1023 depending on how bright or dark the area is.
Step 4. Analyze and Convert Sensor Readings as needed
Some sensors require a unit conversion. For example, it’s easier to understand what temperature it is when the units are in Celcius or Fahrenheit. Furthermore, with our LDR we could convert the unit readings into a brightness percentage. That way when we analyze the data, we can check for conditions based on 25% bright, 100% bright, or a unit that makes more sense for the application.
Most datasheets specify formulas that you can use to make these conversions. You don’t always have to “make up” a unit for your sensor.
Step 5. Use sensor data to make decisions
Once you have an understanding of how data is collected from your analog sensor, you can use the readings to make decisions.
We’ll use conditional statements to check to see if a condition is TRUE or FALSE. Then, based on that condition, we’ll react accordingly.
Here’s an example using the LDR. If the condition is LIGHT, then let’s write the word “daylight” to the Serial Monitor. Otherwise, write the word “nighttime” to the Serial Monitor.
First, add a method called lightCheck() to the previous Arduino sketch.
//globals to store data
int reading;
int threshold = 900; //range of 0-1023 / higher value = brighter

void lightCheck(){
    reading = analogRead(ldr);
    if(reading >= threshold){ //this condition means the readings are light
        Serial.println("daylight");
    }
    else{
        Serial.println("nighttime");
    }
    delay(1000);
}
Then, we’ll call lightCheck() in our loop() method. Here’s how it should work.
Try this project!
Resources to Learn Arduino
Now that you have an understanding of how to use analog sensors with Arduino, you can brush up on your Arduino skills with these popular resources.
Online Robotics Class
I created the Online Robotics Class to guide you through building, wiring, and coding your own Arduino prototype. We use a variety of sensors in this course and walk through both the technical terminology and the practical applications.
By the end of this course, you’ll have a firm grasp on how to wire sensors to Arduino, read data, make decisions, and create custom prototypes using Arduino.
Then, you’ll go on to build a robot, create 3D CAD models, and have the fundamental skills to become a Full-Stack Junior Roboticist!
You don’t need engineering or technical experience to get started with this course! Join the next cohort of the Online Robotics Class, here.
Related Arduino Articles
If you’re interested in learning how to code Arduino sensors, then you’ll want to check out these related articles.
Arduino Projects using Sensors
Looking for Arduino projects to work on? Here are some tutorials to get you started!
- BME280 Temperature, Humidity and Pressure Sensor with Arduino Tutorial
- OLED Display with Arduino Tutorial
- Make an Autonomous Robot Tank with HC-SR04 Sensor
Best Sensor Kits for Arduino
Ready to make your prototype using Arduino and some analog sensors? Then you’ll want to check out these sensor kits. The majority of Arduino sensors are less than $2 each; however, when you purchase a kit, you can often get sensors for less than $1 each.
TL;DR: It’s much more cost-effective to purchase sensor modules in a kit than it is to purchase them separately. If you plan on creating projects that require a variety of sensors, then purchasing a kit is your best bet. Here are some kits that I recommend checking out.
1. ELEGOO 37-in-1 Sensor Module Kit
The ELEGOO 37-in-1 Sensor Module kit is compatible with both Arduino and Raspberry Pi. It includes advanced modules such as the GY-521 accelerometer module and LCD1602 screen as well as classic sensors such as the HC-SR04 ultrasonic sensor and IR sensor. There’s also even a water level sensor. Create a ton of different projects using the ELEGOO 37-in-1 Sensor Module Kit.
Buy on Amazon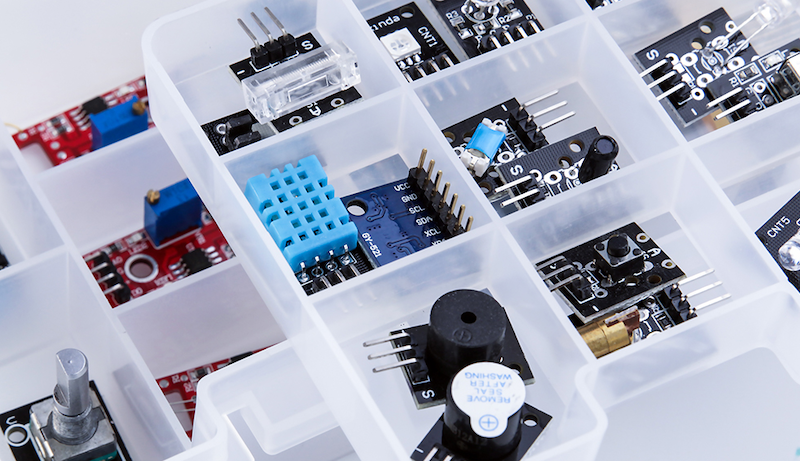
2. Kuman 37-in-1 Sensor Kit
Another 37-in-1 Sensor kit is by Kuman. This kit is similar to the ELEGOO kit but is a little lower in price. It doesn’t include the same modules, but there are a lot of similarities. The key to picking out an Arduino sensor kit is to determine what sensors you need for your project and then find a kit that has the majority, if not all, of the sensors, included.
Buy on Amazon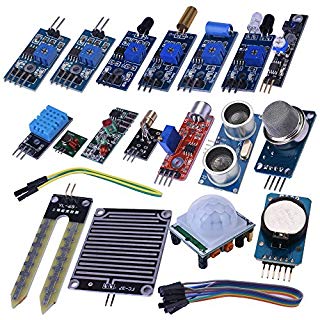
3. KOOKYE 16-in-1 Smart Home Sensor Modules
Lastly, if you’re looking for sensors that are best suited for home automation, then you’ll want to check out the KOOKYE 16-in-1 Smart Home kit. This kit combines the most common electronic components of smart home projects into a single kit. You can detect temperature, humidity, sound, light, infrared, flames, vibration, air press, and more! If you’re building a smart home system using Arduino or Raspberry Pi, I highly recommend checking this kit out.
Buy on Amazon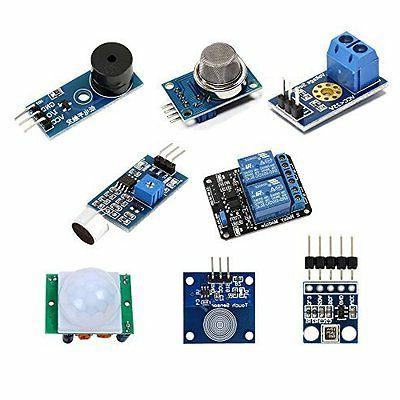
What Arduino sensor are you going to use next? Leave a comment below.
Be sure to share this post with a friend who enjoys electronics and coding.


7 Responses
Great Article! Thank you for sharing this is a very informative post, and looking forward to the latest one
Hi Liz!
Can you help me reading analog values using the registers?, want to learn register level programming..
Thanks!
Great idea, Furqan. It’s been added to the list for tutorials. For now, you can refer to the docs, here. Good luck! ~Liz from Learn Robotics