

The Raspberry Pi is a single-board linux computer that has exposed General Purpose Inputs and Outputs (GPIO). In this tutorial, I’m going to show you how to program the Raspberry Pi to control an LED using Node-RED. Then, we will create a dashboard UI to control the LED from any web browser.
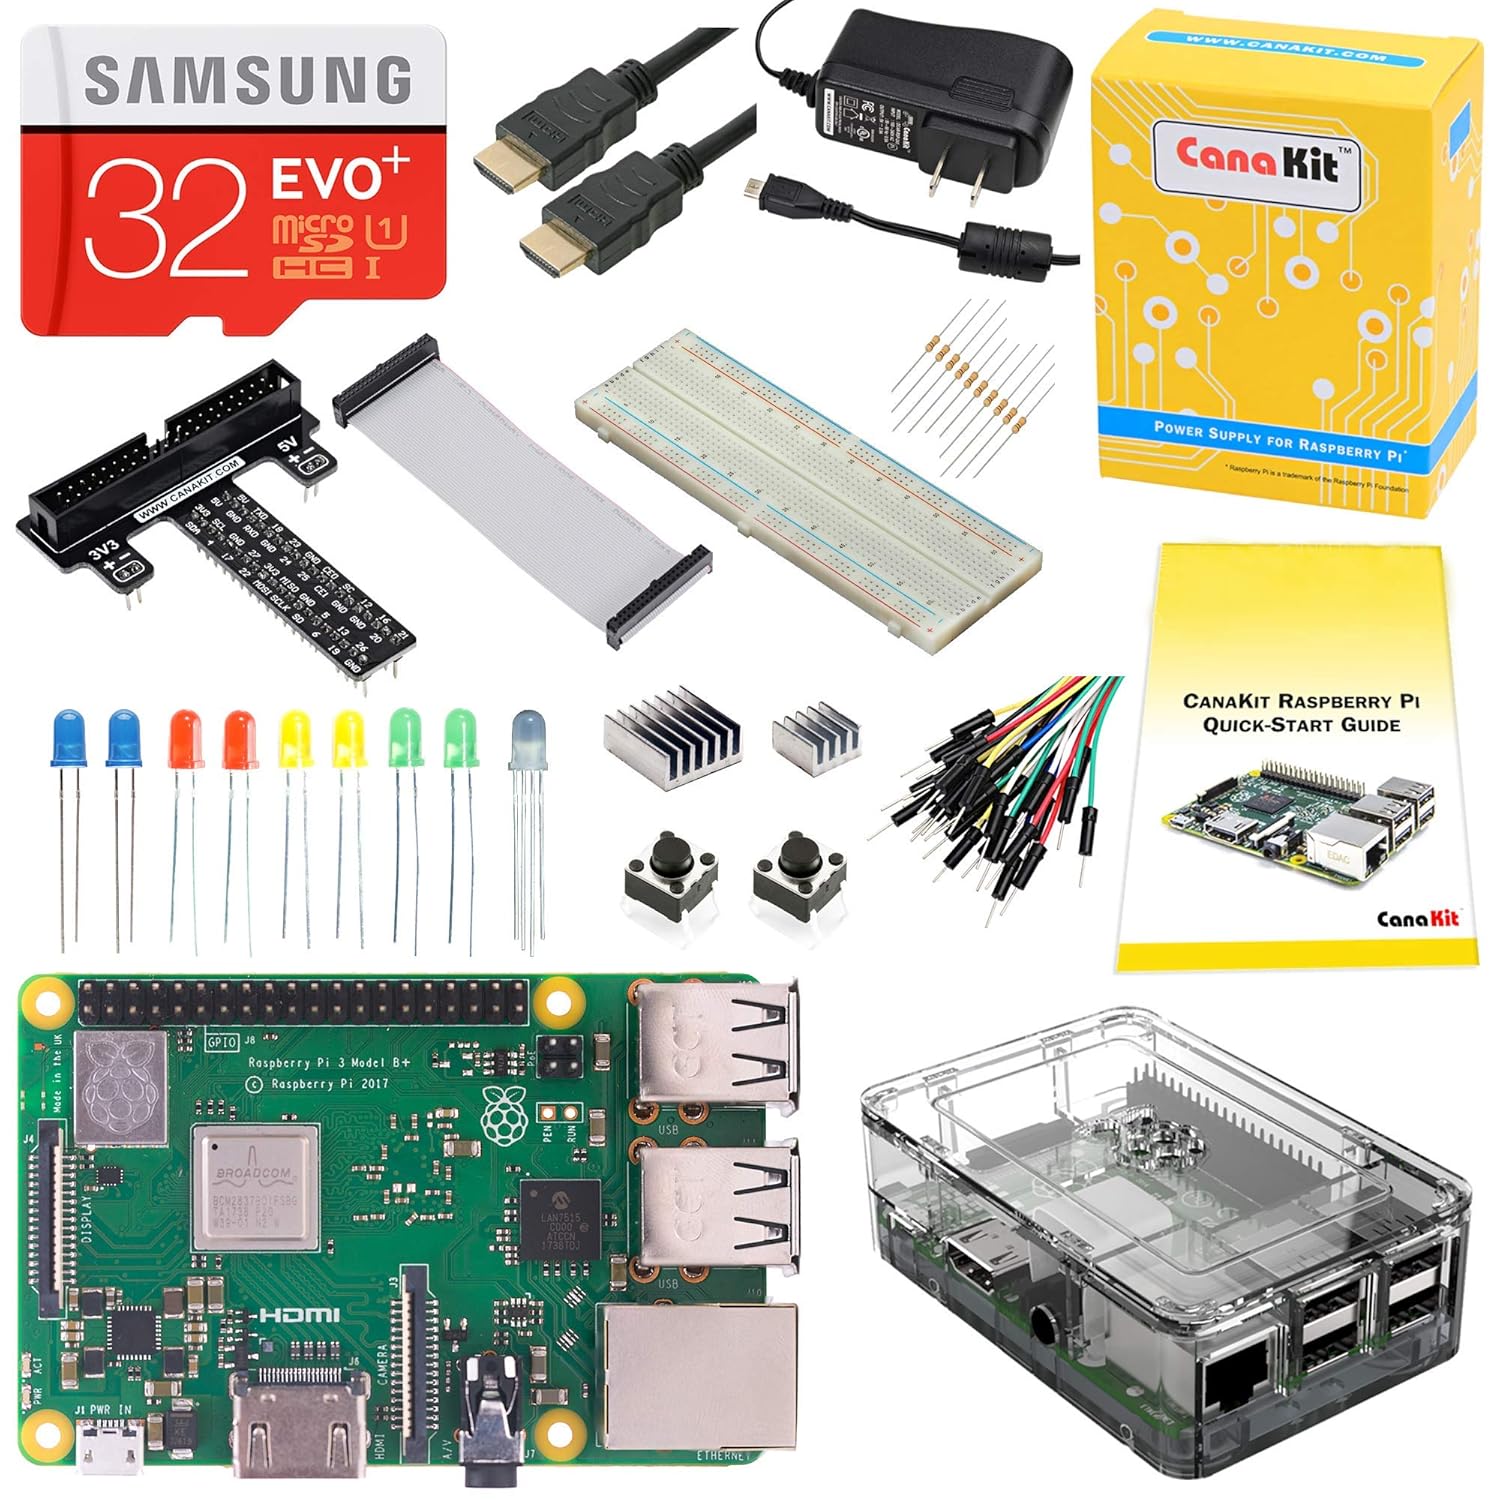
You will need a Raspberry Pi 3 B+, an LED & Resistor, breadboard, and jumper wires to complete this project. I recommend the Cana kit because it has all the components you need (and more).
First, you’ll need to install NOOBS on an SD card (8GB or greater). You can download NOOBS from the Raspberry Pi website. It’s a pretty large download, so while that’s running, let’s wire up our circuit!
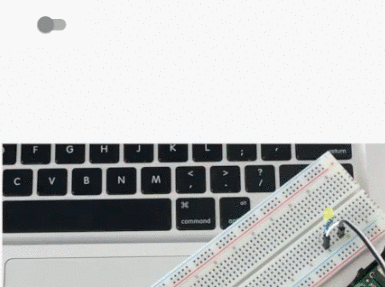
Wire an LED to Raspberry Pi GPIO
This is the wiring diagram we will use for Raspberry Pi Node-RED program. Connect the resistor and positive leg of the LED to GPIO17, which is pin 11 on the Raspberry Pi. Then, connect the negative leg to Ground Pin 9.
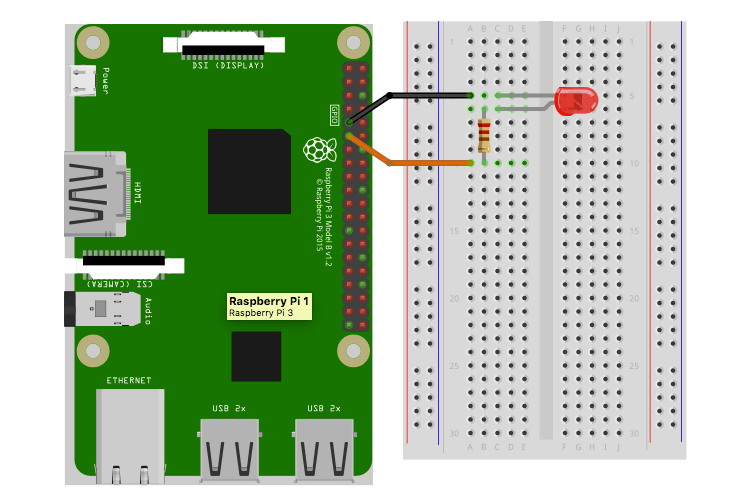
Click Here for the Full Raspberry Pi Wiring Diagram
Now, that our circuit is wired, we can go ahead and connect the USB keyboard and mouse and an HDMI monitor. Connect the SD card once you have NOOBS installed on it. Then, power it up. Here’s a video for your reference.
Enable SSH and Connect to the Raspberry Pi (Headless)
Once you’ve booted up the Raspberry Pi, you need to enable SSH. First, launch Raspberry Pi Configuration from the Preferences menu. Then, navigate to the Interfaces tab. Select Enabled next to SSH. Click OK. SSH should be enabled. Make sure you jot down your Admin password, as we will need it to login to the Raspberry Pi from our laptops.
The NOOBS installation should ask you to configure internet. But if by chance you aren’t connected to your home network, add the network connection and password.
- Launch “WIFI Config” from the desktop, this will launch the GUI application for easily configuring wireless networks
- Click “Scan”
- Double click your desired network, This will bring up another window containing some more advanced options for connecting to your network. For this example, we are assume you have a simple network setup.
- In the “PSK” field, enter your wireless password. All keyboard entries here will be converted into *’s for security purposes
- Once done, click “Add”. This will take you back to the previous scan screen, which you can now close. If everything has been done correctly, the WIFI config application will show you as connected
Next, determine the Raspberry Pi’s IP address. Open up a Terminal Application and type in ifconfig.
Write down this IP address. You’re now ready to use your Raspberry Pi without peripherals!
On your computer (I’m using a Mac), open up a Terminal window (Mac/Linux) or PuTTY (Windows) and type in ssh [email protected]. Replace the X’s with your Raspberry Pi’s IP address. You’ll be prompted to enter in the admin password for the Raspberry Pi. Now that you’ve SSH’d into the Pi, it’s time to install Node-RED.
Install Node-RED for Raspberry Pi
The full instructions are available in the Node-RED documentation. Here’s an abridged version for your convenience:
Since we’re using NOOBS, you can install or upgrade NODE-RED using the Node-RED upgrade script command:
bash <(curl -sL https://raw.githubusercontent.com/node-red/raspbian-deb-package/master/resources/update-nodejs-and-nodered)Run Node-RED on the Raspberry Pi
From Terminal or PuTTY, type in node-red-start. This will launch Node-RED on the Pi.
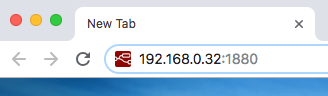
Then, go to a web browser (I like Chrome), and type in your Pi’s IP address. Mine is 192.168.0.32. You’ll append the IP address with the port 1880 (which is what Node-RED runs on).
It should look like this: 192.168.0.32:1880
You should see the full Node-RED application running.
Now that the Pi is set up, you can follow along with the remaining tutorial video.
Create Nodes to Turn the LED on & off
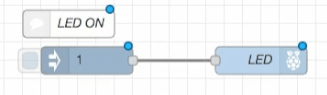
Raspberry Pi Node-RED programming is actually pretty easy. First, connect an inject node to the pi GPIO output node. This will turn the LED on by sending a “1” to the output.
Double click on the GPIO node and modify the settings.
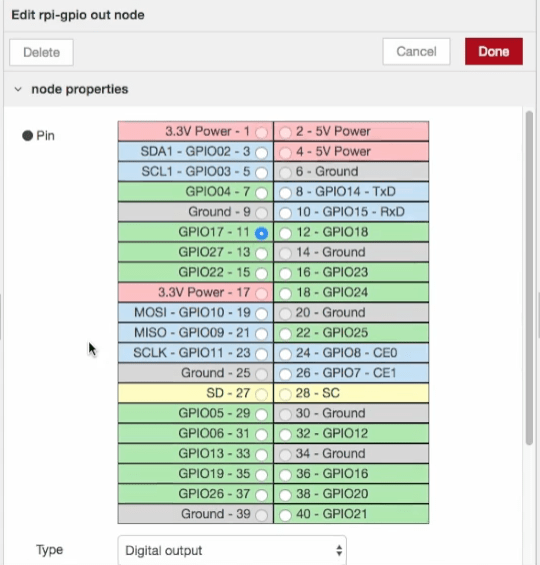
Choose GPIO17-11 and make sure the Type is “Digital Output”. We’ll also initialize the pin as LOW. This prevents the computer from starting the program with the output in a HIGH state.

Then, copy the flow above and paste it below. First, modify the inject node. Change the “1” to a “0” to turn the LED off.

Now, the code is ready to test on the Raspberry Pi. Click Deploy in the top right corner.
For the LED ON code, click the square next to the inject node. You should see the LED turn on. Then, for the LED OFF code, click the square next to the inject node. The LED should shut off.
We can take this project a step further and build a UI using the Node-RED Dashboard Library.
Create a Node-RED Dashboard for Raspberry Pi
Rather than using the Inject Nodes to toggle the LED, we’ll create a Dashboard. Node-RED has a built-in library that supports control widgets. Navigate to the top hamburger menu and click “Manage Pallet.”
Go to Install and search “Dashboard.” Find the package called node-red-dashboard. Click the button, Install in the bottom right. Node-RED will install this library, and you’ll have access to the dashboard widgets.
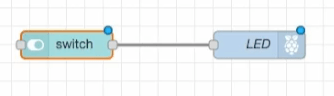
Drag over a switch node and copy your LED rpi GPIO node from before. Connect the two together to form a flow. Here’s what it should look like:
Double-click on the switch and configure the settings to look like the photo below:
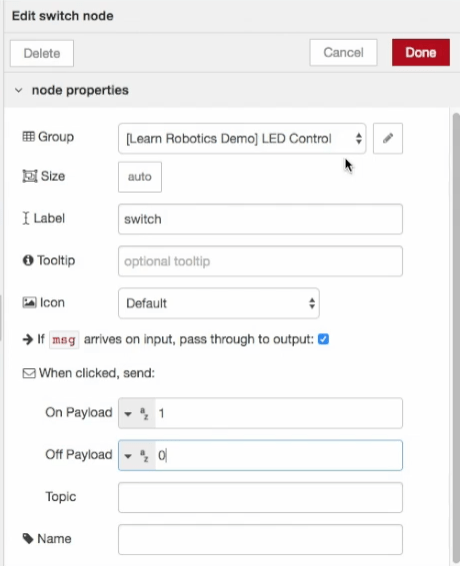
For the Group parameter, click the pencil and create a new Dashboard group. Then, modify the On and Off Payload to send Strings of value 1 and 0, respectively. These settings toggle the LED rpi gpio node either a String 1 or 0 to turn the state on or off.
When you’re finished, click deploy and navigate to the Dashboard URL. For my Raspberry Pi, the Dashboard is located at 192.168.0.32:1880/ui. You can substitute your Pi’s IP address for that URL to view your dashboard. Here’s what it looks like:
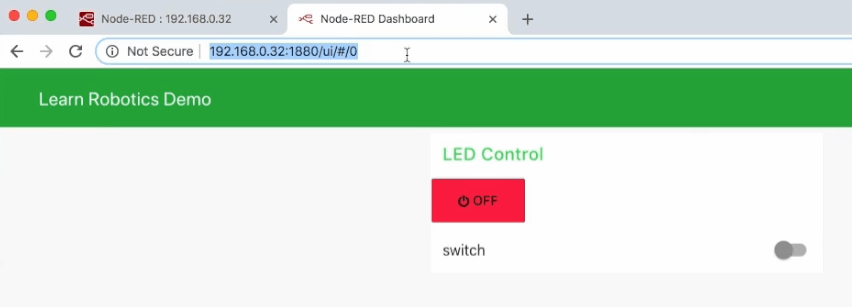
Toggle the switch to turn the LED on and off. If all goes well, the LED state will switch in real-time.
The cool thing about creating code and dashboards in Node-RED is that you can access the UI’s on any device (Smartphone, Computer, Tablet, etc.) It’s a great way to create prototypes without having to spend time developing full-stack code.
If you enjoyed this tutorial, please share it with a friend! You can also support the work we do by sending us a Coffee!


