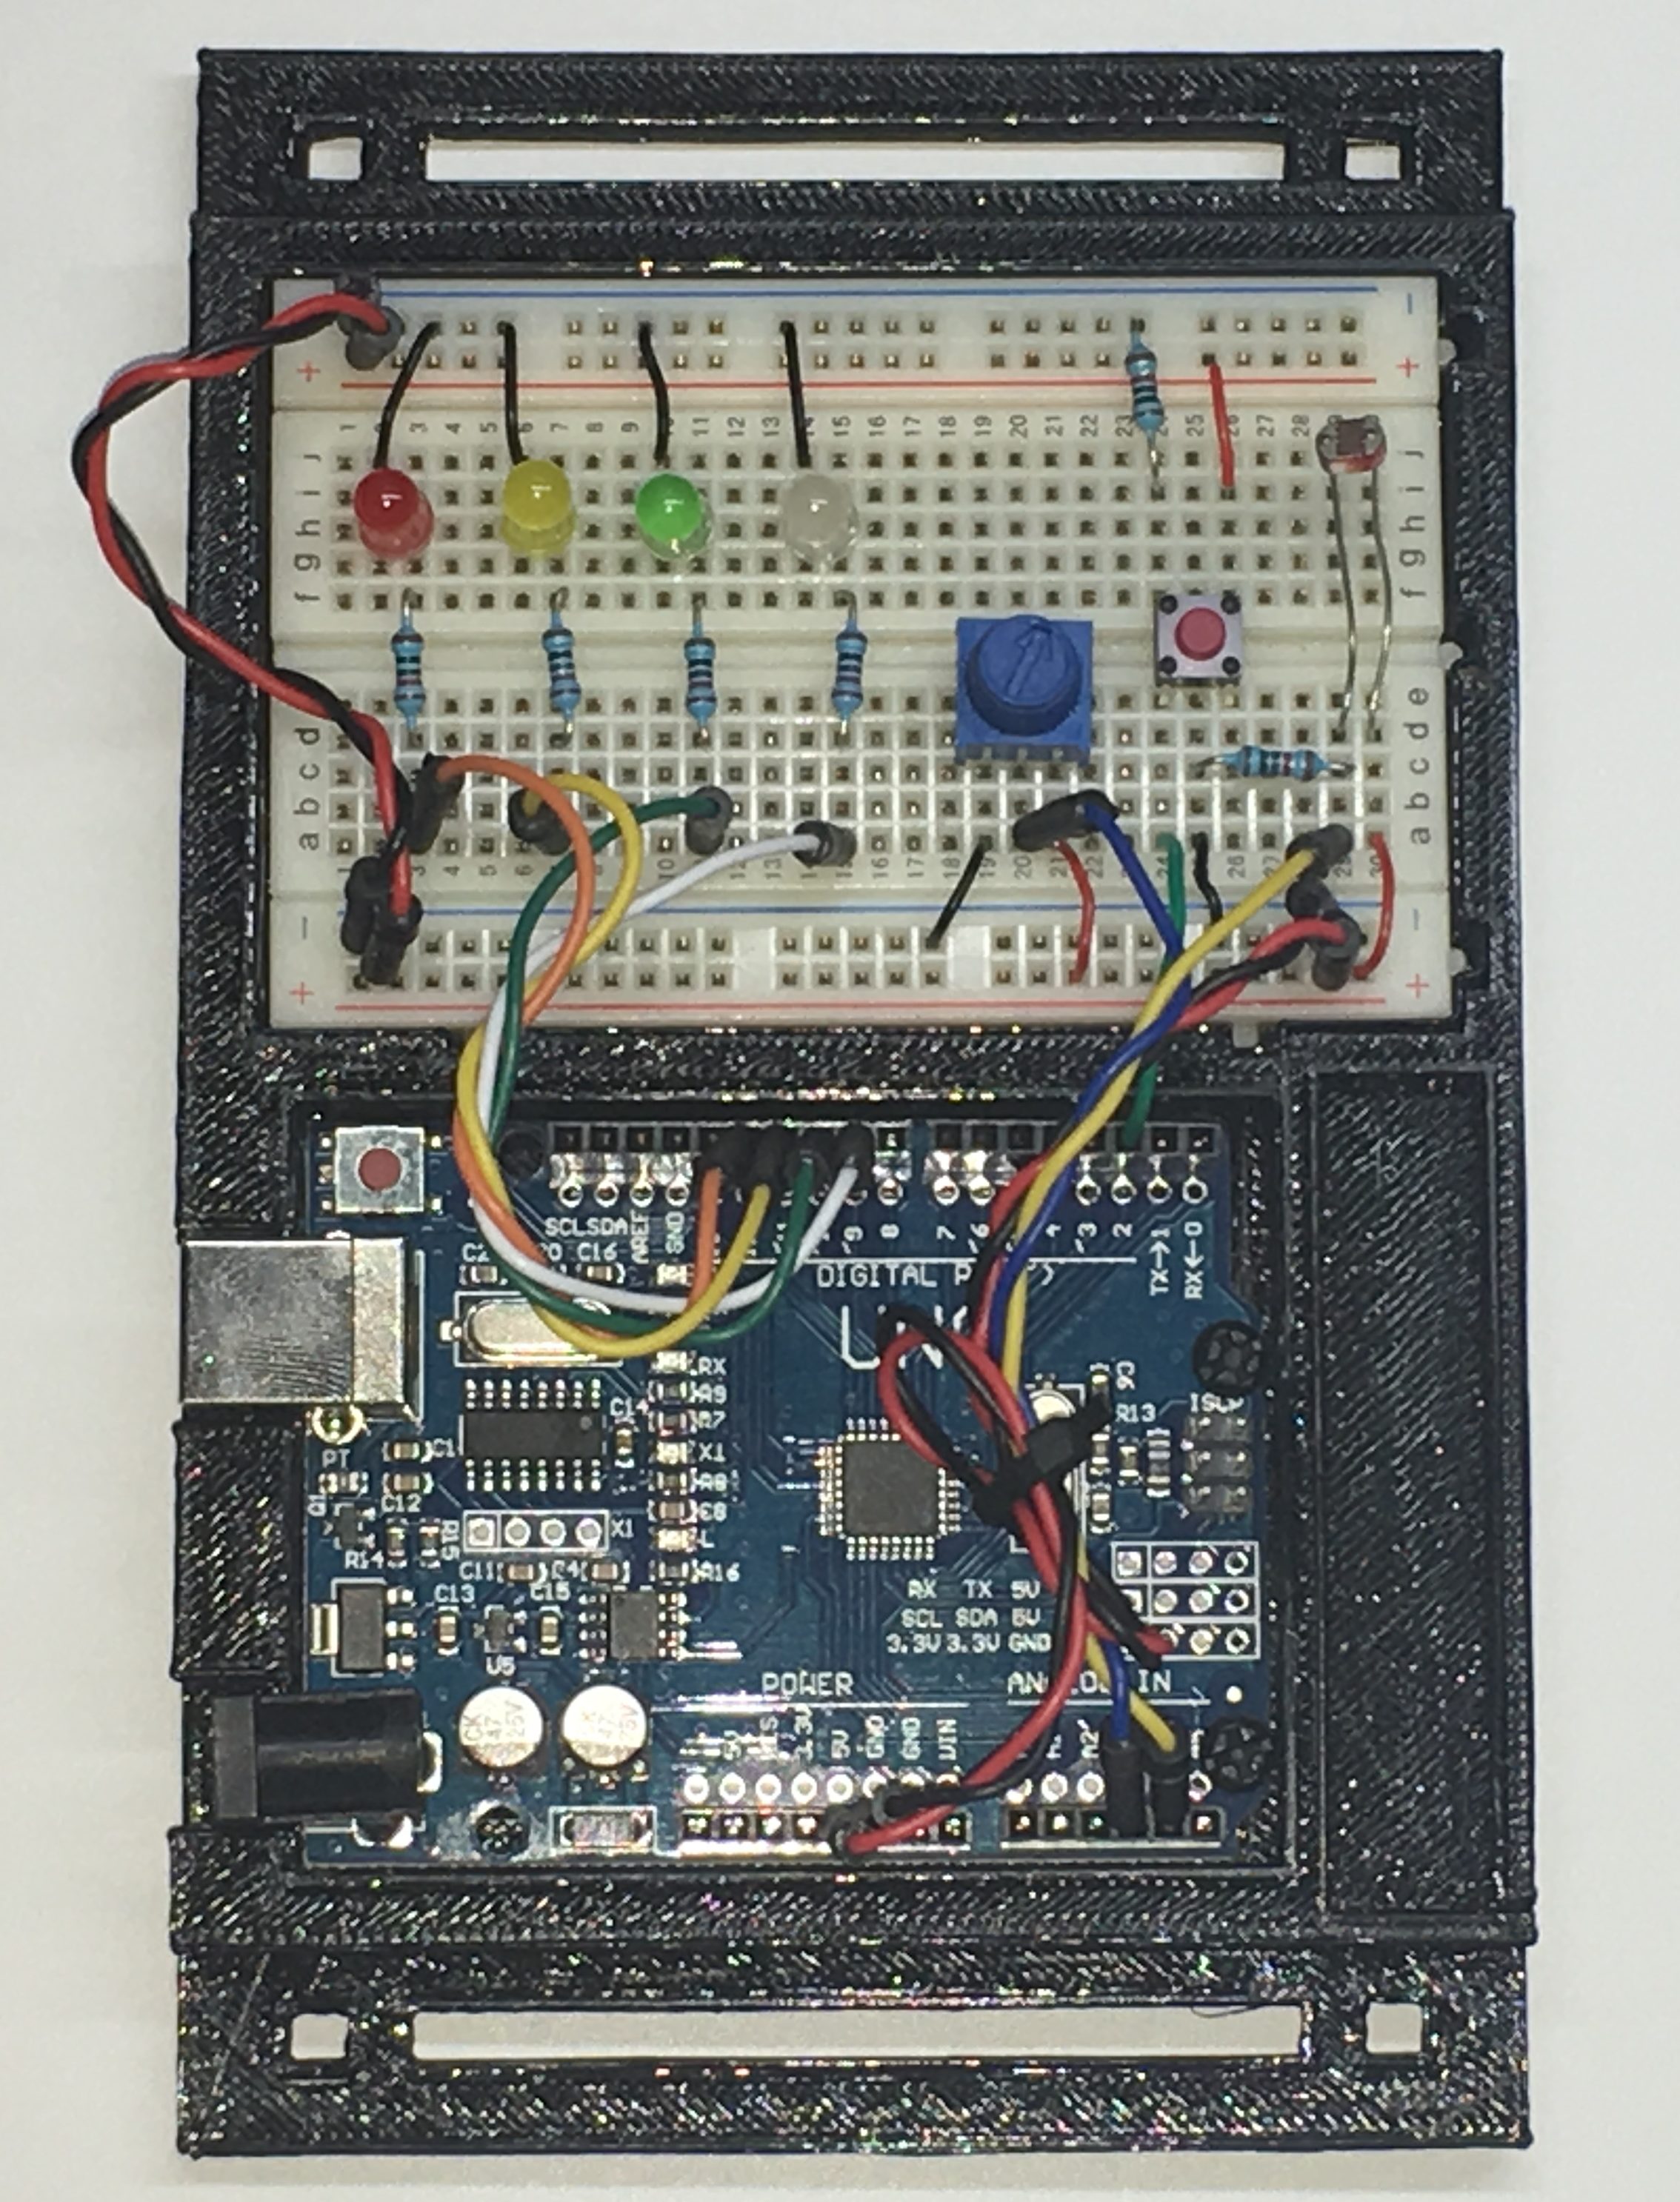
Blinking LED’s is a staple example of beginner Arduino programming. In this tutorial, we’re going to step it up a notch and use both arrays and the random() method to determine which LED to turn on and off for a duration.
Materials for Random LED project
- Arduino Uno (or similar controller)
- Breadboard
- 4X LED’s in various colors (We’re using Red, Yellow, Green, and White)
- 4X 220-ohm resistors
- Jumper Wires
- USB Cable to download the program
- Arduino IDE & laptop
Here’s a kit you can use which has all the components.
Amaze your friends with this randomized LED generator
This project is not only fun, but it’s rather straightforward. We will wire the LED to a digital input pin on our Arduino. Then, we’ll send a signal to the pin we want to trigger. This will serve as the “random” LED.
Grab your materials, and let’s wire up the circuit.

Define the process before writing any code
We’re going to start by mapping out the process of how this device should work.
First, we want to determine which LED should turn on. We will use the random() method from the Arduino Library.
Next, we want to determine which color has been selected. We can use an array of Strings for each color name to identify the selected LED. We can initialize the Serial Monitor and then print out the color once it’s been selected.
Finally, we’ll turn the chosen LED on and off using the same strategy as the Blink example sketch, digitalWrite(...) and delay(...).
For clarity, I’m going to wrap this all up into a separate method and then call the method in loop(). You’re more than welcome to include the code in loop(), but I think it looks cleaner writing a separate method.
Translate your process into Arduino code
Now that we have ourselves a roadmap, we’ll open up the Arduino IDE, and translate the process into code.
Start by mapping your LED’s
I always recommend creating global variables for all Inputs and Outputs connected to your Arduino board. Then when you want to use that sensor or device, it’s already defined within your code!
/*
   Random LED Generator
   Last Revision: 6/7/18
   Written by Learn Robotics
   www.www.learnrobotics.org
   --------------------------
   Pin Wiring:
   ===========
   OUTPUTS
    - BUILT-IN LED: 13
    - RED LED: 12
    - YELLOW LED: 11 | PWM CAPABLE
    - GREEN LED: 10 | PWM CAPABLE
    - WHITE LED: 9 | PWM CAPABLE
*/

// OUTPUTS
int red_led = 12;
int yellow_led = 11;
int green_led = 10;
int white_led = 9;

/*
Create an array (size 4) to store color names
led_colors[0] = "white"
led_color[1] = "green"
led_color[2] = "yellow"
led_color[3] = "red"
*/
String led_colors[4] = {"white", "green", "yellow", "red"};

void setup() {
  // put your setup code here, to run once:

  //configure outputs
  pinMode(red_led, OUTPUT);
  pinMode(yellow_led, OUTPUT);
  pinMode(green_led, OUTPUT);
  pinMode(white_led, OUTPUT);

  Serial.begin(9600); //enable the serial monitor
}
Also, call pinMode(...) for each LED. They’ll be OUTPUTS in this case, since we are sending data from the Arduino to the outside world. Then, initialize the Serial Monitor, by calling
Serial.begin(9600);
We’ll use this to print out the color on the Serial Monitor.
The color of the LED will be stored into an array of Strings.
String led_colors[4] = {"white", "green", "yellow", "red"};
An array stores values in an indexed list. That means, we can call the array variable, led_colors using an index number 0-3. In computer programming, you start counting indexes at 0. Therefore, white is 0, green is 1, yellow is 2, and red is 3. So, if you want to get the value green, you’d reference led_colors[1]. We’ll expand on this concept to print out the color name once we obtain the randomly generated LED pin.
Select a Random LED and identify the color from the array
The random number we’ll select will be between 9 and 13 because we have LEDs plugged into these pins. Then, we’ll map the selected number 9-13 to the range 0-3, which will form the index of the color_map array. Next, we can print out the color using the mapped index, our led_color array, and the Serial.print(...) command. Finally, we turn the selected LED pin HIGH (on), delay for 1/2 second, then LOW (off), for 1/2 a second.
This is the code we obtain once we piece it all together.
/*
   Select a random LED to turn on
   Print out the name of the color
   in the Serial Monitor
*/
void random_led() {
  // pick a pin number 9-13 because we have LEDs on those pins...
  int random_led = random(9, 13);

  // generate our map of the random LED to the map of our array
  int color_map = map(random_led, 9, 12, 0, 3);
  Serial.print("Color is... ");
  // Use the random array number to print out the color
  Serial.println(led_colors[color_map]);

  //turn the LED on, then off for 1/2 second
  digitalWrite(random_led, HIGH);
  delay(500);
  digitalWrite(random_led, LOW);
  delay(500);
}
Call the random_led() method in loop(). Then upload the code to your Arduino & test it out!
https://www.instagram.com/p/BjS_6qmgVS4/?taken-by=learnrobotics
Snag our Arduino Project eBook!
If you liked this tutorial, you’re going to want to check out our Arduino Projects Workbook. Build over 20+ hours worth of Arduino Prototypes that are built with Arduino and common electronics. You won’t want to miss this!
Have question? Drop it in the comment section!
And don’t forget to tag us in your Random LED Dance Party @learnrobotics on Facebook & Instagram!


4 Responses
Hi…its great to have found your lab for this subject. Im trying to do a random () on a non-sequence pin range, is there a way to map this by assigning globals to the pins in that non-sequence range?
This question come from using led ports in a nano board, the issue arises after I do 2 mode program where in one if statement I apply random to a sequence range (2-7), and in the 2nd mode I need to apply random() to a non-sequence range (2,3,4,5,8,9).
Thank you in advance : D
Aurello, thanks for dropping by.
random()method in Arduino has input parameters that are the min and max respectively.Because you have a non-sequence range that’s relatively small (n = 8), and only 2 of the numbers are “invalid,” I’d recommend running random on this range (2-8) and then if the result is 6 or 7, run
random()again. do this until you have a valid number selection.This is pretty hacky, and I’m sure there’s a possibility that you’ll get stuck inside a loop of invalid random results. However, if you don’t need to enforce random results, you could always set a fallback LED pin.
Let me know how it goes!
Hello Again Liz, thanks a mill for your reply and suggestion. I was able to pull it of using an array for it…it was pretty cool going through all the process of trying out..and of course, sweet success was awesome. So I ended up forming an array with the non-sequence pinouts, from there I normalized them with the map function, after this I called it using random() inside the array and voila! I tried so many ways and finally weaved this in. Thanks allot again for sharing
Very good! That sounds like a great solution! Feel free to tag me in your project on Social Media (@learnrobotics). I’m curious to see how it turned out 🙂