Welcome back to another Learn Robotics Tutorial! In this article, I will show you how to use the NodeMCU controller (ESP8266) with dweet.io & Freeboard.io to collect, publish, and display sensor data.
The inspiration behind this tutorial stems from my experience in manufacturing. We have a ton of legacy equipment that isn’t “connected.” Therefore, we don’t know when a machine is running, down, or fully staffed unless we are physically standing at the machine. I’m going to show you how to simulate machine status in a manufacturing environment.
Furthermore, we will be using concepts from the tutorial I wrote on publishing to dweet.io. If you haven’t checked that out, please read that tutorial first.
NodeMCU, dweet.io, & Freeboard.io Tutorial
I’m going to break this article into a few sections:
1. Wire up your NodeMCU Circuit
2. Write code to publish to dweet.io
This tutorial will be more technical. I highly recommend background in Arduino programming, Breadboarding, and previous tutorials on using dweet.io. While this will be a thorough walkthrough for this application, it won’t be a comprehensive review of the basics.
Gather your Materials
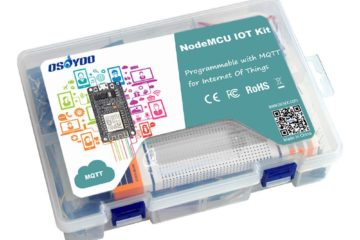
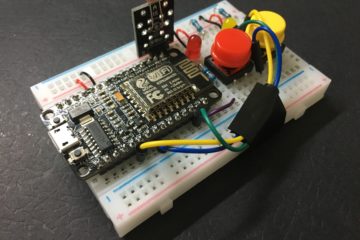
Before we begin, be sure to gather up your materials. I highly recommend the Osoyoo NodeMCU IOT Starter kit because it has 100% of the components you need to complete this project. Plus, at less than $35, you really can’t go wrong!
Shout out to Osoyoo for working with us to provide a kit for this tutorial. I’m a huge critic when it comes to electronic kits. But, I’m highly satisfied with the quality components, sturdy packaging, and affordable price for this kit. Feel free to pick yours up here.
Wire up your NodeMCU Circuit
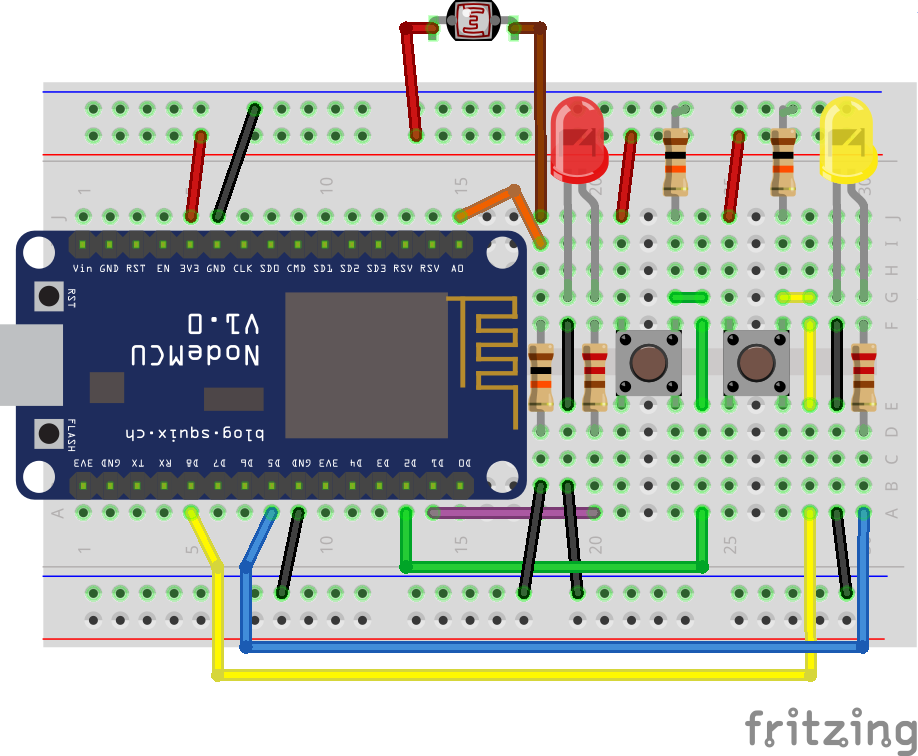
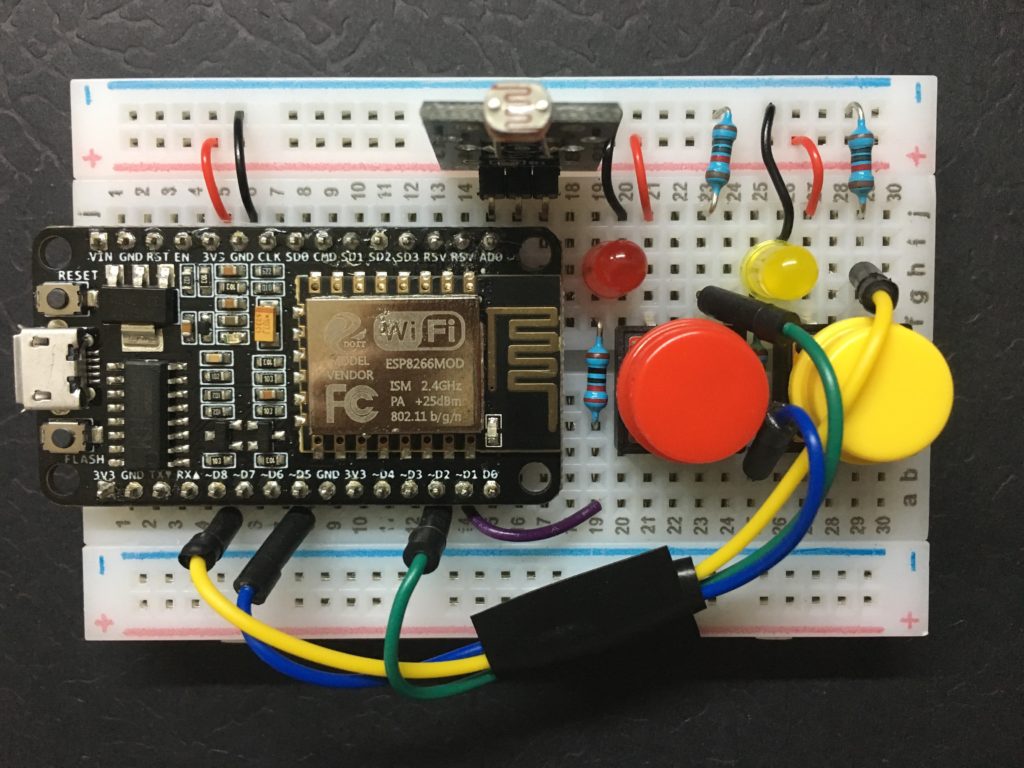
We’re going to use 3 INPUTS (2 push buttons and 1 Light Dependent Resistor – LDR) and 2 OUTPUTS (2X LEDs) for this tutorial.
Here’s a look at the circuit diagram. I’ve opted to use a 400 pin breadboard, but I highly recommend using an 800 pin breadboard. It’s a lot easier to wire up with more space.
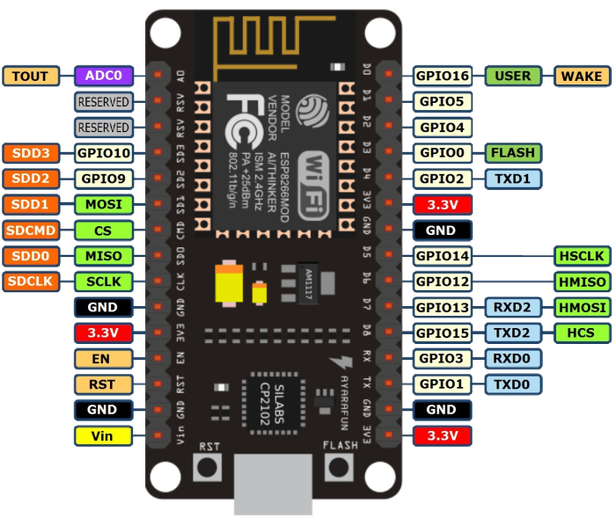
Once you’ve wired up to your NodeMCU, it’s a good idea to check out the wiring diagram for this circuit board. Unlike other Arduino boards, it’s better to reference the GPIO PIN rather than the pin name written on the board.
Test all the I/O before continuing
It’s always good practice to test all inputs & outputs (I/O) before continuing. You can use the sample code, or write your own. Just make sure that your devices are connected to the same pins like the ones in the script. Otherwise, it won’t work.
Write code to publish to dweet.io
If you remember the tutorial on publishing data to dweet.io, we used a Wemos D1 mini to share LDR data. Dweet.io is a simple, yet robust site where you can publish data online from sensors. Think of it like Twitter for your connected components. Messages are called “dweets.”
Defining the application
We are going to expand on this code to include metrics to monitor a furnace. Each I/O will represent the status or a sensor on our furnace.
INPUTS
- Red Button: Sets Machine Status
- Yellow Button: Sets Operator Status
- LDR: Sets Oven Temperature
OUTPUTS
- Red LED: Displays Machine Status (On = Running, Off = Down)
- Yellow LED: Displays Operator Status (On = Staffed, Off = Unstaffed)
Reuse Code because inventing the wheel is unnecessary
Here’s the code from our previous dweet.io tutorial. It’s rather long, so click the link to view it on Github Gist.
Let’s polish it up for our furnace monitoring device.
First, modify the I/O defined as global variables. Then create an array of 3 key metrics: Temperature, Status, Staff. Initialize these readings to zero.
The code should look something like this when you’re finished.
Don’t forget to debounce your buttons
Since we’re using multiple buttons in this project, you have two choices. #1 Hardwire the buttons to the LED’s or #2 use debouncing in software to check the button and set the LED. I’ve designed this to use option #2, but #1 would be easier, presuming you don’t want to set the LED’s from the NodeMCU.
Here’s the debouncing code added to our project.
You’ll notice I’ve repeated the debouncing code once for each button. I did this intentionally because I wanted to have separate global variables to check the state of each button. There are quicker and shorter ways of doing this, but for clarity, I’ve opted for this method.
I also moved the publishing code from the loop() method to a separate pubDweet() method. This allows me to call each button (redCtrl() and yellowCtrl() from loop()) then initiate a call to pubDweet(). pubDweet() collects a reading from the LDR then sends the readings up to dweet.io.
Modify data for clarity
The LDR I used for this tutorial has a pull-up resistor, so the readings appear “backward.” Brighter conditions yield lower numbers and darker conditions result in higher numbers. Rather than rewire the sensor, I collect a reading and then subtract from 1024 (line 182). This gives the reverse effect.
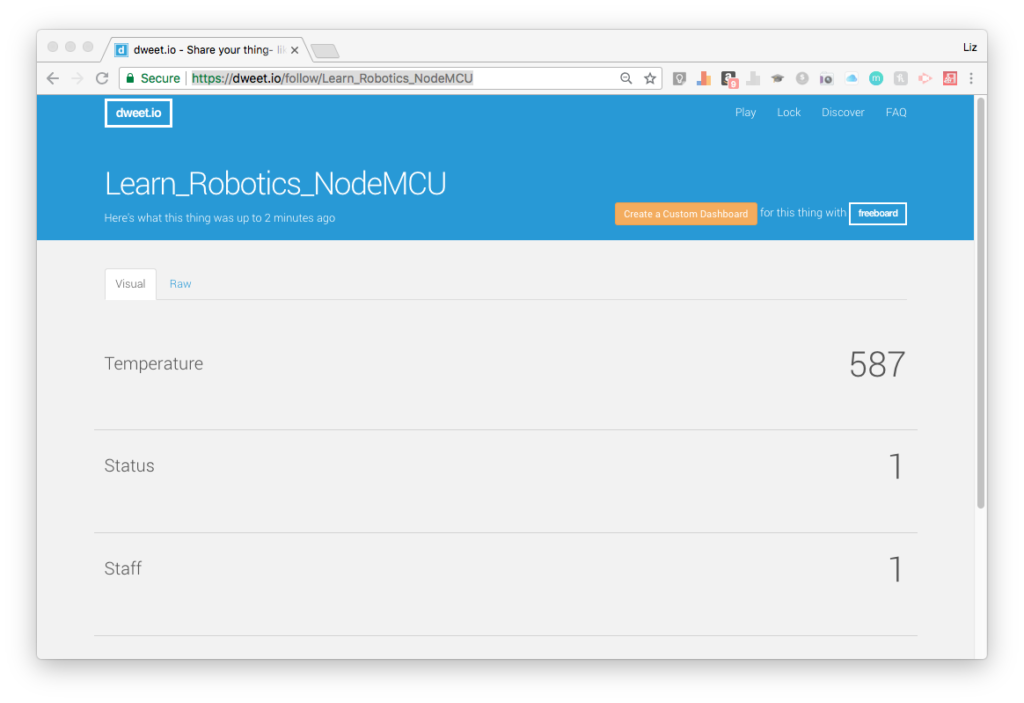
Once you have your code, go ahead and compile and upload it to your NodeMCU. Visit https://dweet.io/follow/Learn_Robotics_NodeMCU to view the published data. If you changed the thing name (line 26) to blueHippo, then your URL will be https://dweet.io/follow/blueHippo
You should see something like this if your device is working properly.
Also, if you press the RED button, the RED LED should illuminate. If you press the YELLOW button, the YELLOW LED should light up. Verify that this works as well. If not, revisit this section and make sure it’s working before moving to the next step.
If all looks good, it’s time to create our visualization using freeboard.io.
You’ll need to create a free account. Freeboard.io is free for 30 days. Pricing starts at $12/mo for their Micro plan up to $100/mo for their Large plan. I’m not sure if they’ll make you switch to a paid plan after 30 days, but this should be enough time to get you started.
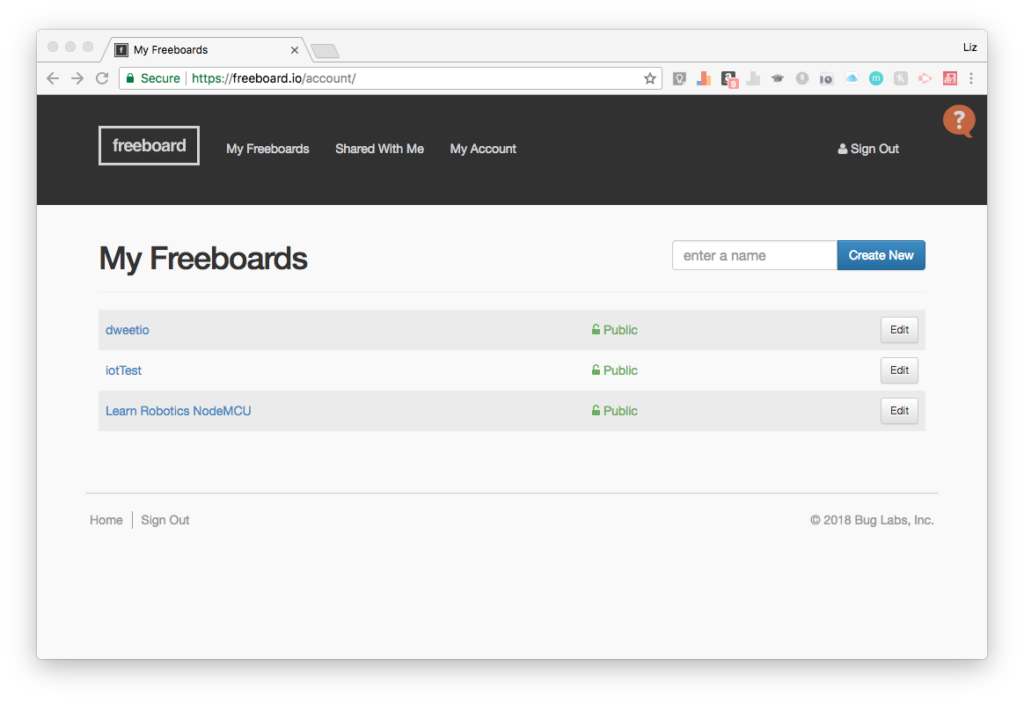
Create a freeboard display
Once you log in to your account, you’ll be able to create a new freeboard. I’ve named mine Learn Robotics NodeMCU for this tutorial. It’s public, so feel free to check it out!
Add a Datasource
Freeboard.io and dweet.io work nicely together because they’re developed by the same company.
Click on the ADD button under the Datasources section in the top right corner.
Select Dweet.io from the drop-down menu. Type in whatever name you want to call this Datasource. The Thing Name will be the thing we defined above in our code. The default code uses Learn_Robotics_NodeMCU as the thing name. But, if you changed it to blueHippo, you’d type blueHippo here.
If your dweet is locked (or private), you’ll enter its Key in the key field.
Lastly, you can opt to show the full payload which includes timestamps. I recommend choosing YES in case you want to use it at a later time.
This is what my configuration looks like:
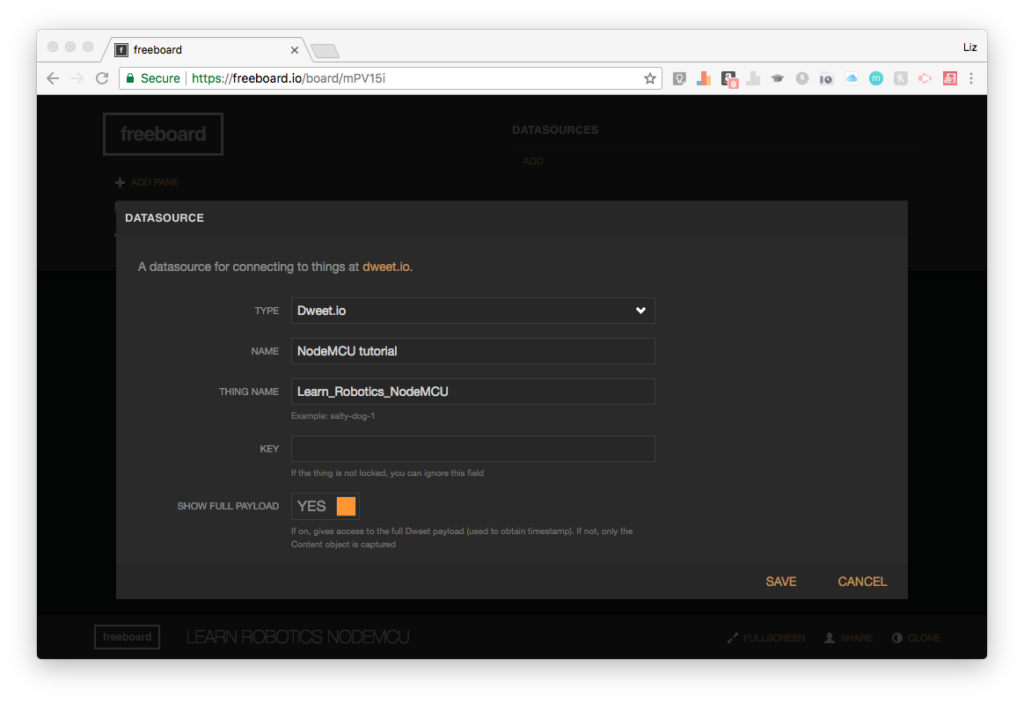
When you’re done, click SAVE. The data source should appear in the top right corner.
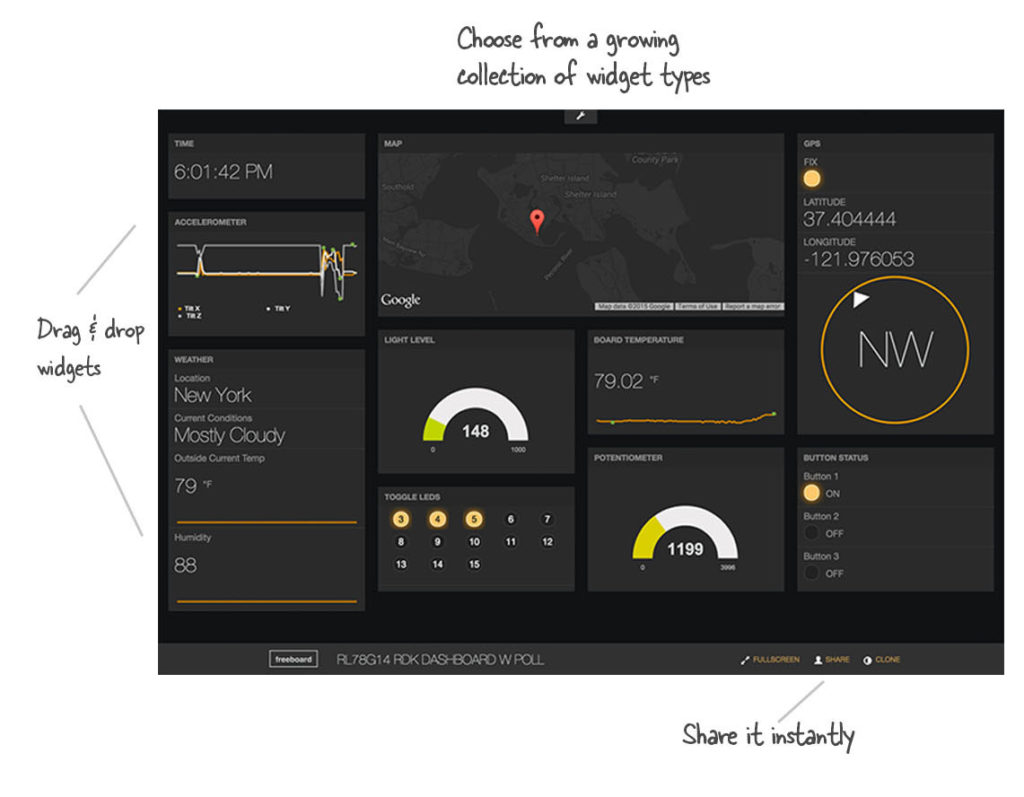
Bring data to life with Widgets
To add widgets to the display, you’ll first have to add a pane. Click the ADD PANE button in the top left corner.
Then, press the plus “+” button inside the pane to add a widget. Next, select the widget type. I’m going to use a Gauge to display Temperature. The Value is connected to the data source. Click the + DATASOURCE button next to the Value line. Dweet.io creates a JSON format that is easily parsed by software. This means you’ll have to navigate through the list of key-value pairs.
Select NodeMCU tutorial > content > Temperature. This is what it looks like when it’s configured.
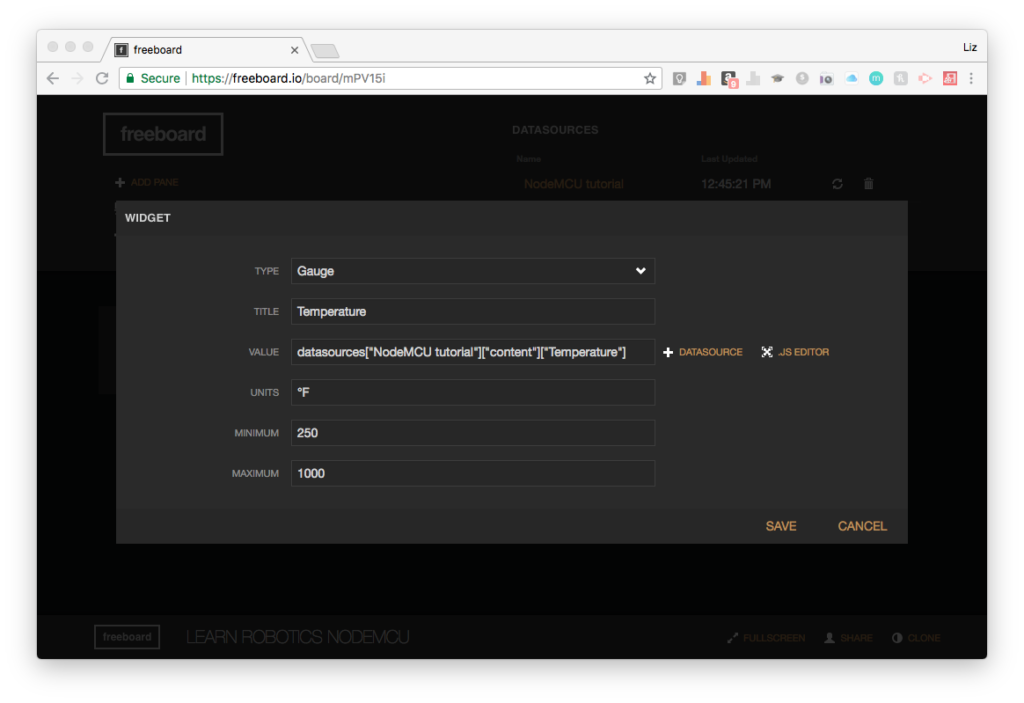
Click SAVE. This is what the display looks like. You should see the same reading on dweet.io and freeboard.io. It updates in real-time, so if you cover the LDR, you should see the temperature gauge drop instantly.

Repeat the same steps for the Machine Status and Operator Present metrics. Try out different widgets for visualizing data. You can also bring in the Date/Time as well as the location of your simulated factory. These displays are public, so be careful with sharing your exact location.
Visit this link, to check out the completed freeboard.io display.
Wrap up & Final Thoughts
And, that’s a wrap for this week’s tutorial. If you liked it, be sure to share it with your friends!
I wrote this tutorial for other engineers interested in IoT and Industry 4.0. While there is a real-world application for this project, I can also see a benefit for schools in completing an activity like this in their classrooms.
Unique Classroom Experience
For under $1,000 you could have a cool elective course. Students can work in small groups or pairs to develop a project like this.
We even offer training for advanced educators. The possibilities are endless. If you’d like to bring a project like this to your school, contact me here. Learn Robotics is proud to offer affordable, real-world engineering curriculum and consulting services for schools across the United States.