I want to warn you before you read this article. It’s very easy to get sucked into a black hole looking at NeoPixel projects.
Why are LEDs and RGB lights so fascinating? Is it random patterns or colors? Or it because LEDs make the world brighter and more interesting?
Regardless of the reason, these NeoPixel projects are downright ridiculously cool. If you’ve ever wanted to start an electronics or art project using LEDs, then you’ll want to add these project ideas to your repertoire.
Just be warned, you might be on this page for a while.
What is a NeoPixel or WS2812B LED strip?
Before we begin, it’s only fair to discuss what NeoPixels are. You’ve probably seen them before or have them in your house already.
That means if you want official, brand-name NeoPixels, you’ll purchase them through Adafruit.
Project 1: NeoPixel World Map
The first set of NeoPixel projects on the list is a NeoPixel World Map. There are many variations to this project, but essentially, the project uses RGB strips to light up a map of the world.
When art meets engineering, this is what you get…
World of Light by Joshua Krosenbrink
The World of Light project uses a Raspberry Pi and custom libraries to drive 426 RGB LEDs on a map to show realtime income website feedback.
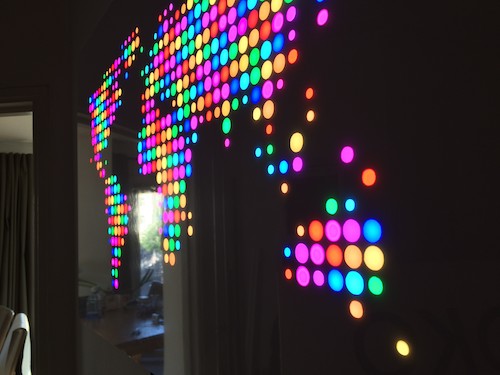
Don’t expect to build this in a few hours, though. Just wiring up (and soldering) the RGB strips will take you some time! Who knows, maybe one day I’ll have a version of this hanging in my office to display current website traffic on Learn Robotics! (Wouldn’t that be cool?!)
You can read more about the World of Light project on Hackaday.
World Map Project
Another version of this project uses laser-cut continents and NeoPixel strips. This beautiful piece measures over 6 feet long and weighs 15 pounds! The World Map has 578 LED lights and is controlled by an ESP8266 running the FastLED library.
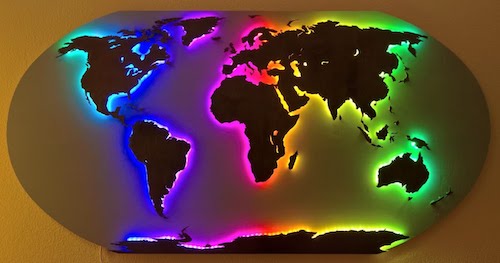
What makes this map unique is that all of the continents are backlit with WS2812B RGB strips. Wooden front panels cover the continents so that the map looks dimensional. While this map isn’t “connected” like the World of Light project, it uses the ESP8266 to drive the NeoPixels.
If you want to build this project yourself, there’s room to expand this into an IoT project or swap out the controller for a Raspberry Pi for more complex ideas. This project takes a lot of time and the process is well documented on the maker’s website. Check it out here.
Parts you might need:
[amazon box=”B01CDTECSG,B00SLYAHSW,B081CSJV2V” template=”list”]Project 2: Wearable NeoPixel Disco Helmet
Next, we have a wearable NeoPixel project: a Disco Helmet. The Disco Helmet project by Electromaker combines 3D printing with electronics and programming to create a fully-customizable DIY helmet.
The NeoPixel Disco Helmet powered by Arduino, which means you can create all sorts of light shows, patterns, and displays. While you might not be able to see very well out of this helmet, it looks cool and could be modified if you want to wear it to a convention or as part of a costume.
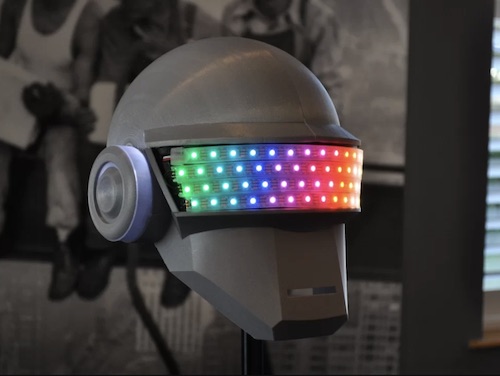
If you’re into EDM you can adjust the code to synchronize the RGBs with music. Pretty cool, right?!
Want to build one? Preheat your 3D printer, and snag the 3D printer files and wiring diagrams on Thingiverse.
Parts you might need:
[amazon box=”B07D218NX3,B015I1CYFE,B00R5CBOWY,B01EWNUUUA” template=”list”]Project 3: Running Water Faucet with NeoPixel Ring
Thirdly, we have a NeoPixel project that uses the NeoPixel Ring. In previous projects, we saw examples of NeoPixel strips. If you want to display light in a circular direction, the NeoPixel Ring comes in handy.
The Running Water Faucet is a lamp that gives the illusion that water is spewing out of a faucet and into a mug.
This project uses the Adafruit Flora controller, but you can use any controller you’d like depending on what you’re trying to do! More details on how to make this project can be found on Instructables.
Parts you might need:
[amazon box=”B0105VMWRM,B0105VMT4S,B00J2QFB20″ template=”list”]Project 4: NeoPixel Matrix Animations
Next, we have a NeoPixel project that uses an RGB array to convert images or sprites into animated displays.
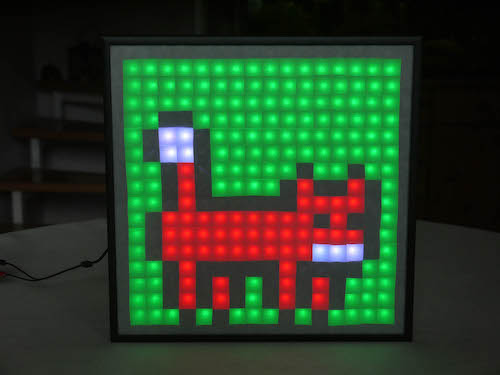
You can find sprites on Spriters Resource and then convert them into matrices based on the size of your NeoPixel array. Then, once you have the image, you can save it as a bitmap image and use a software tool to convert the image into a C array that can be read by Arduino. After you have the image represented in C, you can open the Arduino IDE and program away! More technical details can be found using this programming video.
Here are some useful utilities if you’re working on this project:
Bitmap to C Software — Click here for Mac Software
LCD Image Converter — Click here for Windows Software
Parts you might need:
[amazon box=”B07GVR3FNS,B01NBZ5FHT,B071VN9D6N,B01LSF4Q0A,B007R9TUJE” template=”list”]Project 5: NeoPixel Glowing Tikis
If you’re big into summer BBQs and outdoor chilling, then you’ll want to check out this NeoPixel project. Using a NeoPixel strip, a mason jar, and some clear plastic beads, you can create glowing tikis in an hour or less.
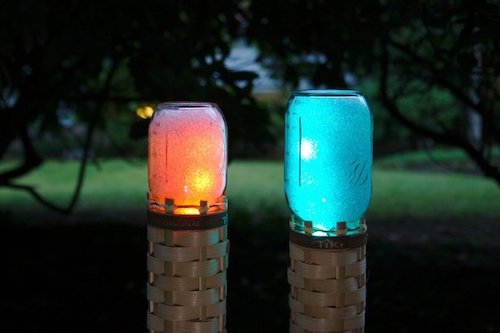
The Tikis can be illuminated with a variety of colors and are weatherproof enough to stay outside for a while. The NeoPixel Glowing Tikis are also a great way to get the kids involved in a useful tech project during those warm summer months! Find all of the build instructions on the Make: website.
Parts you might need:
[amazon box=”B07JGNCLLM,B00NJA1002,B075DLJJDD,B06XNN825B,B01EE4VXS0″ template=”list”]Project 6: NeoPixel Ring and Arduino Bike Light
This sci-fi inspired NeoPixel project by Adafruit combines a NeoPixel ring and a NeoPixel Jewel to create an Arduino Bike Light. The headlight fixture was inspired by rocket boosters and jet engines.
The Arduino Bike Light has a built-in control box that allows you to navigate through a variety of colors and animations. All of the 3D parts for building this project are available on Adafruit’s website so you can remix and re-modify the files to best fit your bike.
Bikes aren’t the only thing you can mod out with LEDs. If you’re into longboarding, there are NeoPixel projects for that as well.
Parts you might need:
[amazon box=”B0105VMWRM,B0105VMT4S,B00MB3CV6K,B00J0ECR5I,B07R9VWD39,” template=”list”]Project 7: NeoPixel LED Mirror
What do you get when you combine 576 NeoPixels, a Raspberry Pi, and a Raspberry Pi camera? If you guessed a NeoPixel LED mirror, then you’re correct!
When you walk up to this huge 24×24 array of RGB LEDs and you’ll see a grayscale version of your reflection in realtime.
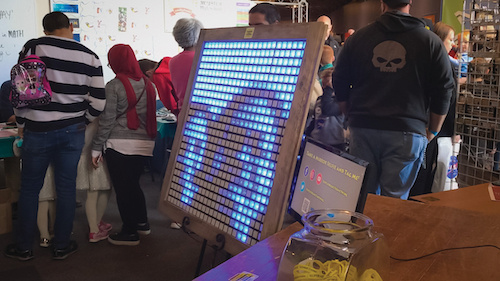
First, the Raspberry Pi camera takes a photo and the image is reduced to a small region of 24×24 pixels. Then the image is converted into a grayscale matrix and translated into a 1×576 vector to assign colors and brightness values to the LEDs.
If you’re looking for a longer project to hone your skills in laser cutting, 3D printing, electronics, and coding, then this could be an interesting one to try!
You can learn more about the NeoPixel LED Mirror on the Super Make Something here.
Parts you might need:
[amazon box=”B07V5JTMV9,B07JPLV5K1,B07F8TMC7Z,B01LSF4Q0A” template=”list”]Which of these ridiculously cool NeoPixel projects are you planning to try? Leave a comment below!
Sharing is caring! If you enjoyed this article, please share it on your favorite Social Media platform.

