

Last week, we looked at fetching data from dweet.io using Python. Then we found a way to retrieve data and store it in a local database. In this tutorial, we’re going to create our own electronic device and publish data to dweet.io.
Hardware for this project
You will need a WiFi-compatible controller to complete this tutorial. We will be using the Wemos D1 Mini, which you can pick up here.
I also recommend picking up a sensor kit. We will measure brightness in this tutorial, so a simple photoresistor (LDR), mounted to a breadboard with a resistor, and some jumper wires will suffice. Depending on what you’re trying to measure, you may want to purchase a starter or advanced Arduino kit.
This tutorial assumes you have experience with Arduino. I will not review the common setup and configuration for Arduino in this tutorial, but if you need a refresher, check out this article.
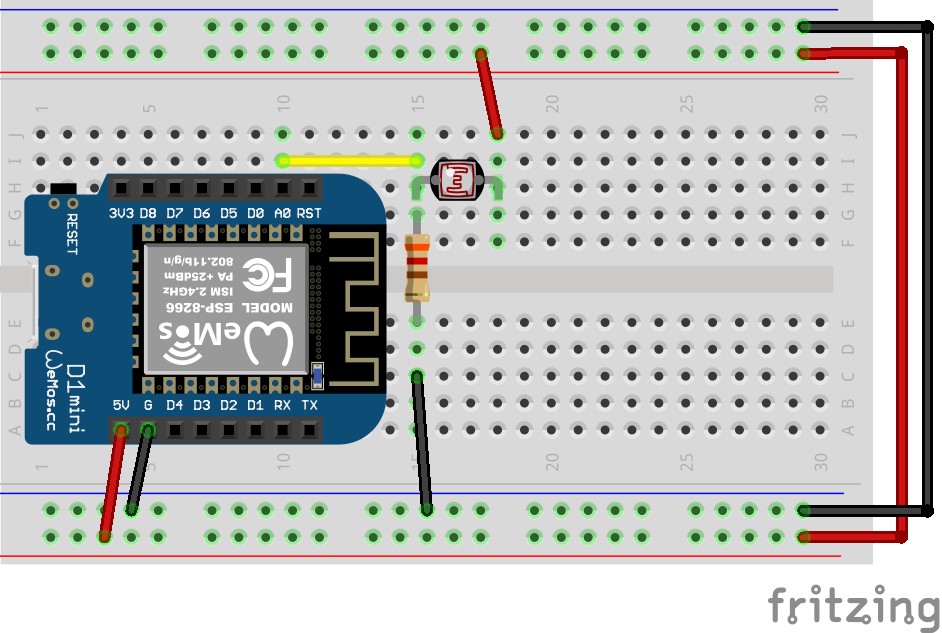
Wire up your circuit
Here’s the configuration for the circuit we will use in this tutorial.
Make sure you have the drivers installed, or it may not recognize your controller. Then connect the Wemos D1 Mini to your computer. Feel free to use whatever IDE you like to code up your controller.
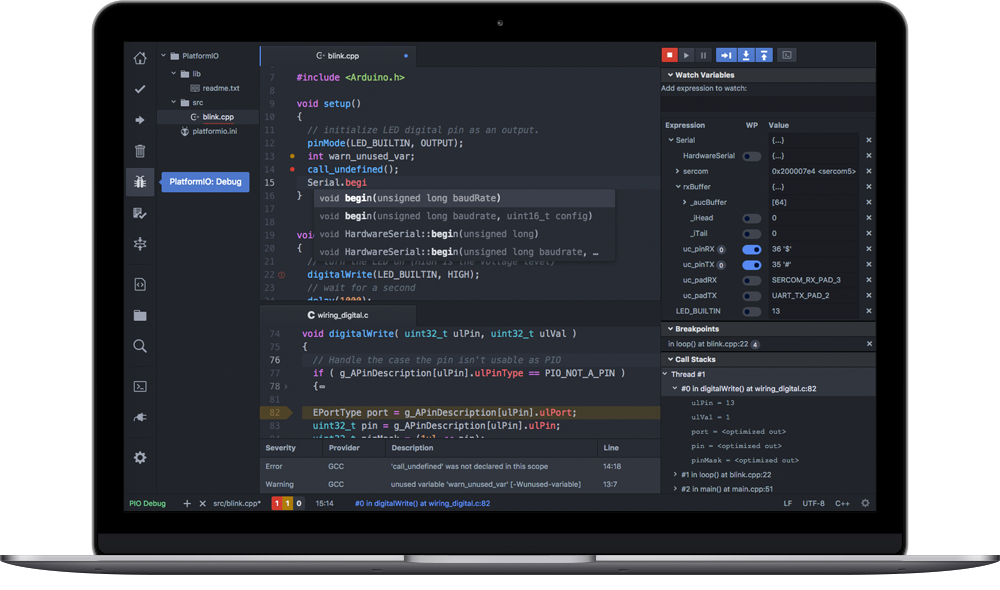
I recently tried out the Platformio IDE (built on Atom.io), and it’s definitely a leg above the regular Arduino IDE. If you’re more advanced, then I highly recommend checking it out.
Software for dweet.io with Wemos D1 Mini
If you’d like to follow along with this project, you can download the sample code, below.
Here’s your download!
Arduino to Dweet.io Example Sketch (.ino)
First, include the ESP8266WiFi library. Next, you’ll enter in your WiFi network name (ssid) and password. We’ll create a string to call our dweet “thing”. And, the hostname is “dweet.io.”
Finally, we create an array of variable names to store the name(s) of the metrics we want to send to dweet.io. Initialize the variable values to zero.
Then, create a variable to store the LDR data. Since the Wemos D1 mini only has 1 analog pin, we will connect the LDR to pin A0. If you’re using a different board, then make sure you change this value to whichever pin the sensor is connected to.
Initialize configuration in the Setup method
Initialize the LDR sensor using the built-in pinMode(...) method. Next, begin the Serial Monitor. The Wemos D1 mini runs at 115200 baud. Make sure you adjust this value because the default is 9600 baud.
The next section configures the WiFi connection from the Wemos to your Internet Network. It’s written so that the device has 15 tries to connect or it will fail. The print lines shows the current status of the WiFi connection. I’ve commented the code to make it easier to decipher.
Custom Methods for Dweet.io
Now that our Wemos is connected to the Internet, we need a way to publish data to dweet.io. Therefore, we create two custom methods: String getDweetString() and void sendDweet().
getDweetString() provides a way to get the dweet.io URL String to publish to.
sendDweet() allows us to publish sensor data to dweet.io.
Once we have these methods, we can use them in the loop() method to execute code on our Wemos board.
Put it all together in loop()
We’ll collect a reading from the LDR sensor and print it out to the serial monitor. Then we’ll set the arrayVariableValue equal to the LDR reading and assign it a String name “Brightness.” Lastly, we’ll call sendDweet().
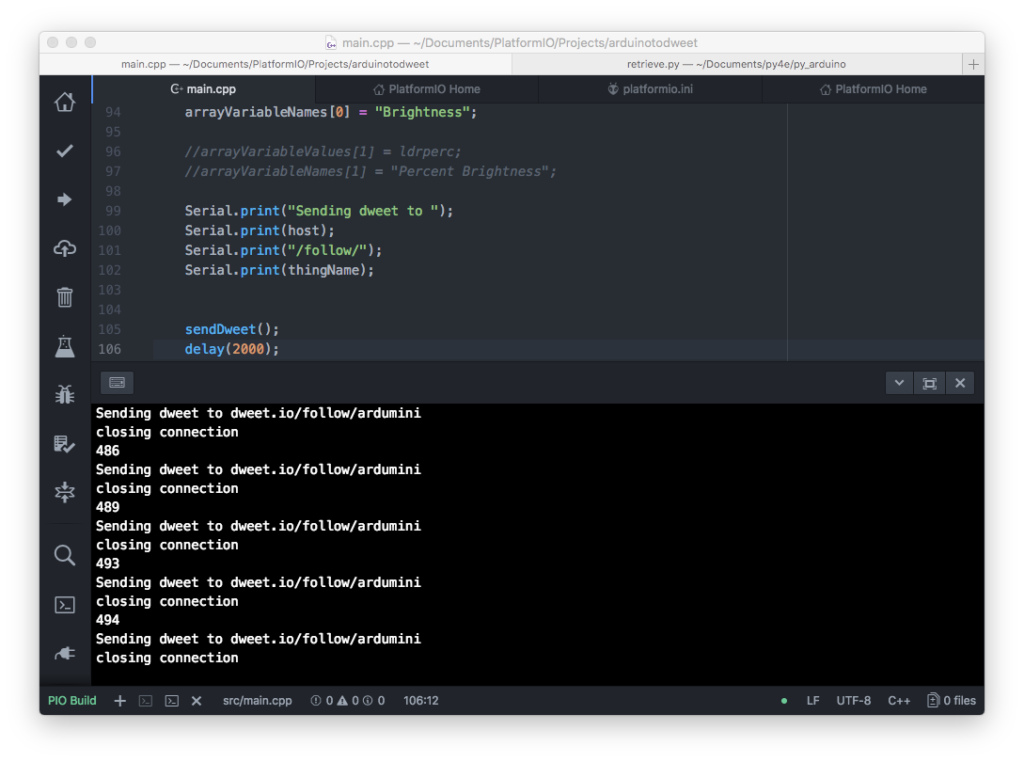
I’ve set the refresh rate to 2 seconds (2000 msec), but you can adjust this based on how frequently you want to send data to dweet.io.
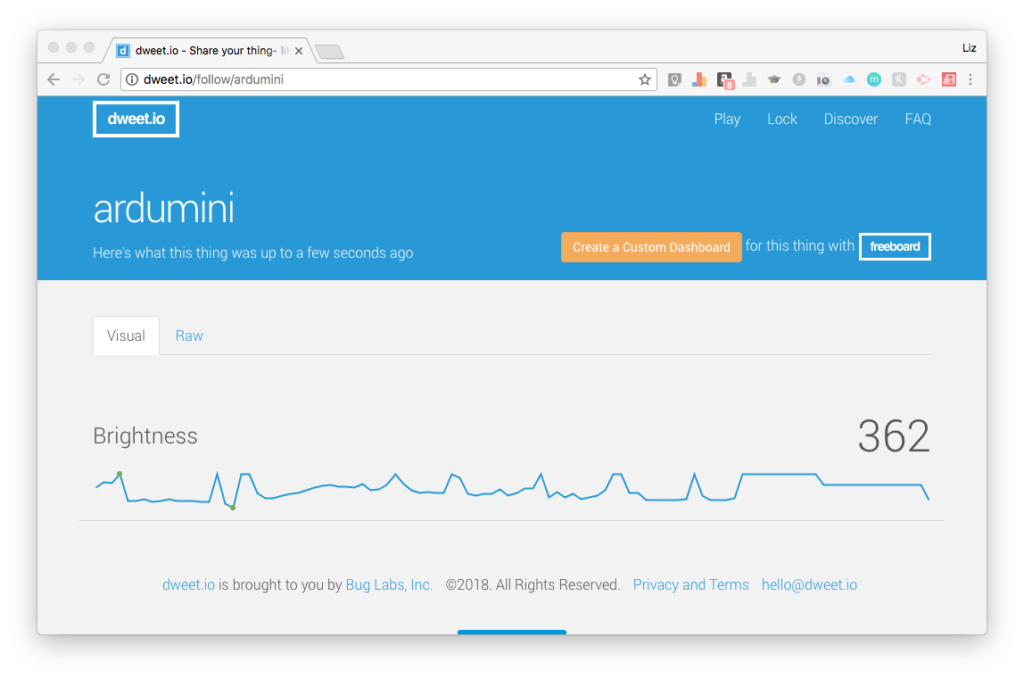
If you used the sample code, you can view your thing’s data at dweet.io/follow/ardumini
The thing name is set in the global variables as String thingName = “ardumini”; Feel free to change this name to best suit your application.
Considerations & Applications
Once you have everything working, I recommend deploying this application in a remote setting.
If your device is tethered to your computer, it’s pretty useless. Therefore, the best applications for this would be field devices.
Measure the brightness of your garden. Determine when the water level is low on your pool so that you can refill it. Use it to collect temperature readings on your weather station. These are just a few cool applications where a device like this would make sense. The possibilities are endless!
Take it further with Cellular
If you’re in a remote environment, you may want to consider using a cellular connection. I recommend checking out some products and tutorials on Hologram.
Dweet.io lifespan
Dweet.io keeps the last 5 dweets for 24 hours. If you want to keep more data, you’ll have to purchase a lock ($1.99/mo). You can read more about the limitations (or benefits) to dweet.io, here.


2 Responses
I can’t seem to find a link to the code you’re using, am I missing it? Can you help me find it? Thanks 🙂
Hey there Tony, yes, I’ve added the example code to the post. Check it out!