

Halloween is near, and what better way to celebrate than to make a glowing ghost project! In this tutorial, I’ll show you how to wire up and solder a perf board to create a ghost that automatically lights up when it’s dark (and shuts off in the light).
This project was featured on Episode 2 of Learn Robotics LIVE. If you haven’t checked out Learn Robotics LIVE, you can view the replay in the Special Topics Robotics Course. Join the course, here.

Materials for the Glowing Ghosts
This project assumes some (but not professional) soldering skills. If you’re 100% new to soldering, I recommend picking up a soldering kit and practicing before attempting this project.
If you’d like to make one of these glowing ghosts, without having a gazillion spare parts, you can pick up a Glowing Ghosts Kit on the LR shop. Otherwise, you’ll need to have the following materials available.
- Perf board
- 2X 10 KΩ, 1X 1KΩ, 1X 100Ω resistors
- 1X Photoresistor
- 1X NPN Transistor
- 1X LED (Green, Red, Blue, or Yellow)
- 2X jumper wires
- 1X button cell battery holder
Tools You’ll Need
This project also requires some tools. Here’s what you’ll need to complete the Glowing Ghost project. A lot of these tools can be reused for other projects, especially if you’re interested in electronics and prototyping. If you do plan to do many more projects, it’s worth picking out better tools. That way they last longer and work better.
- Soldering Iron (Better one)
- Solder
- Wire cutters/strippers
- Paper towel or Tissue
- Sharpie
- 3V Button cell battery
- Hot Glue Gun
- Multimeter (Fluke Meters are better)
If you do want to save some money, you can get away with going cheap on most items; however, I HIGHLY recommend buying a nicer soldering iron and a nicer pair of wire cutters. Go cheap on either of these and you’ll kick yourself later. (Trust me, I’ve been there.)
Glowing Ghosts: Circuit Diagram
Now, let’s take a look at the conceptual diagram of what the glowing ghost circuit does.
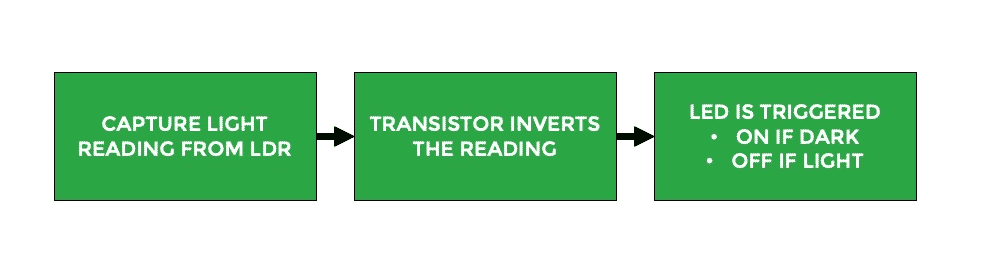
First, the photoresistor or Light Dependent Resistor (LDR) will capture a light reading. That reading will be sent into the base of the NPN transistor. The transistor acts as a switch and will effectively “invert” the reading from the LDR. That means when it’s light, there is a low signal, and when it’s dark, there’s a high signal.
The LED will illuminate when the signal is high and shut off when it’s low. Lastly, we’ll use a paper towel or tissue to diffuse the light from the LED, which gives the ghost a spooky glowing effect when it’s dark. Pretty nifty, right?
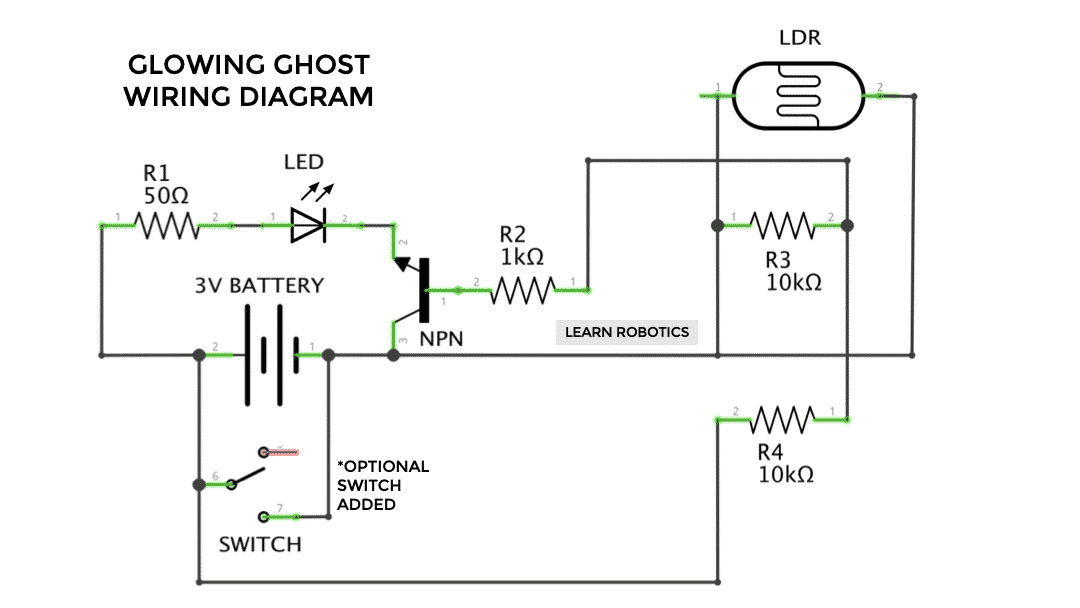
Glowing Ghosts: Wiring Diagram
Next, let’s look at the wiring diagram. All circuit projects are based on a wiring diagram or schematic. You’ll notice a secondary toggle switch, which allows the user to shut off the circuit when it’s not in use.
Now that we have the circuit, we can translate it to a perf board. If you’re not comfortable soldering yet, feel free to use a mini breadboard. Breadboards are a lot easier to use, plus you can reuse your components later. For a more permanent decoration, I highly recommend learning to solder and mounting components to a perf board.
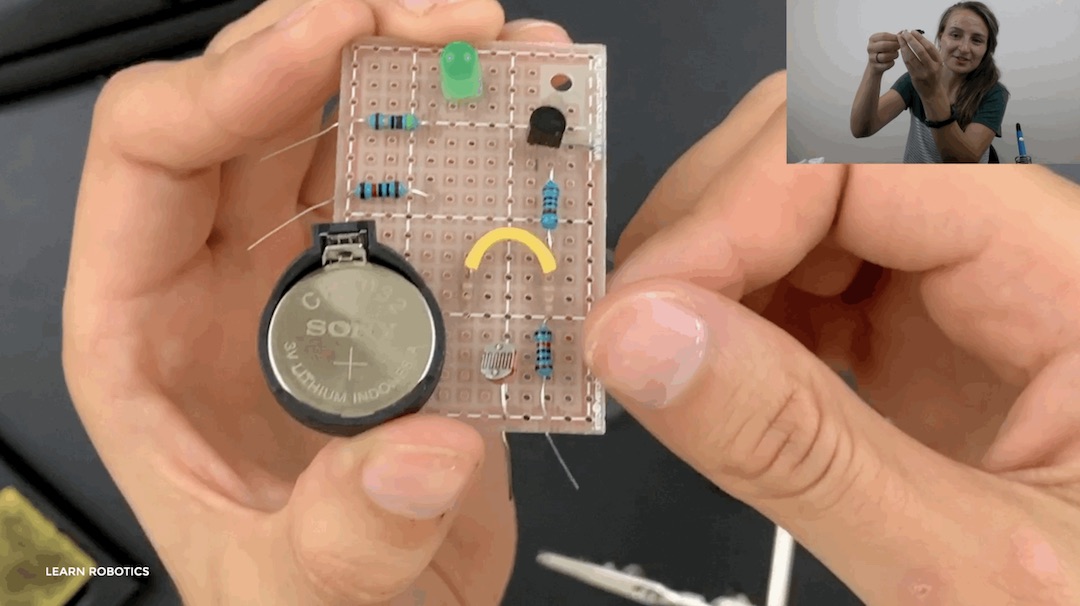
Solder the Glowing Ghost Perf Board
Here’s a helpful layout to plan your perf board. Feel free to modify where the components are placed to best suit your board.
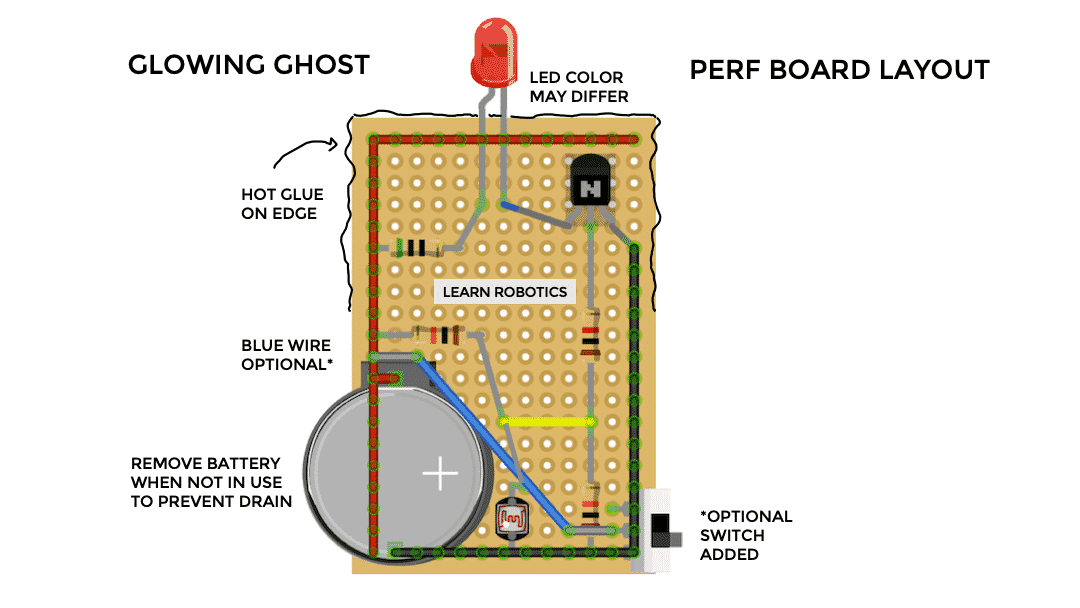
Download a PDF copy when you join the Special Topics Robotics Course. Click here to sign up.
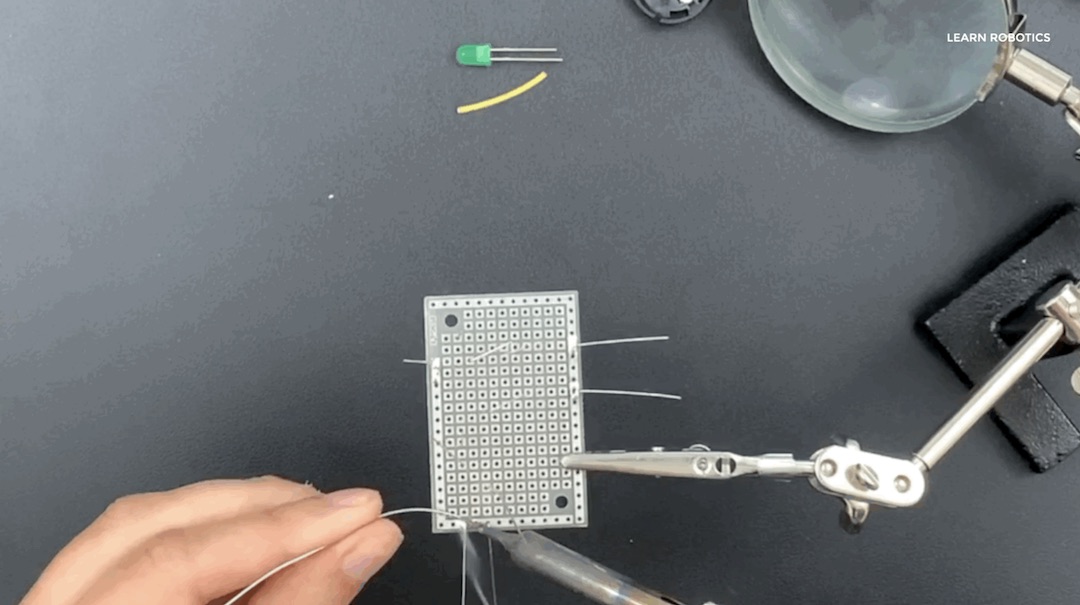
Next, place the components and then solder them up! If you have a set of helping hands, this is when you can put them to use! It’s important to take your time. Don’t forget to breathe!
When you’re finished, connect the 3V coin cell battery and test out your circuit. When you cover the LDR, the LED should illuminate. If so, move on to the next step. If not, verify that your wiring is correct.
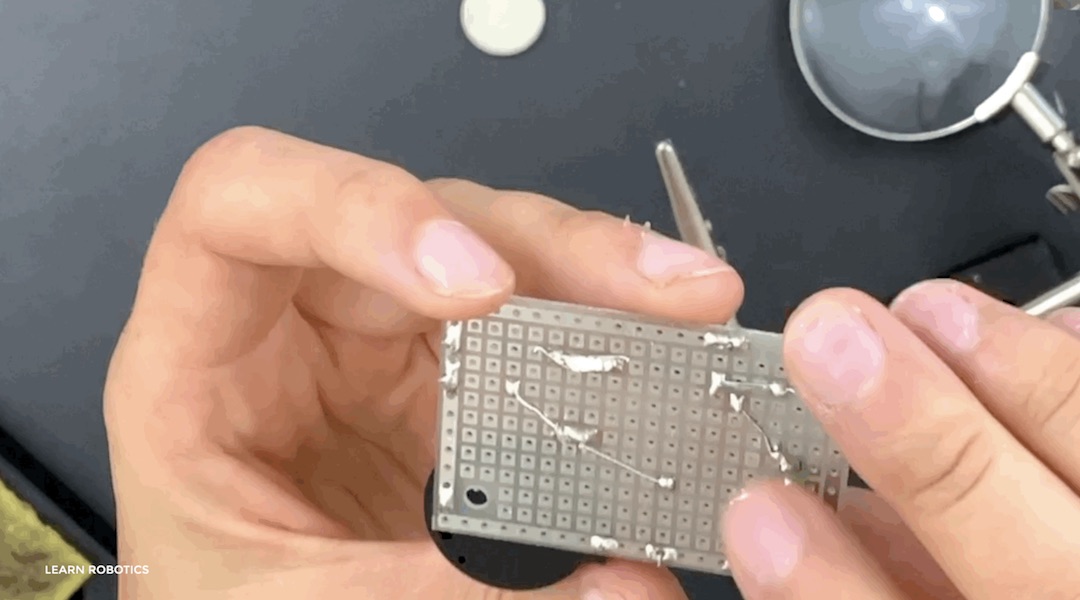
Remove the battery and snip off any excess wires on the back of your board. You can add a layer of hot glue over the solder joints to protect them if you’d like.
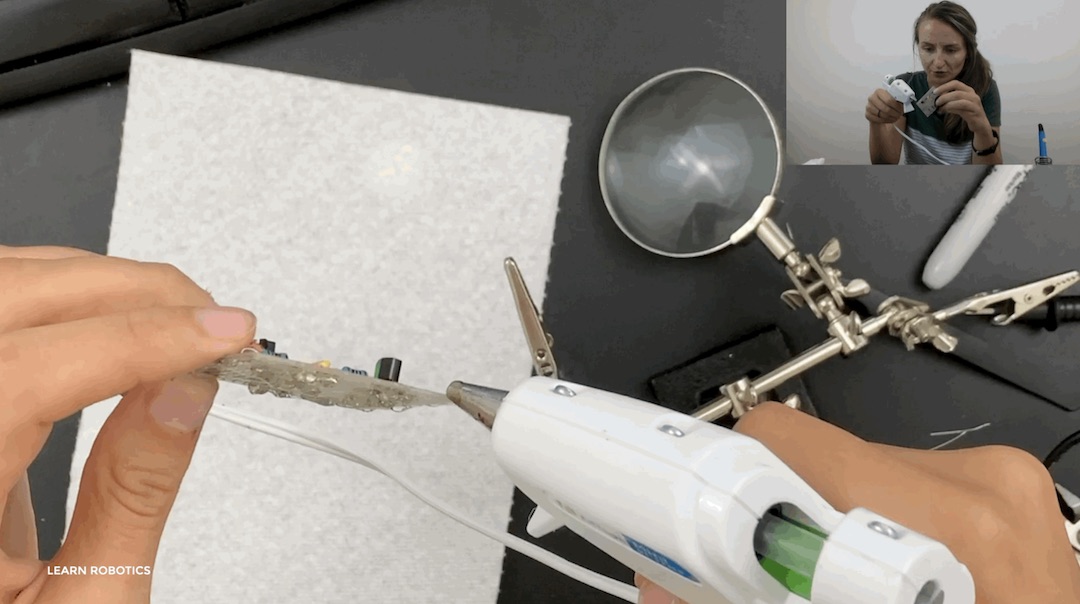
Then, run a bead of hot glue around the top edge of the perf board. Attach the paper towel over the top. You’ll have to play around with the positioning of the towel to make it look like a ghost. Make sure that the LDR isn’t covered by the paper towel. We want ambient lighting to determine whether the ghost is glowing.
Add some extra drops of hot glue onto the paper towel to create the appearance of arms. When you’re finished shaping your ghost, you can use the Sharpie to draw on the eyes.
Lastly, attach the rubber band to the top of the ghost’s head using hot glue. Insert the coin cell battery again and move the ghost into a dark room. It should start glowing!
Next Steps
I hope you enjoyed this Halloween-themed electronics project! While this project is pretty awesome as-is, I wanted to provide a few ideas to take the project to the next level.
- Use multiple switches to change the color of the LED (multi-colored glowing ghost option)
- Connect additional LDR’s to capture readings on all sides of the ghost
- Transfer the schematic into an EDA software (KiCad/Altium/Eagle/EasyEDA/etc) and have custom Circuit Boards printed
The cool thing about this project is that you’ll learn more about electronics and prototyping without getting bogged down with coding and testing. Plus, the logic will never change because it’s hard-wired together. If you’d like to purchase your Glowing Ghost kit, head on over to the shop and place your order. We have a limited number of kits available!
Learn Robotics LIVE
In case you didn’t know, I host a live show every Friday at 12:30 PM EST. This project appeared in Episode 2. So, if you like this kind of stuff, consider this a sincere invitation to join the live stream.
It’s a Special Topics kind of class where we’ll build a bunch of random robotics projects to enrich our robotics skills. I’m not going to lecture you. It’s a fun forum. Ask me questions. Build projects. Gain skills in robotics. It’s really that simple. Capisce?! Capisce.
Did you make this project? Leave a comment below, and be sure to share the Glowing Ghost project with a friend who enjoys making!


