

Regardless of if you’re new to the 3D printing world or you’re a professional, issues can arise with your 3D printer at any time. In this article, we’re going to fix 3 common 3D printing problems so that you can get back to manufacturing.
If any or all of these 3 tips are misconfigured, you’ll run into a lot of problems while trying to 3D print a part.
While this article is most useful for 3D printer kits (not pre-assembled 3D printers), you can also use the topics outlined in this article if your 3D print quality is poor or you are having trouble printing quality 3D parts.
[amazon box=”B07W954YL6″ template=”list”]Common 3D printing problems (and their solutions)
I wrote this article because a lot of the problems I was facing with my 3D printer (Anet A8) weren’t properly documented online.
My goal with this article is to save you the trouble of finding the answers to these problems and outline the full solutions in this guide.
This guide provides solutions to the most common 3D printing problems.
- How to prevent Nozzle Leaks with proper nozzle installation.
- How to position your Extruder Gear so that filament feeds correctly.
- How to level and adjust your Heat Bed in order to obtain prints that stick.
Ready to get started?
Problem #1: Filament Leaks while printing
If you’ve ever built a 3D printer, either from a kit or using parts you’ve acquired on your own, a leaking nozzle is no joke.
While the problem within itself is very frustrating, it’s actually a fairly easy fix if you know what to do.
How to Fix a Leaking 3D Printer Nozzle
Reassemble your hot end. Most hot end assemblies come pre-assembled but aren’t assembled correctly.
Go figure, right?
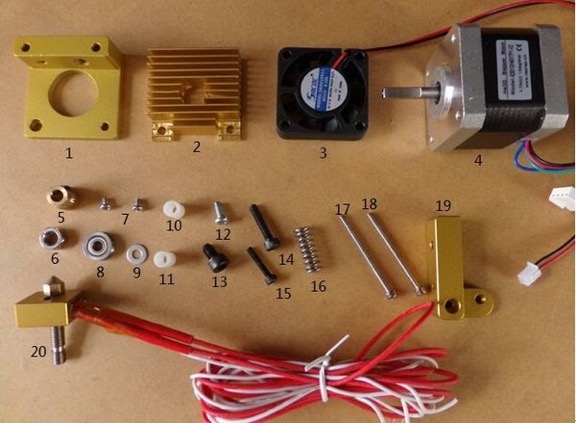
You’ll need to take this assembly apart and reassemble it correctly to prevent leaks. We will be modifying the hot end assembly (part #20 shown below).
Use the video and the following steps listed below to fix this problem.
Parts you’ll need
[amazon box=”B0718WYN5R,B00004YO5M,B00WLVV2YE” template=”list”]Before you begin, remove any filament from the extruder. This is easiest to do when the extruder is at temp (~190°C). Then shut off your 3D printer. Ensure that the extruder temperature is cool enough to touch or reads 0°C before continuing.
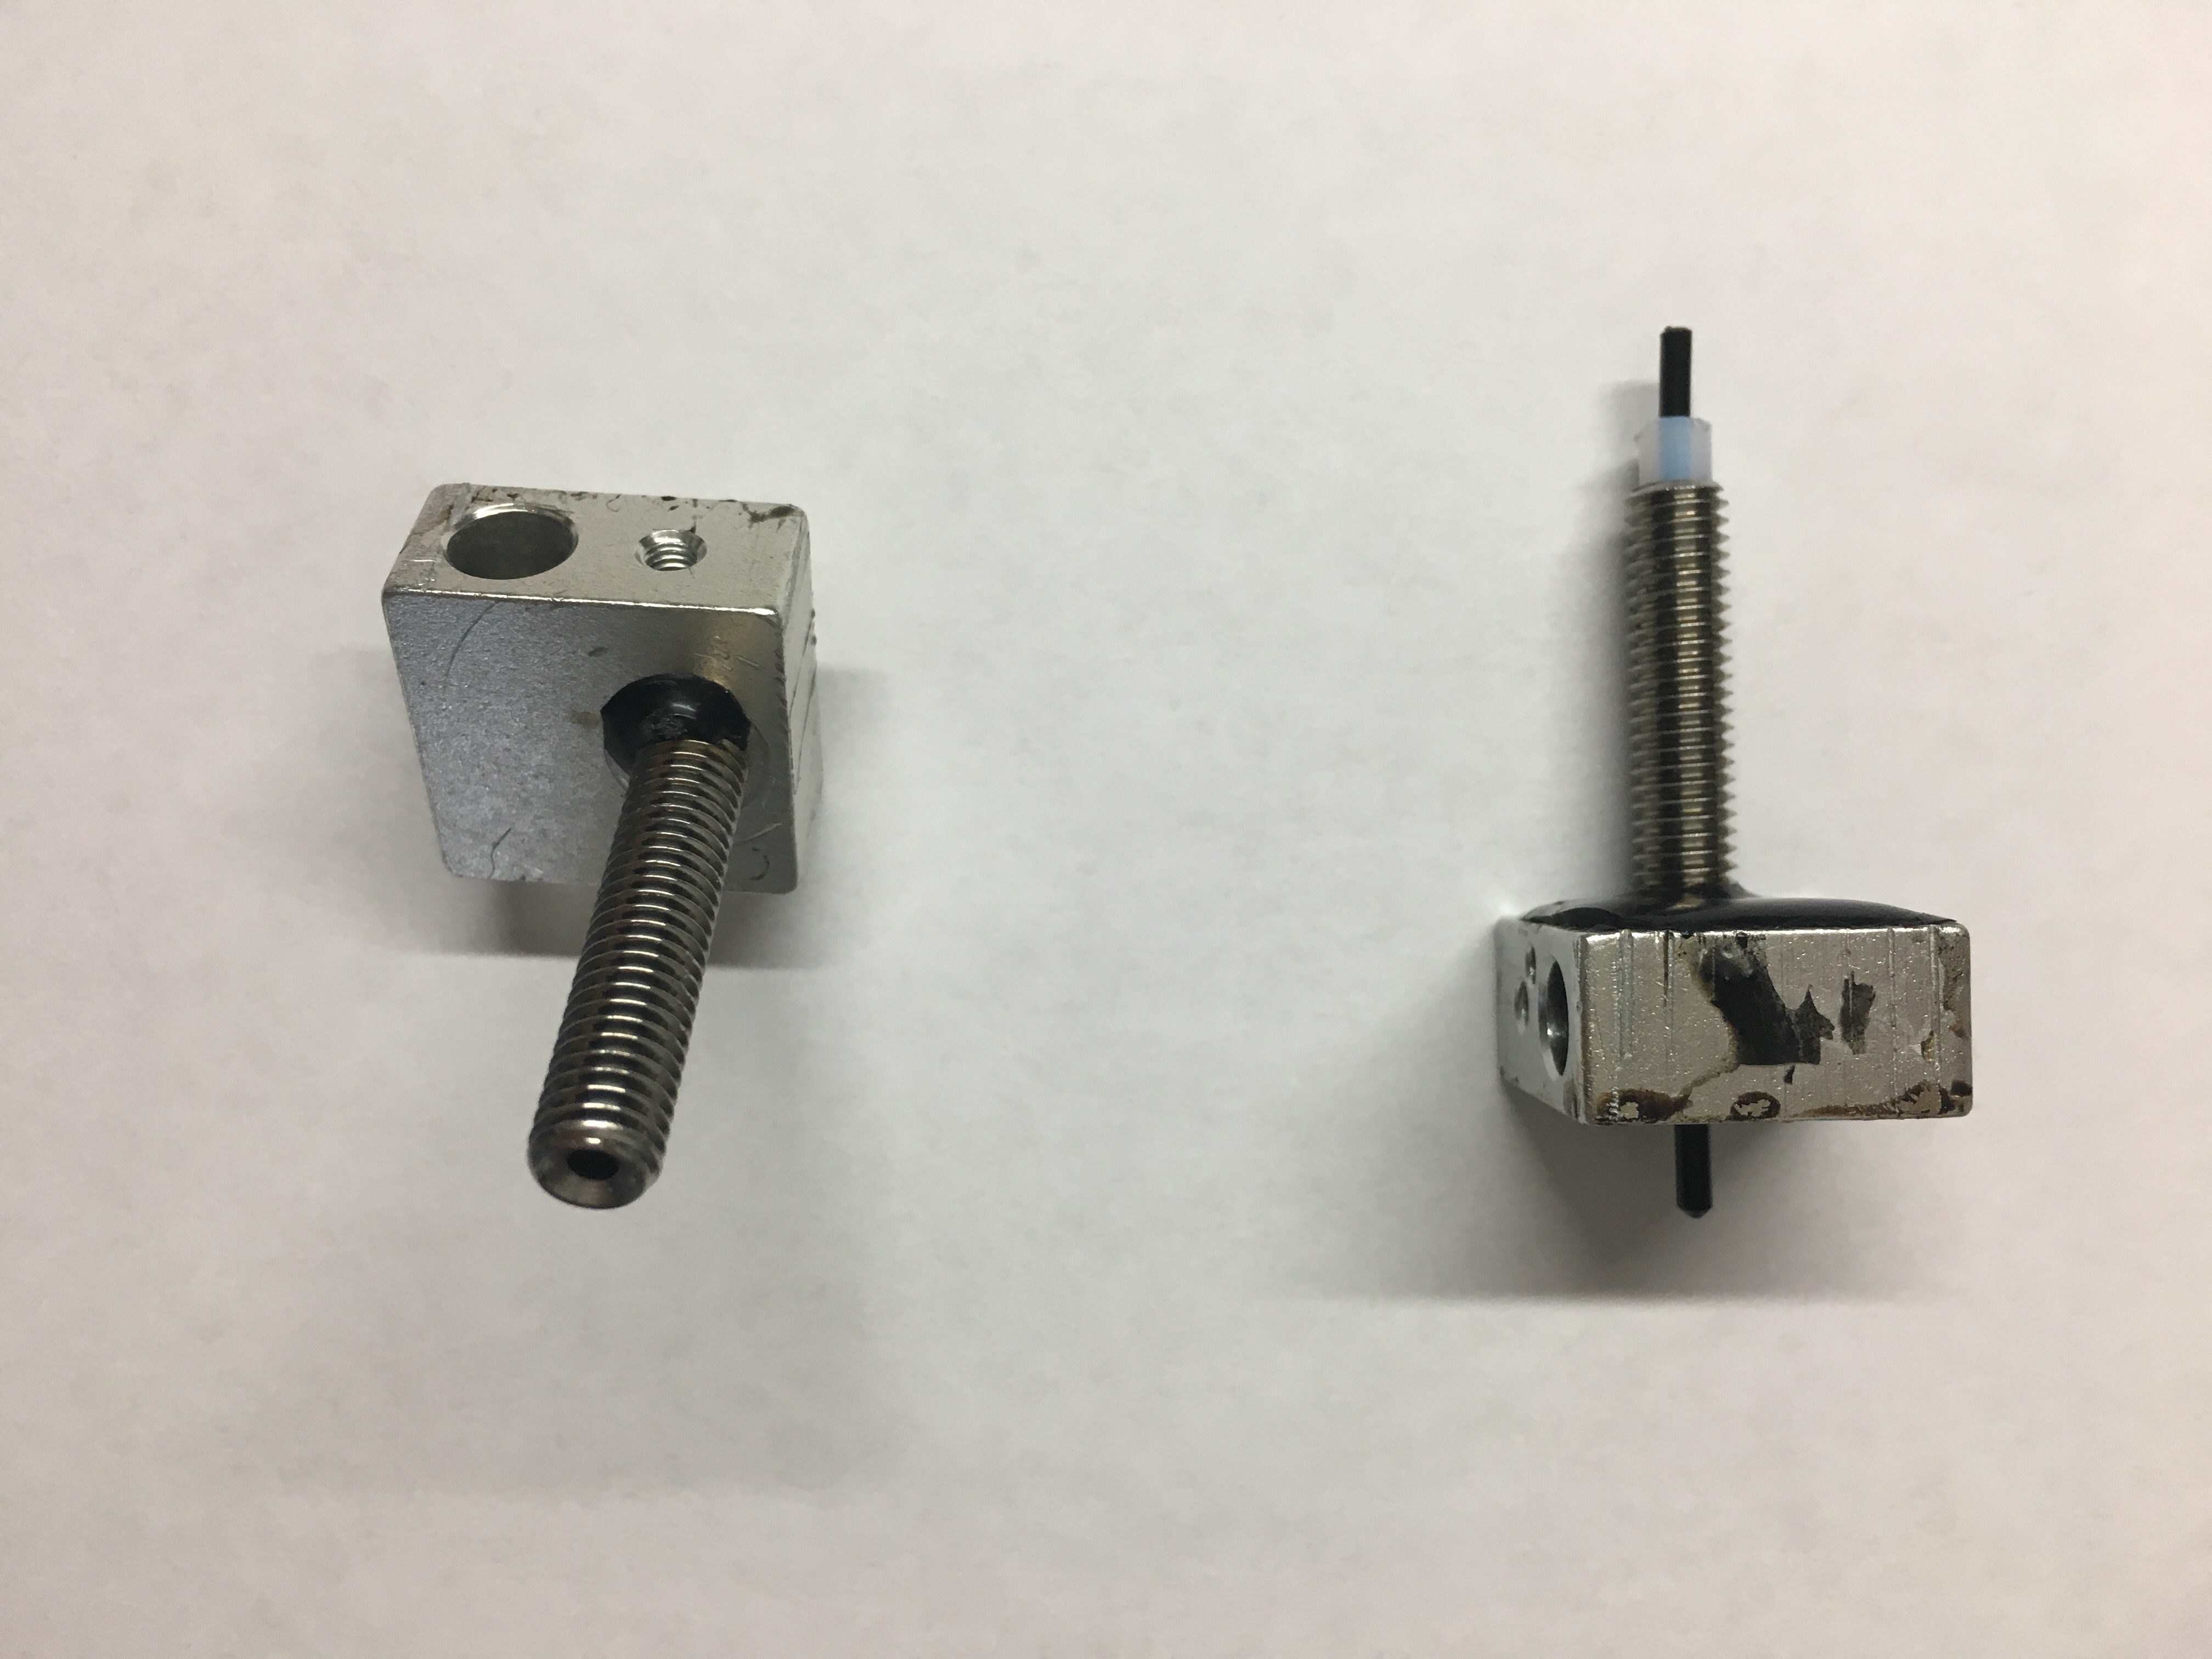
First, remove the hot end (cylindrical heating element) and thermistor (sensor) from the heat block.
Next, disconnect the heat break/metal feed pipe and nozzle from the heat block. You may need to use a 6mm wrench to get the nozzle off.
Then, connect the metal feed pipe to the heat block. Hand-tighten 1 or 2 turns. Attach the nozzle to the heat block. Hand tighten all the way to the block, then unscrew the nozzle about 1mm.
Add a gap for heat expansion
We want a small gap to help with heat expansion. This will prevent the filament leaks you’ve been having. Refer to the picture below. 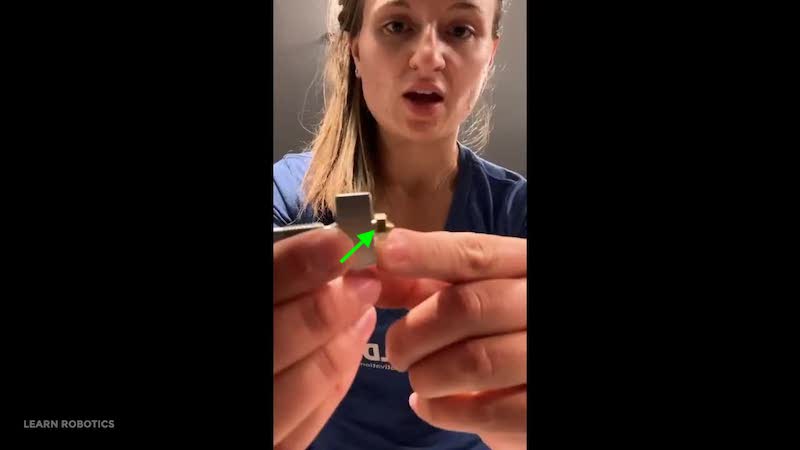
Next, hand-tighten the metal feed pipe until it’s touching and flush against the nozzle. The nozzle and the metal feed pipe should feel solid and connected.
Grab a socket wrench to place around the nozzle. (6mm is a good starting point.) Hold the heat block and use the wrench to tighten the nozzle.
We want the nozzle to be snug while maintaining that 1mm gap. You can also grip the heat block using some vice grips or pliers. Just try not to damage, scratch, or break the heat block assembly.
Reinstall the nozzle assembly to the 3D printer
Finally, reinstall the hot end tube and thermistor and connect the extruder assembly to your printer. For more in-depth instructions for assembling the extruder, visit RepRap’s page, here.
Once you have your assembly back up on your 3D printer, go ahead and do a preheat cycle, feed in some filament and test for leaks.
Now that the nozzle leak is cleared, I’m going to show you how to properly position the extruder gear so that your filament flows nicely.
Problem #2: Filament is jammed or doesn’t flow from the nozzle
If you’re like me and you’ve felt like you had to manually “feed” your 3D printer filament to get it to work, or you hear clicking and grinding noises, then you probably have an extruder gear problem.
What I’m specifically talking about is the gear that rotates when the extruder motor spins, feeding filament into the metal feed pipe and through the nozzle.
This step is probably most relevant for 3D printer kits, like my Anet A8, but if you have access to the stepper motor axle for the extruder (without voiding your OEM warranty), you can give these steps a shot to fix the feeding problem.
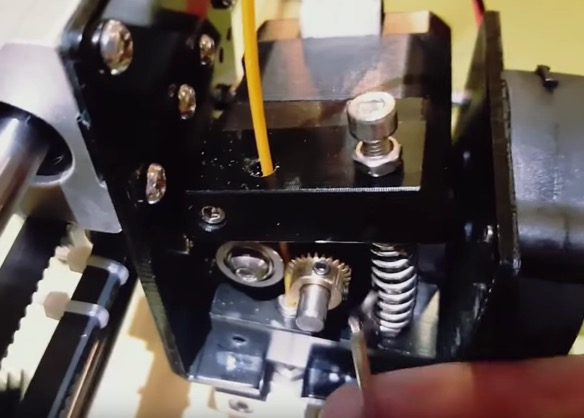
First, make sure you remove any filament in the extruder assembly. Then cool down the printer. Open up the extruder assembly fan cover and look for the extruder gear and wheel. (See the picture below.)
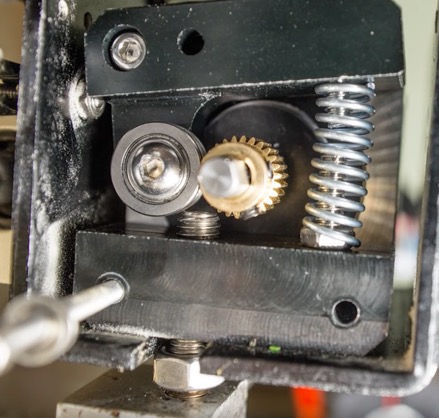
Then, line up the gear with the wheel track. Both pieces should be above the top of the metal feed pipe. There should be enough room for the wheel to spin without too much of a space between the metal feed pipe and the gear.
Also, check to make sure that the gear’s set screw is fully tightened against the motor axle. Take your filament and feed it into the extruder to ensure that you have proper alignment and positioning before closing up the fan case.
Remove the filament, close up the extruder assembly, and run a preheat cycle. Then feed your filament, and run a test print. If everything is aligned, you won’t hear a clicking or skipping noise.
[amazon box=”B07C3ZVZ41″ template=”list”]Problem #3: Parts detach from the bed mid-print
There are many different schools of thought when it comes to adhesives and settings for a 3D printer heat bed. In this guide, I’m going to go over what works for me on my Anet A8.
You can also refer to the owner’s manual (or online wiki) for your 3D printer model.
Solution A: Use the Correct Heat Bed Temperature
PLA can be printed with or without a heated bed. If you choose to heat the bed, I recommend printing with the bed set around 60℃-70℃.
For ABS you may want to have a hotter bed around 110℃.
Check the label on your box of filament for recommended printing and heated bed temperatures.
[amazon box=”B00J0ECR5I” template=”list”]Solution B: How to Level your Heat Bed Correctly
It’s a 100% must make sure that your heat bed is LEVEL & level in ALL directions (front to back, left to right, and both diagonals). This is really simple to do if you have a mini level like this one.
Here’s a demo of how to level a 3D printer heat bed using a level tool. Place your level on the bed and then adjust the wingnuts so that the bubble is in the middle.

On the Anet A8, the heat bed has 4 screws in the corner that can be tightened or loosened to help keep it level. Ensure that the wingnuts are secured once you achieve the position you want.
[amazon box=”B07PHGDDWL” template=”list”]Once the bed is level, you’ll want to make sure that your nozzle (Z-axis) height is correct. The best way to do this is to use a piece of printer paper to achieve the correct distance from the heat bed to the tip of the nozzle.
Ensure that your stepper motors are disabled so that you can move the nozzle assembly and heat bed around to obtain that height. Then adjust the Z-axis limit switch into the correct position.
Next, slide the piece of printer paper between the nozzle and the heat bed. You should be able to move the piece of paper easily without seeing a noticeable gap. Repeat for all sides of the heat bed.
Best Adhesives for 3D Printer Heat Bed
I’ve personally had good luck using blue painter’s tape and Glue Sticks for my heat bed. The tape lasts about 3 or so prints before I have to change it, and the glue I re-apply before each print as the bed is warming up.
One thing to note is that as the bed is heating, the tape can peel. Just make sure that the tape is completely pressed down prior to starting a print or you won’t have a “level” surface to print on.
You can also use hairspray or glue on a glass plate on top of your heat bed. I’ve tried this method recently, and I actually really like it. The PLA adheres nicely to the bed, and when you remove the part, it leaves the bottom smooth and shiny!
Before each print, apply some rubbing alcohol to the glass bed and then apply your glue. This ensures that the bed is clear of residue from previous prints.
What problems do you have 3D printing?
3D printing is a lot of fun once you learn the basics and have a few successful prints. However, no matter if you have a lot of experience with 3D printing, or if you just started last week, you may run into some issues.
Troubleshooting your 3D printer is part of the process. You might have one perfect print and then the next one gives you problems. Unfortunately, that’s just how it goes, especially with lower-cost 3D printer options.
In this article, we explored ways to fix 3D printing problems such as a leaky nozzle, clicking extruder, and prints not sticking to the bed.
Fixing a 3D printer is frustrating, so if you have any issues trying these techniques, be sure to leave your comments below.
You can also check out these popular Learn Robotics resources on 3D printing:
- 3D print with Anet A8 Starter Guide
- Anet A8 3D Printer Leaking Nozzle SOLVED!
- Before you buy an Anet A8, read this!
What issues have you faced while 3D printing? Leave your questions and solutions below!
Lastly, if you 3D print a lot, consider bookmarking this page (CTRL-D on Windows or CMD-D on a Mac) so that you have it later!


4 Responses
I have an Anet ET4 Pro, which has the auto-level sensor built in. My sensor failed just a week or so after my return date, but after many weeks, I finally found a source for a replacement and Anet agreed to cover it under warranty. BUT, I don’t know how to remove the bad one. I’ve searched online and found one site weeks ago, before I was sure I could even get a replacement. Now, I cannot find that bookmarked site. I tried asking Anet … they missed that part of the email. So, I’m looking for some insight into how to remove the bad one. I think if I can find the key to this puzzle, I can replace it without issue. It can’t be that awfully difficult but I don’t want to damage something else in the effort. Thanks
Hi Sheila – we’re not affiliated with Anet, so we don’t have manuals for replacing parts. I’d recommend searching for an Anet ET4 assembly guide or Auto Leveling replacement tutorial. There may be some guides online. If not, try contacting Anet again either via email or through their Facebook page. Sometimes they’re more active on Facebook. Good luck ~Liz from Learn Robotics
mid print all metal hotend , the last 1 or 2 mm gets stuck in the hot end
Hi Andrew – could be a heating issue or a nozzle assembly issue. Good luck! ~Liz from Learn Robotics