

You just got an Arduino robot, and now you want to add a remote control. In this tutorial, we will show you how to configure the HC-06 Bluetooth module to drive a 2WD Arduino Mobile Robot with your Bluetooth keyboard.
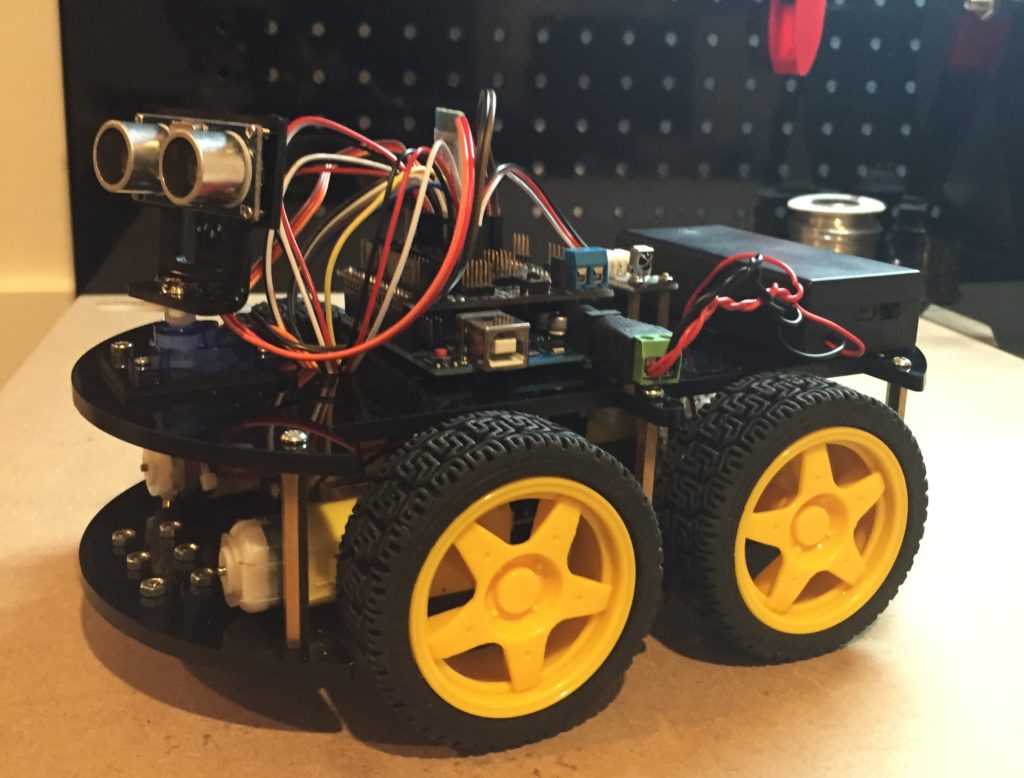
This guide assumes you have already assembled, wired, and programmed your robot to move forward, backward, left, and right. Go ahead and configure autonomous controls for your robot first, and then come back to this tutorial to learn how to configure Bluetooth control.
[amazon box=”B01FCQZ8VW” template=”list”]Connect the HC-06 Bluetooth module to the Arduino
The HC-06 Bluetooth module has 4 pins. They are TX, RX, VCC, GND. TX plugs into RX on the Arduino; RX plugs to TX on the Arduino; VCC goes to 5V; and GND to Ground.
Here’s a diagram of the setup.
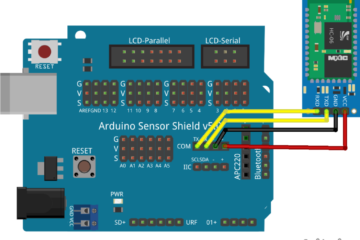
If you have right-angle header pins, you can connect the module directly into the Arduino sensor shield without additional wiring. If you aren’t using the Arduino sensor shield, you can wire the module into a breadboard and mount that directly on your robot.
Download a blank loop() program to the Arduino via USB
We don’t want the robot to execute pre-existing programs from the Arduino when we power it on. Therefore, we will download a blank sketch (or empty loop() method) to our controller. Then when we power the robot via its battery pack, we won’t have any unexpected movements.
Step 1 – Open a blank Arduino sketch. Go to File > New.
Step 2 – Plug one end of your USB cable into the Arduino and the other end into the computer. Download your blank sketch to the board.
Power on the Mobile Robot
Now, we can power our robot. This will allow you to connect your computer to the Bluetooth module.
Connect your computer to the HC-06 module
Go into the Bluetooth settings on your computer and scan for available devices. You should see a connection called “HC-06”. Connect to this device as you would any other Bluetooth speaker or device. When you pair the Bluetooth module to your computer, the key is “0000” or “1234” by default.
Write the Bluetooth control program and download to your Arduino
Now that we’re connected, we can download programs via Bluetooth to our robot. Go to Tools > Port and select the one with HC-06.
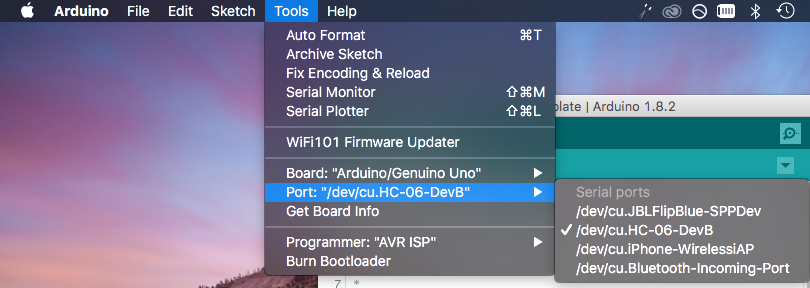
Download the sketch by verifying and uploading. Next, we will set up the code for keyboard control using Serial communication.
Step 1 – Create a method for keyboard control
For this tutorial, we will create a method, keyboardControl() to read the value of our keyboard input into the Serial monitor.
First, we will check to see if there is a signal on the Serial port. Then we will read the data using the Serial.read() command.
Lastly, we will use a switch-case statement to compare the input data to one of five cases:
Case 1 – We press a “1” on our keyboard, which will command a left turn.
Case 2 – We press a “2” on our keyboard, which will command the robot to move backward.
Case 3 – We press a “3” on our keyboard, which will command a right turn.
Case 5 – We press a “5” on our keyboard, which will command the robot to move forwards.
Case 0 – We press a “0” on our keyboard, which will command the robot to stop.
Inside each case statement, we will call our autonomous commands for moving. In the sample code, below, you will see the methods, motors() and backwards() which are custom methods used in this example.
Note, you must write the methods to control your motors for this keyboardControl() method to work.
/*control robot via computer keyboard & bluetooth module
  * Uses serial monitor
  * Must be paired to bluetooth module HC-06 on host computer!
   */
void keyboardControl(){
  if (Serial.available() > 0){ //Listen for signal in the serial port
    int data = Serial.read();
    Serial.println(data);
    switch (data) { // Switch-case of the signals in the serial port
    case '1' : // Case Number 1 is received,
    Serial.println("left");
    motors(0,100,1000); //replace with your leftTurn method
    break;
    case '2' : //// Case Number 2 is received,
    Serial.println("backward");
    backwards(100, 100, 1000); //replace with your backwards method
    break;
    case '3' : // Case Number 3 is received,
    Serial.println("right");
    motors(100,0,1000); //replace with your rightTurn method
    break;
    case '5': // Case Number 5 is received,
    Serial.println("forward");
    motors(80,100,1000); //replace with your forward method
    break;
    case '0': // Case Number 0 is received,
    Serial.println("stop");
    digitalWrite(INL1, LOW); //disable motors
    digitalWrite(INL2, LOW);
    digitalWrite(INR1, LOW);
    digitalWrite(INR2, LOW);
    default :
    break;
    }
  }
}
Step 2 – Initialize Serial communication in the setup() method
Include this line of code in your setup() method to use the Serial Monitor.
Serial.begin(9600);
Step 3 – Call the keyboardControl() method in loop(). Then download the sketch onto the Arduino. We’re now ready to test drive!
Open the Serial Monitor for Testing
Once downloaded, open the Serial Monitor in the Arduino IDE. Navigate to Tools > Serial Monitor.
When you press “5” the robot will move forward; press “2” the robot will move backward; press “1” it’ll go left, and press “3” it’ll turn right. To stop, press “0”.
Press keys on your keyboard – the robot will start to move!
One of the drawbacks to the Serial Monitor is that you must press the enter key to submit values to the Arduino.
Therefore, when you drive the robot, you will press one of the five command keys followed by the enter key. It takes a little practice to drive, but once you have the hang of it, it’s pretty fun to walk around and control the robot via your Bluetooth keyboard!
Improving the RC keyboard controls
Now that we have a template for controlling the robot with our Bluetooth keyboard, we can tweak our system to make it more reliable and enjoyable to drive.
A few improvements I would recommend include:
- Making turns (left & right) sharper and cleaner
- Adding the option to type in a numerical speed for on-demand speed control
- A button or key to switch out of RC keyboard control to autonomous mode and vice-versa
- Programmable turns by typing in a numerical degree for precise turns
With this foundation and a couple of recommended upgrades, you will be well on your way to teleop control!


6 Responses
Your title is misleading you’re not actually connecting a bluetooth keyboard to the arduino robot directly. You are using a computer to control a robot via bluetooth. And that should be the title here.
Chris, the HC-06 Bluetooth module communicates serially, so the only way to use it in this example is with a host computer. If you wanted to put a computer (i.e. Raspberry Pi) on your robot, you could do that instead to have direct control.