

Recently I started learning Python, and I was amazed by the simplicity and capabilities. So, I thought let’s connect it to Arduino, and see what I can do with it.
Communication between Arduino and Python isn’t a new concept, There are many modules available for Python that help in the process. In this tutorial, I’m going to use ‘pyserial‘ package for communication. For this, you will need a basic understanding of Python and Arduino. I’m using ‘Python 2.7‘ here.
Once you learn how to communicate between these two environments you can use it for multiple projects. Python is a great tool for image processing, object detection, and color recognition which can be used in various robotics projects.
So let’s get started…
What You Need
- Arduino Uno (Nano or Mega)
- LED
- Arduino IDE
- Python 2.7
Check The Video Tutorial
Setup Process
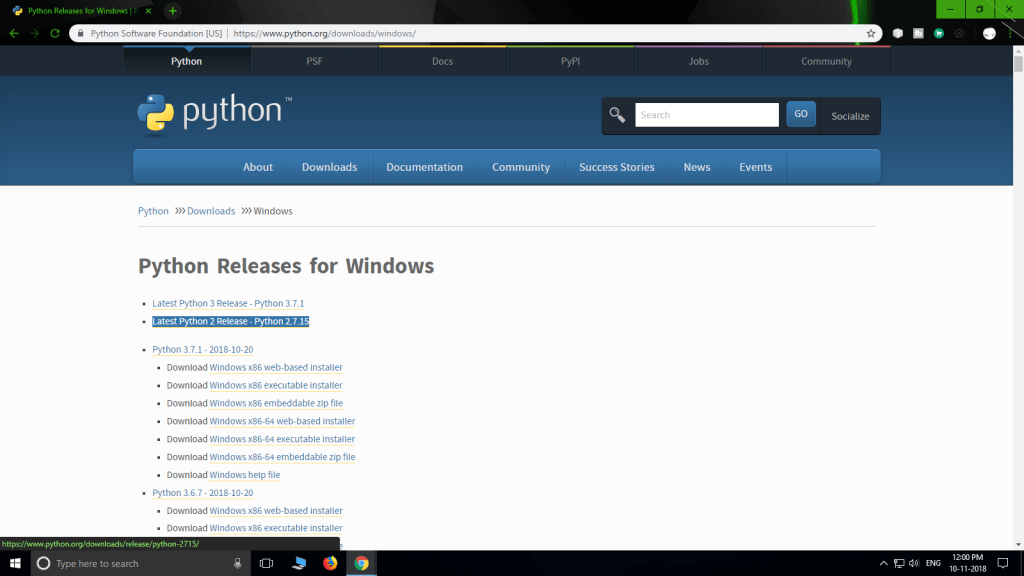
- Download and install Python 2.7.x compatible with your OS. If you use Linux, Python is probably already installed. I use Windows 10, so I installed Python for Windows.
- Once it is properly installed, set environmental variables so it can be accessed from CMD.
- Now to communicate between Arduino and Python, we need to install a Python module called “pyserial“. To install modules we use the command “pip install“.
- Open up a CMD terminal, and type
pip install pyserialthis will install the module required for Serial communication.
With these steps done, we are ready to start programming.
First Download the Arduino and Python example codes, below or follow along with this tutorial.

Writing the Arduino Sketch to Communicate to Python
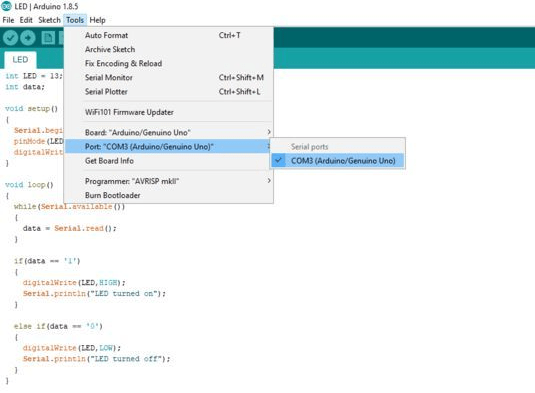
Open up the Arduino Sketch, LED.ino.
Now select the board & correct COM port and upload the code.
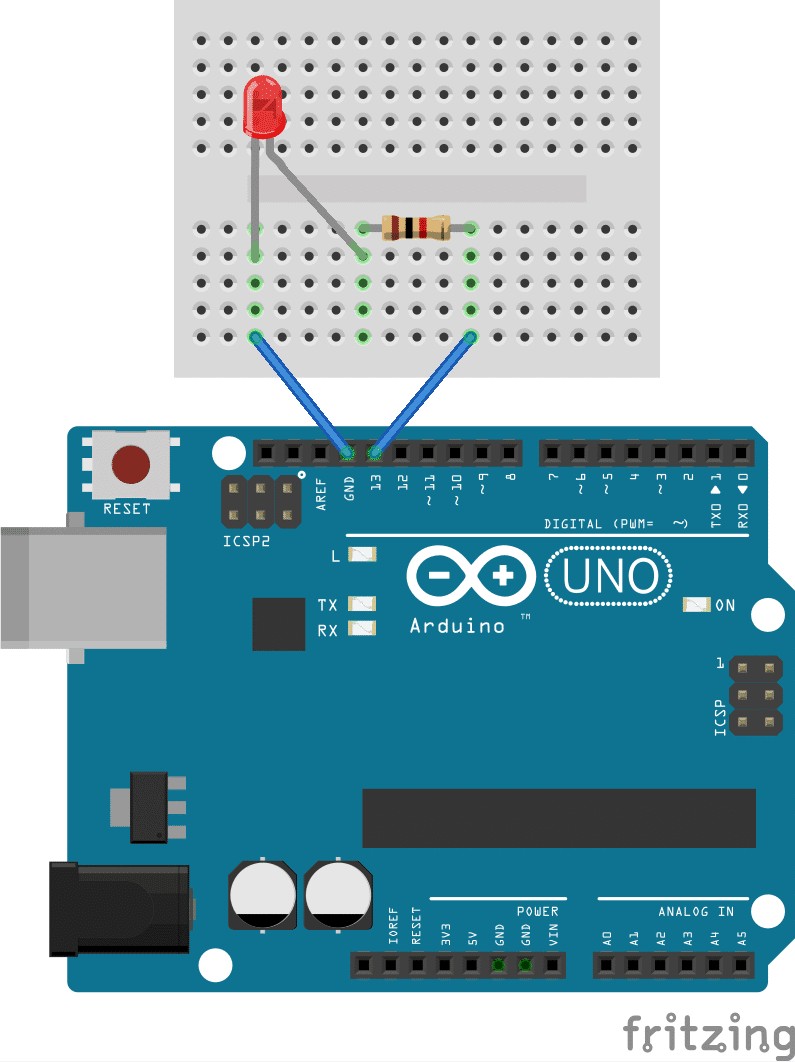
After the sketch is uploaded Goto >> Tools >> Serial Monitor, Enter ‘1’ to turn the LED on and ‘0’ to turn it off. We used the built-in LED (pin 13) in the code, but you can connect an external LED to pin 13, 220-ohm resistor, and GND.
Writing Python Script
Next, let’s write the python code. But first, note the COM port to which the Arduino is connected. Mine is “COM3”. You can find it out from Tools >> Port or through Device Manager. We will need it in the next step.
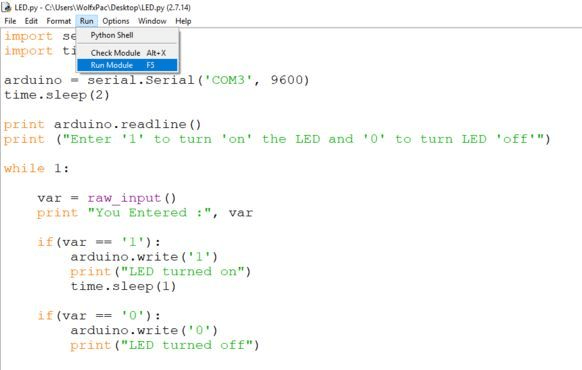
Open the example Python script first in Python IDLE. Goto >> Files >> Open.
Now in the script, you have to make a small change. The COM port to which the Arduino is connected needs to be added to the script. In the example code, replace ‘COM’ with your COM port.
Testing the Build
After writing and editing the script in IDLE, save it as LED.py (Hit Ctrl + S to save).
Now before running the program, close the Arduino IDE. We need the COM port to be available for serial communication, so both programs can’t be running simultaneously.
Finally, you can RUN the code. Go ahead and hit F5 to run the script.
You will see a screen asking for input. Just enter ‘1’ or ‘0’ to turn the LED on/off. If the LED does not respond for the first time just close the IDLE and unplug Arduino and plug it again and retry.

If you can control the LED, you have successfully established communication between Arduino and Python.
How to Control Arduino with Python 3.7 and 3.9
For Python 3.7, you need to make a few minor adjustments to the code. A special thanks to Paulo, for his improvement to this project and for providing us with the sample code for Python 3.7. Give it a try, and let us know how it goes!
python3.9 -m pip install pyserial.import serial
import time
arduino = serial.Serial(port = 'COM3', timeout=0)
time.sleep(2)
while True:
print ("Enter '1' to turn 'on' the LED and '0' to turn LED 'off'")
var = str(input())
print ("You Entered :", var)
if(var == '1'):
arduino.write(str.encode('1'))
print("LED turned on")
time.sleep(1)
if(var == '0'):
arduino.write(str.encode('0'))
print("LED turned off")
Other Arduino and Python Projects to Try
Now, you’re ready to try out our other Arduino and Python Projects.
- Arduino Data Logger (CSV) with Sensors and Python
- Face Tracking OpenCV, Python, & Arduino
- How to fetch data from dweet.io using Python (Tutorial)
I hope you enjoyed this tutorial. Let me know what you think in the comments, below!


8 Responses
Hi! Nice project! btw, Python 3.7 requires some updates regarding to the code above
import serial
import time
arduino = serial.Serial(port = **, timeout=0)
time.sleep(2)
while True:
print (“Enter ‘1’ to turn ‘on’ the LED and ‘0’ to turn LED ‘off'”)
var = str(input())
print (“You Entered :”, var)
if(var == ‘1’):
arduino.write(str.encode(‘1’))
print(“LED turned on”)
time.sleep(1)
if(var == ‘0’):
arduino.write(str.encode(‘0’))
print(“LED turned off”)