Welcome back, Learn Robotics family! This week’s article is about circuits and electronics lessons for grades K-4. A lot of what I do is work with schools to create robotics, electronics, & STEM programs for K-12 education. One of the most common problems I see is a lack of electronics or circuitry classes. I think this is because teachers don’t feel comfortable or confident teaching interactive electronics classes. This could be due to a lack of knowledge, a fear around keeping students safe while playing with electronics, or a combination of both.
Don’t worry! – In this article, I’ve broken down the pro’s and con’s along with tips to set you up for success in your circuit and electronics classes.
And while some schools have physics classes that cover simple circuits on paper: i.e. Ohm’s Laws, Kirchhoff’s Laws, etc, a lot of these lessons do not occur until high school (grades 10-12). The cool thing, though, is that this content isn’t overly advanced, meaning we can start to teach fundamentals of circuits to our K-4 students.
To get you started, I’ve compiled three different ideas for circuits and electronics lessons for grades K-4. I picked these three lessons based on budget (under $100), teachability (how easy the lesson is to teach for beginner STEM teachers), and interactivity (how fun they are for students). If you’re looking to get started with circuits and electronics lessons in your K-4 class, check these ideas out, and don’t forget to leave a comment below with your thoughts!
Jump to Lessons!
Idea #1 – Build a Circuit using a Pizza Box & Paper Clips
Idea #2 – Simulated Circuits using Tinkercad®
Idea #3 – Create Circuits with Snap Circuits® Kits
Idea #1 – Build a Circuit using a Pizza Box & Paper Clips
In this project, students will build simple circuits using thumb tacks, paperclips, LED’s, resistors, buzzers, and photoresistors. I recommend using at least a 51 ohm resistor between the LED and +3V. It’s not a good idea to power the LED directly because you can burn out the bulb or decrease its lifespan.
This project is a great way to get hands-on and teach the basics of electricity. You can change the path of the electric current to run through different sensors. You can switch between lighting an LED or activating a Buzzer. You also have the choice of using a Photoresistor with the LED or Buzzer. The whole project is powered on a 3V button cell, keeping power low, and reducing the risk for smoke or fires.
For grades 4+, you can tie it back to mathematics using Ohm’s Law (V = iR), Algebra, and Multiplication principles. All in all, you have a lot of options for this pizza-box-inspired project for under $40.
https://youtu.be/0j4gCvYYzdA
Read More on Instructables
Pros +
- Simplistic design, under $40 for a class set
- Low Power (lower risk of fires & smoke)
- Bigger pieces are easier for smaller hands
Cons –
- Requires teacher knowledge of circuits
- Parts must be connected properly to work
- Less robust than electronics kits
Related Article
How to Create a STEM Class (3 ways)
Overall Thoughts
If you’re looking for a hands-on way to create circuit diagrams on a small budget, this project ranks at the top of the list. I’d recommend investing in some foam board (or have a lot of pieces of cardboard) so that each student or group can create their own circuit. You’ll also need to ensure that each component is wired properly (paperclips are conductive) in order for this project to work.
Overall, if you’re a teacher who’s familiar with circuits or can put in an hour or two to learn the basics of circuits and electronics, this is a great lesson to do with elementary students in grades 2-4.

Idea #2 – Simulated Circuits using Tinkercad®
If you have access to a computer lab, then this activity is practically FREE. You can create simulated circuits using an online website called, Tinkercad (formerly Autodesk Circuits). The only thing you need to do to get started is create a login account using a valid email address.
Tinkercad is owned by AutoDesk® (the makers of AutoCAD, Fusion360, and popular design software for Engineering fields). You can create electronic circuits using breadboards, develop prototypes and software for Arduino, and print out your Bill of Materials (BOM) all in one program. Tinkercad also has a 3D modeling component, which is a gentle introduction to drafting for 3D printing.
It’s a really nice (FREE) tool, that I happen to use all the time when I’m thinking about creating a prototype prior to purchasing all the components. If you’re on a budget, and have access to the website, I highly recommend checking it out.
https://youtu.be/OCmeyJA5IRk?end=50s
Visit Tinkercad
Pros +
- Free to use if you have computers already
- No materials or components required
- Students can work independently on projects with guidance
Cons –
- Requires online access with email address
- Not a physical project with hands-on activities
- Must have some knowledge of components for it to be fun
Overall Thoughts
Overall, I am a HUGE fan of Tinkercad. I think it’s feature-rich for FREE. Even if you wanted to just use this for learning electronics yourself, there’s a lot of opportunity to use Tinkercad for computer lab activities that will gently introduce students to circuits and electronics at the elementary school level.
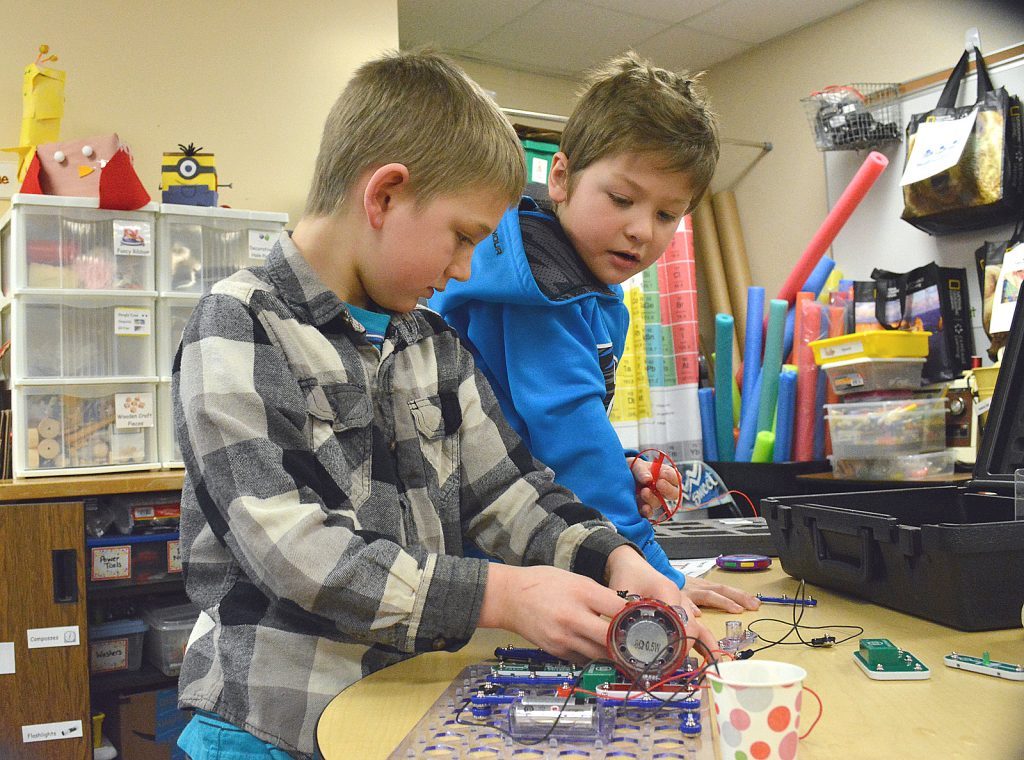
Idea #3 – Create Circuits with Snap Circuits® Kits
Snap Circuits® uses building pieces with snaps to assemble different electronic circuits on a simple “rows-and-columns” base grid that functions like the printed circuit board found in most electronic products. Each component is easily identifiable by a different color and functional purpose. You don’t have to be an electronics engineer to teach students the basics of electronics and circuits using the Snap Circuits® kits.
https://www.youtube.com/watch?v=xDpLvUghfBg
Buy Snap Circuits
Snap Circuits Lessons PDF
Pros +
- Easy to use – snap components together
- Kits are affordable ($20-$50/each)
- Bigger pieces are easier for smaller hands
- Teaches electronic symbols using real components
Cons –
- Lessons might be too easy for some students
- Better for individuals, not for groups requiring more kits per class
Overall Thoughts
While I personally have not used Snap Circuits®, I think the concept is phenomenal for teaching elementary students the fundamentals of circuits. Upon initial inspection, you may need to invest in one kit per student to promote hands-on learning. I think this activity might not be best for groups of 3+ students. Overall though, if you’re looking for a starting point, this could be a great one assuming your budget allows for the $20-$50 kits per student.

Consider This – Breadboards, Polarity, & Wiring
I hope you’ve enjoyed this article. Thanks for reading this far! If you wouldn’t mind taking a quick second to click the 5-star rating below, I’d really appreciate it. Ratings help me determine which articles you like to read!
Before we wrap up this post, I’d like to speak quickly about breadboards and polarity when working on electronic circuits.
Breadboards
This is a breadboard. We can use breadboards to create prototype electronic circuits. To keep things simple, we will refer to the breadboard, held in the horizontal position, like the picture below.
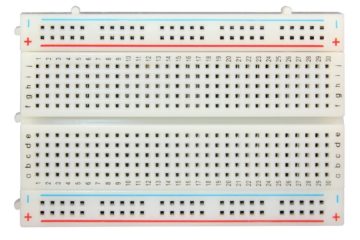
While they might look intimidating or confusing, there are only three key things you need to know & remember to use a breadboard:
- Breadboards have NUMBERED columns (refer to the picture above). SAME NUMBER = SAME CONNECTION. Therefore, everything plugged into column 4, will SHARE the connection.
- There are TWO parts of the breadboard: Top and Bottom. The channel between rows E and F designates the two parts. Letters A-E are connected; letters F-J are connected.
- The RED rail is POSITIVE. The BLUE rail is NEGATIVE. All slots along the same colored rail are CONNECTED. The top set of rails is INDEPENDENT of the bottom set of rails.
Polarity
Polarity matters when you connect certain components within a circuit. Polarity means that the component has a POSITIVE and a NEGATIVE terminal, similar to how a BATTERY has a + and – side.
When you install batteries into a device, you always check to make sure that the + terminal is connected to the + markings on your device, correct?
The same is true for wiring up circuits. When you’re just starting out there are a couple key components that POLARITY matters. To make things easier, I’ve compiled a list of components that you must check the polarity before applying power.
If components are installed backwards, then you’re at risk for damaging equipment and components, creating smoke, or starting a fire. We never want to release black magic smoke. Keep the Genie in. Double check you and your students’ work.
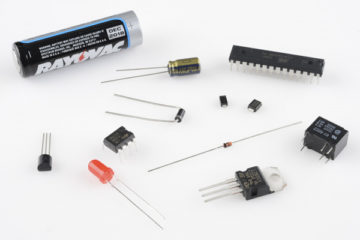
Polarity Component List
- Diodes
- LEDs
- Integrated Circuits (IC’s)
- Batteries
- Electrolytic Capacitors
- Transistors
- MOSFETS
- Voltage Regulators