

I am back again with a simple electronics tutorial for beginners. In this post, I will show you how to get started with the Bluetooth Low Energy (BLE) 4.0 module to control LEDs. This project can be adapted to also control relays or robots. BLE is not like normal HC05/06 modules, because it works on Bluetooth V4.0. To be able to connect to this module, your smartphone must have bluetooth version 4 or higher.
Materials for Bluetooth Low Energy Arduino project
- Arduino Uno
- Bluetooth Module (AT-09 or HM-10)
- Breadboard, LED, and Resistors Kit
- Smart Phone (with Bluetooth 4.0 or above.)
- Serial Bluetooth Apk.
NOTE: Most of the GUI control apps do not work with BLE modules.
BLE Arduino Wiring Diagram
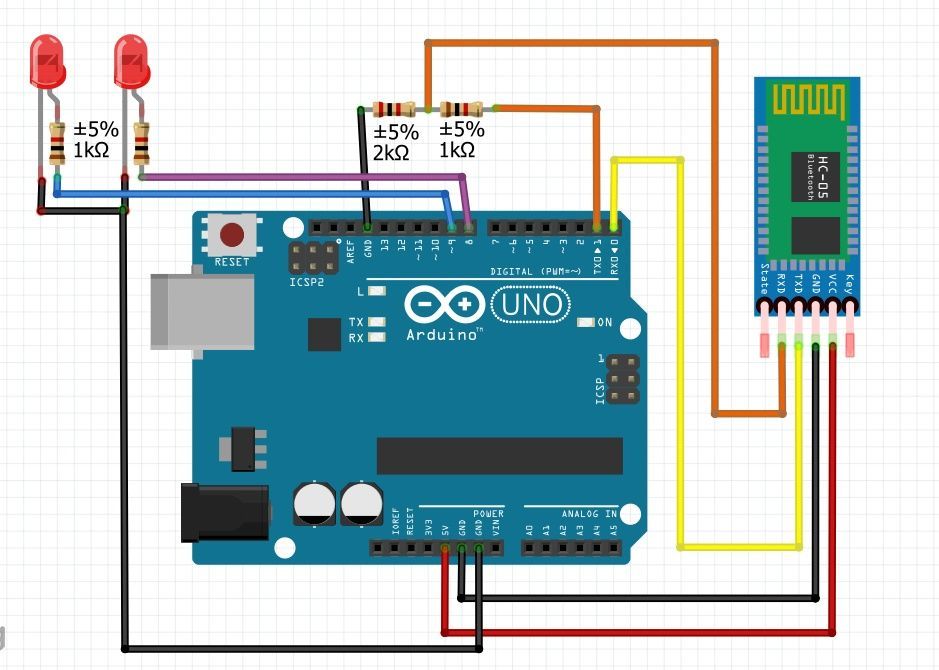
First, connect the bluetooth module on the breadboard. The bluetooth module RXD pin requires 3.3V, while the Arduino supplies a 5V output. Therefore, we will create a voltage divider using 1K and 2K Ohm resistors to adjust this voltage.
When you’re finished, make the following connections (Bluetooth Module -> Arduino):
- VCC -> 5v
- GND -> GND
- TX -> RX
- RX -> TX
Be sure to connect the resistors to the bluetooth module as shown in the picture. Then, connect one end of resistor (2 KΩ) to GND and other resistor (1 KΩ) to TX pin of the Arduino. The BLE modules have a different pinouts, so make sure you read the labels carefully before connecting.
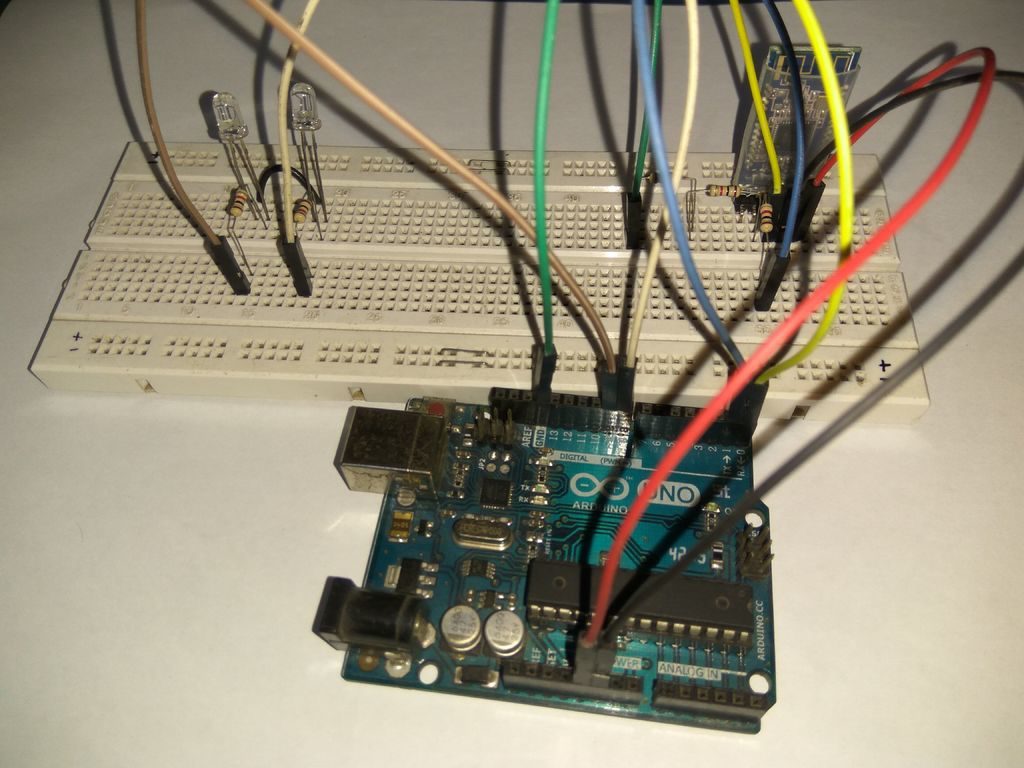
Now, connect two LEDs on breadboard in series with 1 KΩ resistors. Then attach the LEDs to pins 8 and 9 on the Arduino. Here’s what it should look like when you’re done.
Arduino BLE Code

Now, let’s write a code to control LED’s using Smartphone over Bluetooth. We will achieve this using Serial communication. First, initialize the variables and pins as shown bellow:
int led1 = 8; //First LED to Arduino pin 8
int led2 = 9; //Second LED to pin 9

int data; //Variable to store serial data

int flag1 = 0; //Variable to store LED1 state
int flag2 = 0; //Variable to store LED2 state
Then write the setup() method to set the pins as Outputs and enable Serial communication.
void setup()
{
  Serial.begin(9600); //Start serial communication
  pinMode(led1, OUTPUT); //Set pin 8 as output
  pinMode(led2,OUTPUT); //Set pin 9 as output
}
Finally, we need to write the loop() method to execute the main logic for control.
void loop()
{
  while(Serial.available()) //While bluetooth is receiving data
  {
    data == Serial.read(); //Accept & store data in the variable "data"
    if(data == '1') //If received data = 1
    {
      if(flag1 == 0) //Check if flag = 0
      {
        digitalWrite(led1,HIGH); //turn led1 on
        Serial.println("LED 1 is on"); //print message on serial monitor
        flag1 = 1; //set flag as 1
      }
      else if(flag1 == 1) //If flag is already 1
      {
        digitalWrite(led1,LOW); //Turn off led1
        Serial.println("LED 1 is off"); //print message
        flag1 = 0; //set flag as 0
       }
    }
    if (data == '2') //if data received is 2
    {
     if(flag2 == 0) //if flag value is 0
      {
        digitalWrite(led2,HIGH); //turn led2 on
        Serial.println("LED 2 is on"); //print message
        flag2 = 1; //set flag2 as 1
       }
       else if(flag2 == 1) //if flag2 is already 1
       {
         digitalWrite(led2, LOW); //turn led2 off
         Serial.println("LED 2 is off"); //print message
         flag2 = 0; //set flag as 0
        }
      }
    }
 }
With that done, we can now upload the code to the Arduino board. Make sure you disconnect the bluetooth module before uploading the code. (The TX/RX pins are used by Serial Communication when uploading sketches.)
Download the example code below!
Download BLE Arduino Code (.ino)
Use your BLE Smartphone with Arduino
To connect your phone to Bluetooth first you need a Bluetooth Serial App. I’ve used Bluetooth Serial Terminal.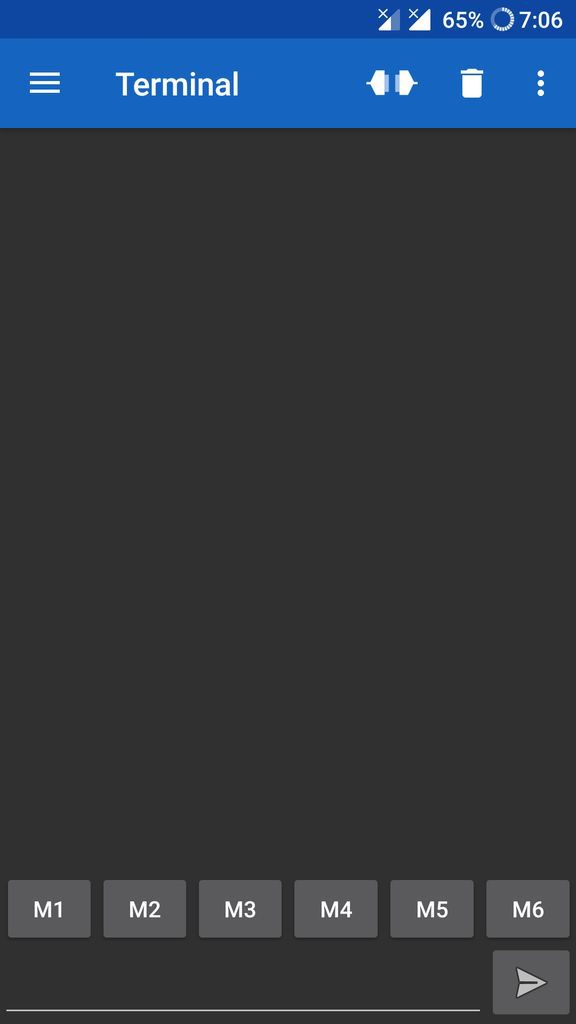
After the connection is established, press the ‘M1’ key to assign it a value. Assign ‘M1’ = 1 and ‘M2’ = 2.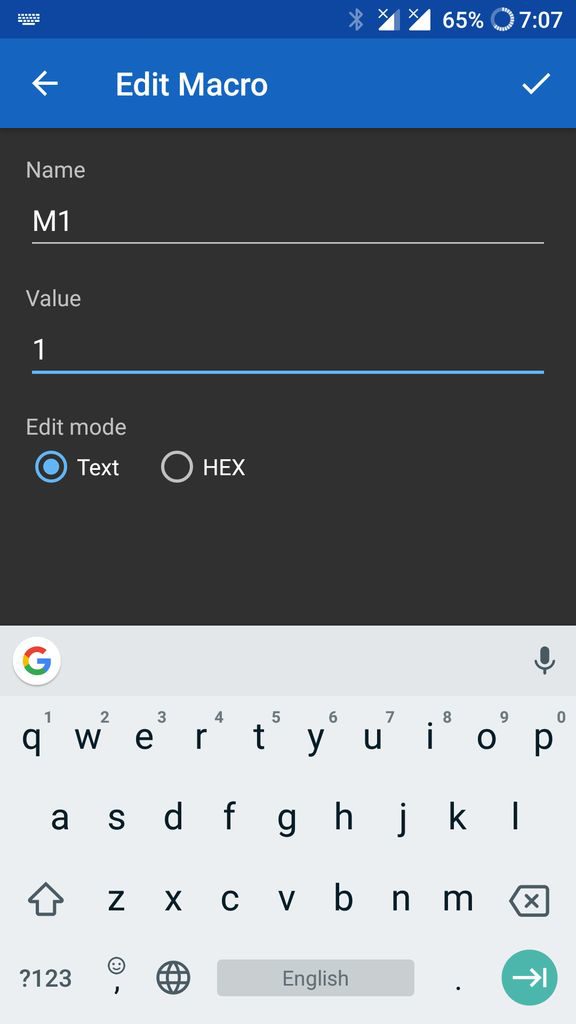
Now power up the Arduino and Click M1 on the Smartphone App. You should see the first LED turn on. Click M1 again to turn the LED off. Repeat this process with M2 for the second LED.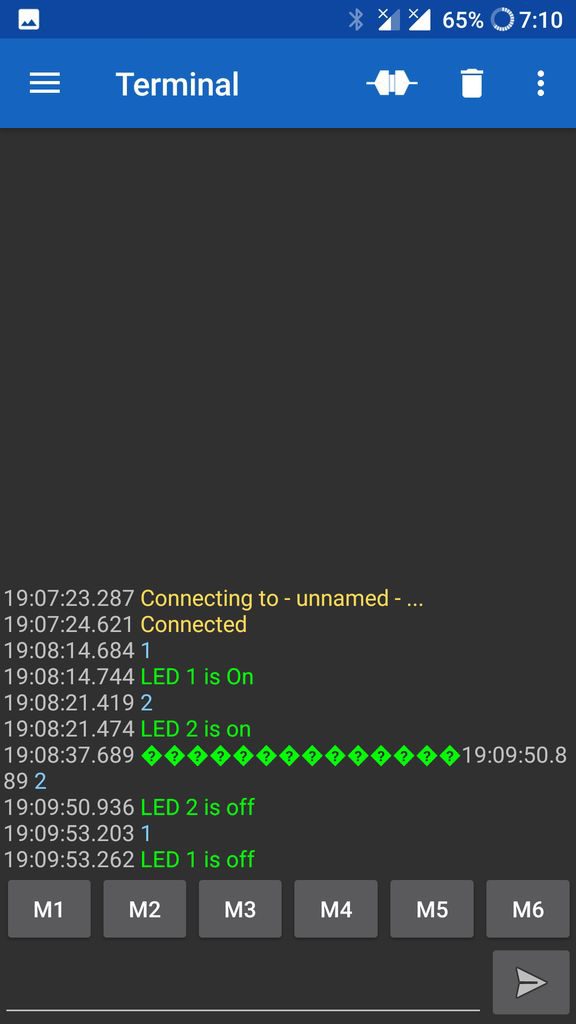
And that’s it! Now that you know how to control LEDs with Arduino through Bluetooth, you can tinker around with this tutorial and modify the code to control your own projects.
If you have any questions or face any difficulty, feel free to ask in the comments below. In next tutorial, I will show you how to make bluetooth controlled robot.
Would you like to earn a Specialization in Robotics? Click here to check out our plans.


2 Responses
The Uno has a 3.3v pin, which I think is an output pin. So you don’t need the voltage divider.
Hey Mike, You need to be able to provide a transmit signal from the controller, which is why we use a digital pin. That pin provides 5V, the RX on the Bluetooth requires 3.3V. That’s why we have the voltage divider. Now if you just wanted the 3.3V power – no signal control, then sure use the 3V3 pin. ~Liz from Learn Robotics